Your First Ribbed Knit Scarf
Ready to dip your needles into the wonderful world of knitting? Imagine wrapping yourself in a soft, warm scarf that you fashioned with your own two hands! This project guides you through making the lovely ribbed scarf shown in the image – a perfect first piece for anyone eager to learn. It’s simpler than it looks, and the result is something truly special and useful. Let’s get those needles clicking!
What You’ll Need to Get Started
Before we begin, gather your supplies. Having everything ready makes the process smooth and enjoyable.
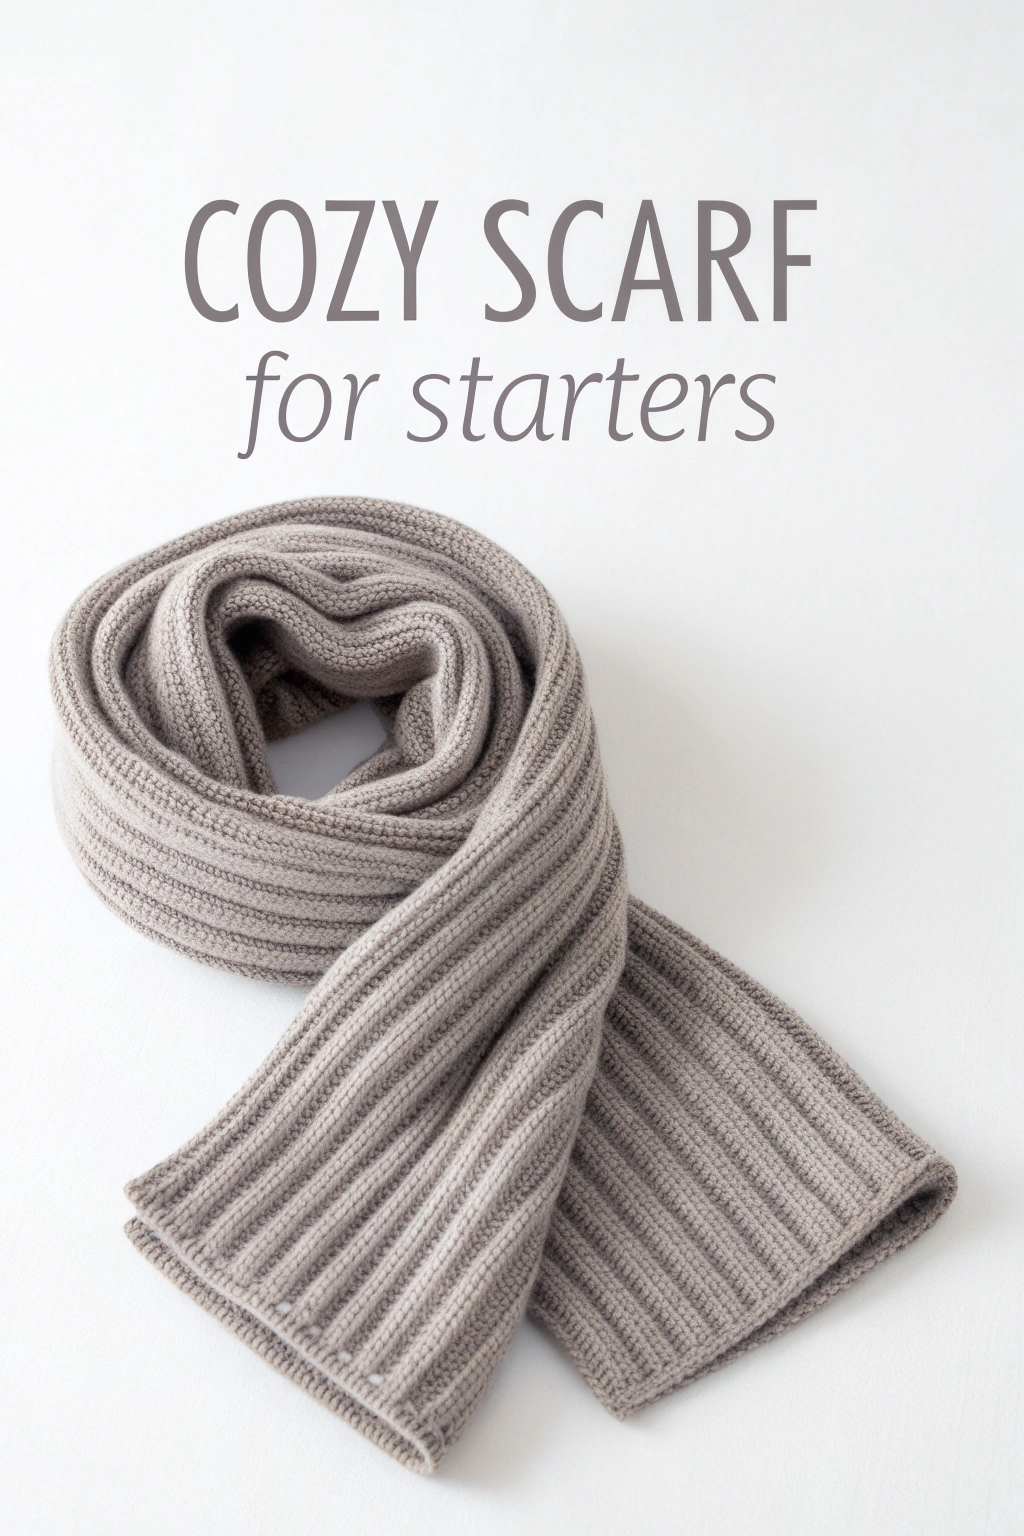
 Yarn: 2 skeins of a soft DK (Double Knitting) or Worsted weight yarn in a light taupe/grey color, just like the one pictured. Aim for about 400-500 yards total. Wool or a wool blend will give that lovely warmth and stitch definition.
 Knitting Needles: Size US 7 (4.5mm) or US 8 (5.0mm) straight or circular needles. Choose the size recommended on your yarn label, or adjust to get a fabric you like.
 Scissors: For snipping yarn.
 Tapestry Needle: For weaving in the ends when you’re finished.
Understanding the Stitches
This scarf gets its beautiful texture from a simple pattern alternating two basic stitches. Don’t worry, we’ll break them down! The scarf possesses a classic 2×2 rib pattern. This means you’ll be working sections of two knit stitches followed by two purl stitches.
- Casting On: This is how you get your first loops onto the needle to begin knitting. We’ll use the long-tail cast-on method, which is sturdy and common.
- Knit Stitch (k): This is the most fundamental stitch. You insert the right needle into the front of the loop on the left needle (from left to right), wrap the yarn around the right needle tip, pull the yarn through the loop, and slide the original loop off the left needle. That’s one knit stitch!
- Purl Stitch (p): This stitch is essentially the reverse of the knit stitch and helps build texture. Bring your working yarn to the front of your work. Insert the right needle into the front of the loop on the left needle (from right to left), wrap the yarn around the right needle tip, push the needle back through the loop, and slide the original loop off the left needle. That’s one purl stitch!
- Binding Off: This secures your stitches when the scarf reaches the desired length, preventing it from unraveling.
Let’s Make the Scarf: Step-by-Step
Follow these steps carefully, and take your time. Knitting is rhythmic, not rushed!
Getting Started: Casting On
- Make a slip knot and place it on one needle. This counts as your first stitch.
- Using the long-tail cast-on method (look up a quick video tutorial if you’re unsure – it’s easy once you see it!), cast on a total of 40 stitches. This number must be a multiple of 4 for the 2×2 rib pattern to work out perfectly. This will give you a scarf width of approximately 7 inches, matching the scarf in the photograph.
Knitting the Body: The Rib Pattern
Now for the main part! You’ll repeat the same row pattern over and over. Consistency here is key to getting those neat, defined ribs visible in the image.
Row 1 (and all subsequent rows):
- Knit 2 stitches (k2). Remember, insert the needle front to back, wrap, pull through, slip off.
- Bring the yarn to the front, between your needle tips.
- Purl 2 stitches (p2). Remember, yarn is in front, insert needle back to front, wrap, push back, slip off.
- Move the yarn to the back, between your needle tips.
- Repeat this sequence (
k2, p2) across the entire row. You should end the row having just completed 2 purl stitches.
That’s it! That’s the entire pattern. Keep repeating this *k2, p2* row.
Tips for Success:
- Check Your Stitches: Make sure you are alternating correctly. Knits look like little ‘V’s, purls look like bumps. Stitches should stack – knits above knits, purls above purls. This forms the columns or ‘ribs’.
- Tension: Try to keep your stitches comfortably snug, but not too tight or too loose. Consistent tension makes the fabric even.
- Don’t Give Up! If you drop a stitch or make a mistake, it’s okay! Gently pull the needle out of the last few stitches and rework them, or look up a video on how to fix common knitting mistakes. It’s part of learning!
Keep Going!
Continue knitting Row 1 repeatedly. You’ll see the ribbed pattern emerge quickly. Keep going until your scarf is the length you desire. The scarf in the image is quite long, allowing for a cozy wrap. Aim for approximately 65-70 inches long. Remember you might need to join a new skein of yarn partway through – just tie a secure knot or look up a seamless joining method like the ‘Russian Join’.
Finishing Up: Binding Off
Once your scarf reaches the perfect cozy length:
- Knit the first two stitches of the row as normal (k2).
- Using your left needle tip, lift the first stitch over the second stitch and completely off the right needle. You’ve bound off one stitch.
- Purl the next stitch (p1). You now have two stitches on the right needle again.
- Lift the older stitch (the one on the right) over the newest stitch and off the needle. You’ve bound off another stitch.
- Purl the next stitch (p1). Lift the older stitch over the newer one.
- Knit the next stitch (k1). Lift the older stitch over.
- Knit the next stitch (k1). Lift the older stitch over.
- Continue this pattern – working the next stitch as it appears in your rib pattern (knit the knits, purl the purls) and then lifting the previous stitch over – all the way across the row.
- When only one loop remains, cut the yarn leaving a 6-inch tail. Pull the tail through the final loop and tug gently to secure it.
Final Touches
Use your tapestry needle to neatly weave in the starting and ending yarn tails. Thread the tail onto the needle and weave it back through the stitches on the wrong side of your scarf for about an inch or two, changing direction once to secure it. Snip any remaining excess yarn.
Your Cozy Accomplishment
Stand back and admire your handiwork! You’ve just brought a beautiful, functional piece of knitwear into being. Feel the texture of the ribs, the softness of the yarn. Wrapping this scarf around your neck on a chilly day will feel extra special because you put every stitch into it.
Don’t hesitate to share photos of your finished scarf! It’s always inspiring to see what fellow makers are working on. Happy knitting adventures!