How to Remove Sticky Residue from Jars and Bottles
Have you ever peeled off a label from a jar or bottle, only to find yourself battling with stubborn, sticky residue that refuses to budge? You’re not alone. This common household challenge can turn a simple upcycling project into a frustrating ordeal. But fear not! In this comprehensive guide, we’ll explore effective methods to banish that pesky adhesive once and for all, leaving your jars and bottles pristine and ready for their next adventure.
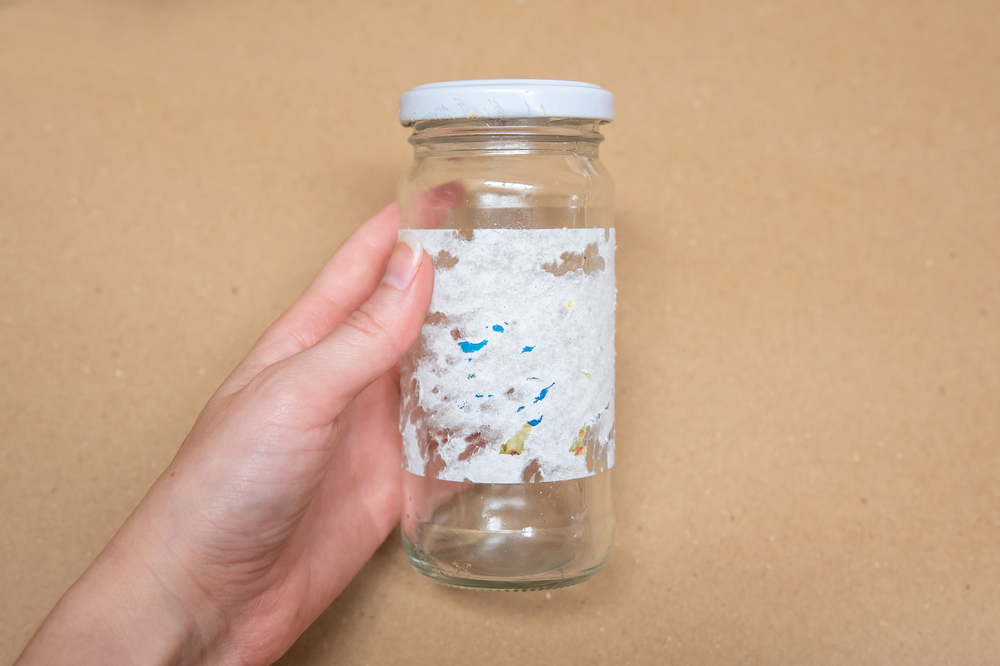
Understanding Sticky Residue: The Tenacious Culprit
Before we dive into removal techniques, let’s understand what we’re up against. Sticky residue is typically left behind by adhesives used to affix labels to jars and bottles. These adhesives are designed to withstand moisture, temperature changes, and handling – which is great for keeping labels intact, but not so great when you want them gone.
Common types of adhesives include:
- Pressure-sensitive adhesives (PSAs)
- Hot-melt adhesives
- Water-based adhesives
The stubbornness of the residue often depends on factors like the type of adhesive, the surface material, and how long the label has been attached. Older labels or those exposed to heat and sunlight can be particularly challenging to remove.
Preparation: Setting the Stage for Success
Before you wage war on sticky residue, it’s essential to prepare properly. Safety should always come first, especially when dealing with various cleaning agents.
Safety Precautions:
- Work in a well-ventilated area
- Wear gloves to protect your skin
- Use eye protection if working with strong chemicals
Tools and Materials:
- Soft cloths or sponges
- Scraping tools (plastic scraper or old credit card)
- Various cleaning agents (we’ll cover these in detail)
- Bowl of warm water
- Protective gloves
Pro Tip: Always test your chosen method on a small, inconspicuous area first to ensure it won’t damage the surface.
Now, let’s explore the various methods to tackle that stubborn sticky residue!
Method 1: The Hot Soapy Water Soak
Sometimes, the simplest solutions are the most effective. Hot soapy water can be your first line of defense against sticky residue.
Step-by-Step Process:
- Fill a sink or large bowl with hot water.
- Add a generous squirt of dish soap.
- Submerge the jar or bottle and let it soak for 30 minutes to an hour.
- Use a soft cloth or sponge to scrub the residue gently.
- For stubborn spots, use a plastic scraper to lift the adhesive.
- Rinse thoroughly and dry with a clean cloth.
Best Soaps to Use:
- Dawn dish soap is known for its grease-cutting abilities.
- Castile soap offers an eco-friendly alternative.
While this method is gentle and safe for most materials, it may not be effective for particularly stubborn adhesives. If you find yourself still stuck (pun intended), it’s time to move on to more powerful solutions.
Method 2: Oil-Based Solutions – Nature’s Adhesive Remover
Oils can be surprisingly effective at breaking down adhesives. They work by seeping into the residue and loosening its bond with the surface.
Types of Oils to Try:
- Vegetable oil
- Olive oil
- Coconut oil
- Baby oil
Application Technique:
- Apply a generous amount of oil to the residue.
- Let it sit for 15-20 minutes to penetrate the adhesive.
- Use a soft cloth to rub the area in circular motions.
- For stubborn spots, reapply oil and let it sit longer.
- Wipe away the loosened residue with a clean cloth.
- Wash the surface with soap and water to remove any remaining oil.
Pros and Cons:
Pros:
- Natural and non-toxic
- Gentle on most surfaces
- Readily available in most kitchens
Cons:
- Can be messy
- May require multiple applications for tough residue
- Not suitable for porous surfaces
Method 3: The Vinegar and Baking Soda Power Duo
When it comes to natural cleaning solutions, vinegar and baking soda are the dynamic duo. Together, they create a fizzy reaction that can help lift stubborn residue.
Creating the Mixture:
- Make a paste using equal parts baking soda and water.
- In a separate container, prepare a solution of equal parts white vinegar and water.
Application and Soaking:
- Apply the baking soda paste to the sticky area.
- Pour the vinegar solution over the paste – watch it fizz!
- Let the mixture sit for 10-15 minutes.
- Use a soft-bristled brush or cloth to scrub the area gently.
- Rinse thoroughly with warm water.
- Repeat if necessary for stubborn residue.
Scrubbing Techniques:
- Use circular motions to work the mixture into the residue.
- For delicate surfaces, opt for a soft cloth instead of a brush.
- Be patient and gentle – let the chemistry do most of the work.
This method is particularly effective for glass and ceramic surfaces but use caution on metal to avoid potential reactions.
Method 4: Commercial Adhesive Removers – The Heavy Artillery
When natural methods fall short, it’s time to bring in the big guns. Commercial adhesive removers are formulated specifically to break down tough residues.
Popular Brands and Products:
- Goo Gone
- WD-40
- Un-Du Adhesive Remover
- 3M Adhesive Remover
How to Use Safely:
- Read the product instructions carefully.
- Apply in a well-ventilated area.
- Wear gloves and eye protection.
- Test on a small area first.
- Apply the product according to instructions.
- Let it sit for the recommended time.
- Wipe away with a clean cloth.
- Clean the surface thoroughly afterward to remove any chemical residue.
When to Opt for Commercial Solutions:
- For extremely stubborn residues
- When dealing with large quantities of jars or bottles
- If time is a factor and you need quick results
Remember, while these products are effective, they contain strong chemicals. Always use them responsibly and keep them out of reach of children and pets.
Method 5: Heat Application – Melting Away the Problem
Heat can be a powerful ally in your battle against sticky residue. It works by softening the adhesive, making it easier to remove.
Using Heat Effectively:
- Hair Dryer Method:
- Set your hair dryer to its highest heat setting.
- Hold it about 3-6 inches from the sticky surface.
- Move the dryer back and forth to heat the residue evenly.
- After 30-60 seconds, try peeling off the residue with a plastic scraper.
- Hot Water Method:
- For heat-safe containers, fill them with very hot water.
- Let sit for a few minutes to warm the adhesive.
- Carefully (it’s hot!) try to scrape off the softened residue.
Safety Considerations:
- Be cautious of burns from hot surfaces or water.
- Avoid using heat on plastics that may melt or warp.
- Never use heat on containers that have held flammable substances.
Combining Heat with Other Methods:
For maximum effectiveness, try combining heat with other techniques:
- Heat the residue first to soften it.
- Immediately apply oil or a commercial remover.
- Scrub gently while the adhesive is still warm.
This combination can be particularly effective for those seemingly impossible-to-remove labels.
Natural and Eco-Friendly Alternatives
For the environmentally conscious, there are several natural alternatives that can be just as effective as commercial products.
Citrus-Based Solutions:
- Lemon Juice Method:
- Soak the sticky area in lemon juice for 15-20 minutes.
- The citric acid helps break down the adhesive.
- Scrub gently with a soft brush or cloth.
- Rinse and repeat if necessary.
- Orange Oil:
- Apply a few drops of orange essential oil to the residue.
- Let it sit for 5-10 minutes.
- Wipe away with a clean cloth.
Coconut Oil Method:
- Apply a generous layer of coconut oil to the sticky area.
- Let it sit for at least an hour, or overnight for tough residues.
- Wipe away with a cloth, using gentle circular motions.
- Clean the surface with soap and water to remove any oily residue.
Environmental Benefits:
- Non-toxic and safe for households with children and pets
- Biodegradable and won’t harm waterways
- Pleasant natural scents instead of harsh chemical odors
These methods not only effectively remove sticky residue but also leave your home smelling fresh and clean!
Dealing with Different Materials
Not all surfaces are created equal when it comes to removing sticky residue. Here’s how to approach different materials:
Glass Jars and Bottles:
- Most forgiving material – can withstand various removal methods
- Start with hot soapy water or oil-based methods
- Can use more abrasive techniques if needed
Plastic Containers:
- Be cautious with heat to avoid warping
- Avoid harsh chemicals that might react with the plastic
- Oil-based methods or commercial removers designed for plastics work well
Metal Surfaces:
- Be wary of rusting, especially with water-based methods
- Avoid abrasive materials that might scratch the surface
- Oil-based methods or specialized metal-safe removers are best
Always consider the material you’re working with and adjust your method accordingly to avoid damage.
Preventing Sticky Residue: An Ounce of Prevention
While knowing how to remove sticky residue is valuable, preventing it in the first place can save you time and effort.
Removing Labels Before Washing:
- Peel off labels as soon as you empty the container.
- The adhesive is often easier to remove when it’s fresh.
Soaking Techniques for Easy Label Removal:
- Soak the container in warm, soapy water for 30 minutes.
- The label may come off on its own, or be much easier to peel.
- Any remaining residue will be softer and easier to clean.
Choosing Products with Easy-Peel Labels:
- Look for products that advertise easy-peel or residue-free labels.
- Some brands use water-soluble adhesives that wash off easily.
By incorporating these preventive measures, you can significantly reduce your battles with sticky residue in the future.
Troubleshooting Common Issues
Even with the best techniques, you might encounter some challenges. Here’s how to handle them:
Dealing with Extremely Stubborn Residue:
- Combine methods – try heat followed by oil or a commercial remover.
- Increase soaking time for tough spots.
- Use a plastic scraper to gently lift the edges of the residue.
What to Do If the Residue Spreads:
- Stop rubbing immediately to prevent further spreading.
- Apply an absorbent material like cornstarch or baby powder to the area.
- Let it sit for a few minutes, then brush off.
- Reapply your chosen removal method, working from the outside in.
Addressing Scratches or Damage During Removal:
- For glass: Use a glass polishing compound to buff out light scratches.
- For plastic: Gentle buffing with a soft cloth and plastic polish can help.
- For metal: Consider using a metal polish appropriate for the specific type of metal.
Remember, patience is key. Rushing the process can lead to damage or spreading of the residue.
Creative Uses for Cleaned Jars and Bottles
Now that your jars and bottles are residue-free, the possibilities for reuse are endless! Here are some creative ideas to inspire you:
Upcycling Ideas:
- Rustic Vases: Paint the jars in pastel colors for charming flower vases.
- Bathroom Organizers: Use them to store cotton balls, q-tips, or bath salts.
- Pantry Storage: Perfect for storing dry goods like rice, beans, or pasta.
Storage Solutions:
- Craft Supply Organizers: Sort buttons, beads, or paint brushes.
- Garage Helpers: Store nails, screws, and other small hardware.
- Office Organizers: Keep paperclips, rubber bands, or push pins tidy.
DIY Projects:
- Candle Holders: Fill with sand and a tea light for beautiful outdoor lighting.
- Herb Gardens: Create a mini indoor herb garden in small jars.
- Snow Globes: Transform them into personalized snow globes for unique gifts.
By repurposing your cleaned jars and bottles, you’re not only being creative but also contributing to a more sustainable lifestyle!
Conclusion: A Sticky Situation No More!
Removing sticky residue from jars and bottles might seem like a daunting task, but armed with these methods and tips, you’re well-equipped to tackle even the stubbornest of adhesives. Remember:
- Start with gentler methods like hot soapy water or oil-based solutions.
- Progress to more powerful techniques like vinegar and baking soda or commercial removers if needed.
- Always consider the material you’re working with and test methods on a small area first.
- Patience and persistence are key – some residues may require multiple attempts.
- Once clean, the possibilities for reusing and upcycling are limitless!
Whether you’re preparing jars for a craft project, repurposing bottles for storage, or simply aiming for a cleaner look, these techniques will help you achieve residue-free results. Happy cleaning, and may your future be stick-free and full of creatively repurposed containers!
Frequently Asked Questions
Q: Can I use these methods on all surfaces? A: While many methods are versatile, always consider the material you’re working with. Glass is the most forgiving, while plastics and metals may require more careful approaches. Always test on a small area first.
Q: How long should I expect the process to take? A: The time can vary greatly depending on the method and the stubbornness of the residue. Simple cases might take just a few minutes, while tougher residues could require soaking overnight. Patience is key!
Q: Are there any adhesives that can’t be removed? A: While most adhesives can be removed with persistence, some industrial-strength adhesives may be extremely difficult or impossible to remove without damaging the surface. In such cases, consulting a professional might be necessary.
Q: What’s the most eco-friendly method? A: Natural methods like using oils (vegetable oil, coconut oil) or a vinegar and baking soda solution are the most environmentally friendly. They’re non-toxic and use common household items.
Q: Can I combine different methods? A: Absolutely! In fact, combining methods can often yield the best results. For example, using heat to soften the adhesive before applying an oil-based solution can be very effective.
Remember, the key to successfully removing sticky residue is often a combination of the right method, patience, and a bit of elbow grease. Don’t be afraid to experiment (safely) to find what works best for your specific situation!