Soft & Fluffy Homemade Milk Bread
Get ready to bake the most delightfully soft and fluffy Milk Bread right in your own kitchen! This recipe is perfect for beginner bakers and promises a truly satisfying homemade loaf. Imagine the wonderful aroma of freshly baked bread filling your home – and the even greater joy of sharing it with family and friends. This guide will walk you through each step, ensuring success even if you’ve never baked bread before. Let’s begin this exciting baking journey together!
Ingredients You’ll Need
Before starting, gather all the necessary halal ingredients. Having everything measured and ready will make the baking process smooth and enjoyable.
- 🌾 3 cups (360g) all-purpose flour, plus extra for dusting. All-purpose flour is the most common type of flour and is perfect for this bread.
- 🍚 1/4 cup (50g) granulated sugar. Sugar not only adds sweetness but also helps the yeast to activate and rise properly.
- 🥄 1 teaspoon salt. Salt is essential for flavour and also controls the yeast’s activity, preventing the bread from rising too quickly.
- 🥛 1 cup (240ml) whole milk, lukewarm. Lukewarm milk is important because it provides the ideal temperature for the yeast to become active. Too hot, and it will kill the yeast; too cold, and it won’t activate properly.
- 🧈 1/4 cup (60g) unsalted butter, melted and cooled slightly. Butter adds richness and flavour to the bread, and also contributes to its soft texture. Ensure it’s cooled slightly so it doesn’t cook the yeast.
- 🥄 2 1/4 teaspoons (7g) active dry yeast. This is the ingredient that makes the bread rise! Active dry yeast needs to be activated with warm liquid.
- 🥚 1 large egg, for egg wash (optional, for a shiny crust). An egg wash gives the bread a beautiful golden and shiny crust. This step is optional but recommended for a more appealing finish.
Kitchen Equipment You’ll Need
Having the right tools makes baking much easier. Here’s a simple list of equipment you’ll need for this recipe.
- 🥣 Large mixing bowl. You’ll need a large bowl to mix all the bread ingredients together.
- 🥄 Measuring spoons. Accurate measuring is important in baking, especially for yeast and salt.
- ⚖️ Measuring cups (liquid and dry). Using both liquid and dry measuring cups ensures accuracy when measuring different types of ingredients.
- ♨️ Saucepan or microwave-safe bowl. You’ll need this to warm the milk and melt the butter.
- 🥄 Spatula or wooden spoon. These are helpful for mixing the dough initially.
- 👐 Clean work surface. You’ll need a clean, flat surface to knead the dough.
- 🥖 9×5 inch loaf pan. This is the standard size for loaf breads and will give your milk bread its shape.
- 🌡️ Oven. Of course, you’ll need an oven to bake the bread!
- ⏲️ Timer or clock. Keeping track of time is crucial for proofing and baking.
- 🔪 Serrated knife (for slicing, once baked). A serrated knife is best for slicing bread cleanly without squashing it.
Let’s Learn Basic Kitchen Techniques
For beginner bakers, understanding a few basic techniques will make this recipe much easier. Don’t worry, they are all simple to learn!
Activating Yeast
Yeast is a living organism that makes bread rise. “Activating” yeast means waking it up so it can do its job. Active dry yeast needs warm liquid and a bit of sugar to become active. In this recipe, we use lukewarm milk and sugar to activate the yeast. You’ll know the yeast is active when it becomes foamy or bubbly after a few minutes. This bubbling is a sign that the yeast is alive and ready to make your bread dough rise.
Kneading Dough
Kneading is a crucial step in bread making. It develops the gluten in the flour, which gives bread its structure and chewy texture. Gluten is a protein in flour that, when worked, becomes stretchy and elastic. To knead, you press, fold, and stretch the dough repeatedly. Imagine you are gently pushing and stretching the dough away from you with the heel of your hand, then folding it back and turning it. This process is repeated for several minutes until the dough becomes smooth and elastic. Don’t be intimidated! It gets easier with practice.
Proofing Dough (First Rise)
Proofing, or the first rise, is when you let the dough rest in a warm place to rise. During this time, the yeast becomes active, producing carbon dioxide gas. This gas gets trapped in the gluten network you developed during kneading, causing the dough to expand and become light and airy. A warm environment helps the yeast work faster. A common method is to place the dough in a lightly oiled bowl, cover it, and leave it in a warm spot, like a slightly warm oven (turned OFF!) or a warm corner of your kitchen.
Proofing Dough (Second Rise)
After the first rise, you gently deflate the dough and shape it. Then, you place it in the loaf pan for a second proof, or second rise. This second rise happens in the loaf pan and allows the dough to rise again, filling the pan and becoming even lighter before baking. This step is important for the final texture and shape of your bread.
Baking Bread
Baking is the final step where the dough transforms into bread in the oven’s heat. The heat sets the structure of the bread, cooks it through, and gives it a golden crust. The baking time and temperature are important to ensure the bread is cooked perfectly – golden brown on the outside and cooked through on the inside. Using an oven thermometer can be helpful to ensure your oven temperature is accurate.
Step-by-Step Instructions to Make Milk Bread
Now, let’s put everything together and make this delicious Milk Bread! Follow these simple steps carefully.
Step 1: Activate the yeast. In a large mixing bowl, pour the lukewarm milk. Make sure it’s lukewarm, not hot. Add the sugar and active dry yeast to the milk. Stir gently to combine. Let this mixture sit for 5-10 minutes. You should see small bubbles or a foamy layer forming on top. Refer to the image; while you can’t see the yeast activating directly, imagine the lively activity happening beneath the surface of the milk in the bowl. This means the yeast is active and ready to use.
Step 2: Add dry ingredients. To the yeast mixture, add the flour and salt. It’s a good idea to add the flour gradually, about a cup at a time. Mix with a spatula or wooden spoon until a shaggy dough forms. “Shaggy dough” just means it’s starting to come together but is still rough and not smooth.
Step 3: Add melted butter. Pour the slightly cooled melted butter into the bowl with the dough. Mix again until the butter is incorporated and the dough is a bit smoother.
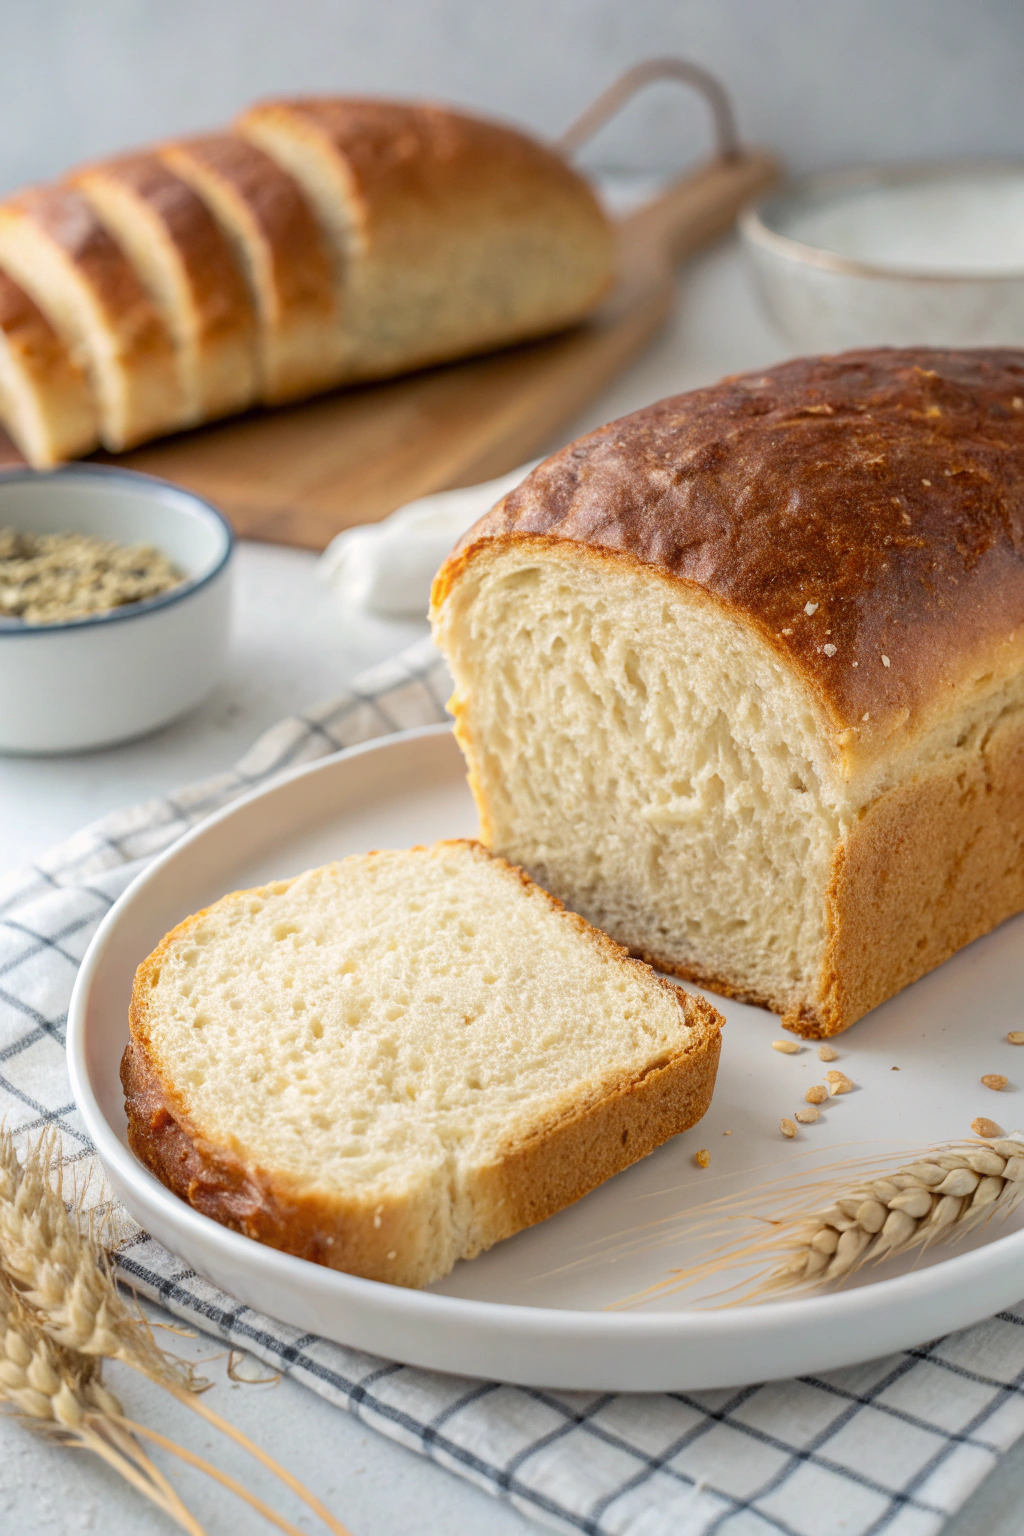
Step 4: Knead the dough. Lightly flour a clean work surface. Turn the dough out onto the floured surface. Begin to knead the dough. Knead for 8-10 minutes. At first, the dough might be sticky, but as you knead, it will become smoother and more elastic. If it’s too sticky, add a tiny bit more flour, a teaspoon at a time. You’ll know it’s ready when it springs back gently when you poke it and feels smooth and elastic, like in the image where the bread has a beautifully smooth surface.
Step 5: First proof (first rise). Lightly grease the large mixing bowl with a little oil or butter. Place the kneaded dough in the bowl. Turn the dough to coat it lightly with the grease. Cover the bowl with a clean cloth or plastic wrap. Place the bowl in a warm place and let the dough rise for 1-1.5 hours, or until it has doubled in size.
Step 6: Shape the dough. Once the dough has doubled, gently punch it down to release the air. Turn the dough out onto a lightly floured surface. Shape the dough into a log shape that is about the length of your loaf pan. While a 9×5 inch loaf pan is recommended for a classic loaf shape, keep in mind that homemade bread can have slight variations in its final form.
Step 7: Second proof (second rise). Grease your 9×5 inch loaf pan. Place the shaped dough log into the prepared loaf pan. Cover the pan loosely with plastic wrap or a clean cloth. Let it rise again in a warm place for 45-60 minutes, or until it has almost doubled in size again and is nicely puffed up over the rim of the pan.
Step 8: Preheat oven and egg wash (optional). About 20 minutes before the second proof is finished, preheat your oven to 350°F (175°C). If you desire a shiny, golden crust, gently whisk the egg for the egg wash in a small bowl. Brush the top of the risen dough gently with the egg wash. However, for a slightly less shiny crust, similar to what is seen in the image, you can skip the egg wash altogether. The bread will still bake to a beautiful golden brown.
Step 9: Bake the bread. Bake in the preheated oven for 30-35 minutes, or until the loaf is golden brown and sounds hollow when you tap the bottom. Keep an eye on it – ovens can vary. If the top starts to get too brown too quickly, you can loosely tent it with foil for the remaining baking time.
Step 10: Cool and slice. Once baked, remove the loaf from the oven and let it cool in the pan for 10 minutes. Then, carefully transfer the loaf to a wire rack to cool completely before slicing. It’s tempting to slice right away, but letting it cool ensures a cleaner slice and better texture. Refer to the image again, noticing how beautifully the bread is sliced – this is best achieved when the bread is fully cooled. Use a serrated knife to slice and serve.
Enjoy the wonderful aroma and taste of your freshly baked homemade Milk Bread! Making bread from scratch is a truly rewarding experience, and this recipe is a fantastic starting point. Don’t be discouraged if your first attempt isn’t perfect – baking is a journey of learning and practice. Keep trying, and each time you prepare this recipe, you’ll become more confident and skilled. Share your baked milk bread with your loved ones and spread the joy of homemade halal food! Remember, even with slight variations in shape and crust finish, each homemade loaf is unique and special.