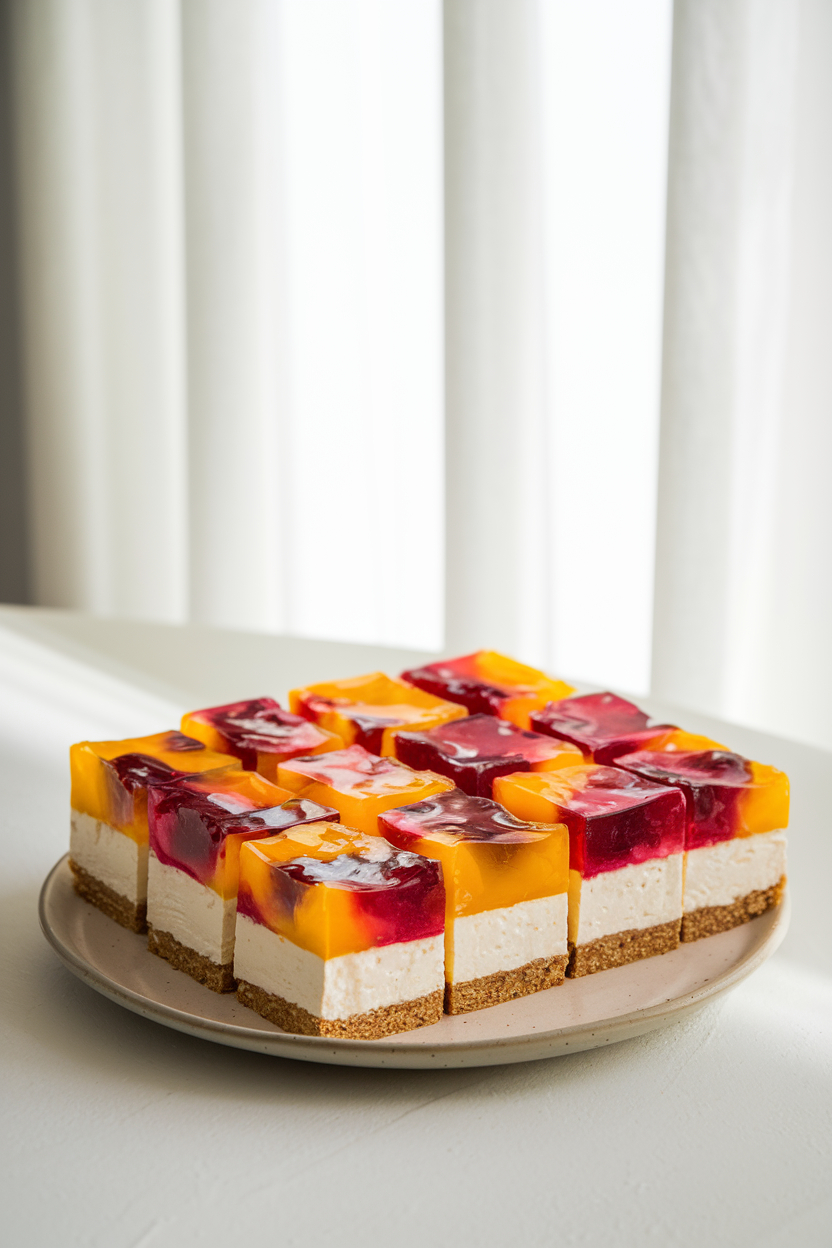
Transform a classic peanut butter and jelly sandwich into a decadent dessert with these no-bake PB&J cheesecake squares. A buttery biscuit base, creamy peanut butter cheesecake layer, and vibrant fruit jelly topping make this a must-try treat!
Ingredients
For the Biscuit Crust:
- 2 cups of crushed graham crackers (or digestive biscuits)
- 1/2 cup unsalted butter, melted
For the Peanut Butter Cheesecake Filling:
- 2 cups cream cheese, softened
- 1 cup creamy peanut butter
- 1/2 cup granulated sugar (or honey for a natural sweetener)
- 1 teaspoon alcohol free vanilla extract
For the Jelly Topping:
- 1 cup strawberry jelly
- 1 cup peach jelly (or other fruit jelly of your choice)
- 2 tablespoons halal gelatin (or pectin as per package instructions)
Equipment Needed
- Square or rectangular baking pan (8×8 inches recommended)
- Mixing bowls
- Hand mixer or stand mixer
- Spatula
- Measuring cups
- Palette knife (optional)
Instructions
1. Prepare the Biscuit Base:
- Crush the biscuits into fine crumbs using a food processor or by placing them in a sealed bag and crushing with a rolling pin.
- Combine the crushed biscuits with melted butter in a mixing bowl until the mixture resembles wet sand.
- Press the mixture evenly into the bottom of your baking pan, forming a compact layer.
- Chill in the refrigerator for at least 30 minutes or until firm.
2. Make the Cheesecake Filling:
- In a large mixing bowl, beat the cream cheese until smooth and fluffy.
- Add the peanut butter and continue beating until well combined.
- Gradually mix in the sugar and vanilla extract until the filling is smooth.
- Spread the cheesecake mixture evenly over the chilled biscuit base using a spatula or palette knife.
- Refrigerate for at least 1 hour to let the filling set.
3. Prepare the Jelly Topping:
- Prepare the jelly according to the package instructions, dissolving the gelatin in water.
- Let the jelly mixture cool slightly before pouring it over the cheesecake filling. This helps prevent it from seeping into the cheesecake layer.
- Pour the cooled jelly over the set cheesecake layer, creating distinct sections if using multiple flavors (e.g., strawberry and peach).
- Chill the pan in the refrigerator for 2-3 hours or until the jelly is completely set.
4. Cut and Serve:
- Run a sharp knife under warm water and dry it before cutting the cheesecake into squares for clean edges.
- Serve on a simple plate to highlight the defined layers of crust, cheesecake, and jelly.
Tips and Variations
- Flavor Swap: Substitute peanut butter with almond or cashew butter for a unique twist.
- Jelly Choices: Experiment with flavors like raspberry or grape for a different take.
- Layering Tip: Ensure the jelly has cooled enough to avoid mixing with the cheesecake filling.
- Serving Suggestion: Garnish with fresh fruit or drizzle with extra peanut butter for an added touch.
Storage and Shelf Life
- Refrigerate: Store the cheesecake squares in an airtight container in the fridge for up to 5 days.
- Freeze: Freeze individual squares for up to 1 month. Thaw in the refrigerator before serving.
FAQs
1. Can I use store-bought jelly for the topping?
Yes, you can use store-bought jelly or jam. Just ensure it’s smooth and prepared to set properly, adding gelatin if needed.
2. What can I use instead of peanut butter?
You can substitute peanut butter with almond butter, cashew butter, or even a nut-free spread if you have allergies.
3. How do I prevent the jelly layer from seeping into the cheesecake?
Allow the jelly to cool until it’s slightly thickened before pouring it over the cheesecake. This helps maintain separate layers.
4. Can I make this dessert ahead of time?
Absolutely! This dessert is perfect for making a day ahead, as it needs ample time to set in the refrigerator.
5. What if I don’t have gelatin for the jelly?
You can use pectin as an alternative to gelatin. Follow the package instructions for best results.
Conclusion
These no-bake PB&J cheesecake squares are perfect for when you want a nostalgic dessert with a sophisticated flair. Easy to make and a show-stopper at any event, they’re sure to be a hit. Give this recipe a try and share your creations or unique variations in the comments!

