Knit a Fun Monster Hat!
Hello fellow crafters! Are you ready to dive into a super fun knitting project? Get ready to make the most adorable and quirky hat you’ve ever seen! In this guide, we’ll walk you through how to fashion this charming monster hat step-by-step. Don’t worry if you are completely new to knitting – we’ll take it slow and explain everything in simple terms, just like chatting with a friend over coffee. Get ready to feel the joy of making something amazing with your own hands!
Materials You’ll Need
Before we begin, let’s gather all the supplies you’ll need to build your very own monster hat. Having everything ready will make the process smooth and enjoyable!
- 🧶 Yarn in bright green (for the main hat)
- 🧶 Yarn in purple (for the brim, horns, and pom-pom)
- 🧶 White yarn (for the eyes)
- 🧶 Black yarn (for the pupils and smile)
- 🧶 Pink yarn (for the cheeks)
- 🪡 Knitting needles, size US 7 (4.5 mm) – these are a common size, good for beginner-friendly projects!
- ✂️ Scissors
- 📍 Tapestry needle (a large, blunt needle for sewing yarn)
- Pom-pom maker (optional, but helpful for forming a perfect pom-pom)
Let’s Get Knitting! Step-by-Step Guide
Now for the exciting part – let’s actually make this monster hat! We’ll break it down into easy stages so it feels manageable, even if you’ve never picked up knitting needles before. Remember, take your time, and most importantly, have fun with it!
Getting Started with Basic Stitches
If you are brand new to knitting, let’s quickly go over the two main stitches you’ll need: the knit stitch and the purl stitch. Think of these as the basic building blocks of knitting. The knit stitch is the most fundamental. Imagine you are constructing a wall with bricks, the knit stitch is like laying each brick in a simple, straightforward way. The purl stitch is like the reverse of the knit stitch. If the knit stitch produces a smooth, ‘V’ shaped texture on the front of your work, the purl stitch forms a bumpy texture on the front (and the knit texture on the back). We’ll use both of these to develop the different parts of our hat.
To start any knitting project, you first need to cast on stitches onto your needle. This is like setting up the first row of bricks for your wall. There are many ways to cast on, but a simple one for beginners is the long-tail cast-on. You can easily find video tutorials online by searching “long-tail cast on knitting” – seeing it done visually is super helpful! For this hat, we will cast on 90 stitches using the green yarn.
Knitting the Main Hat Body
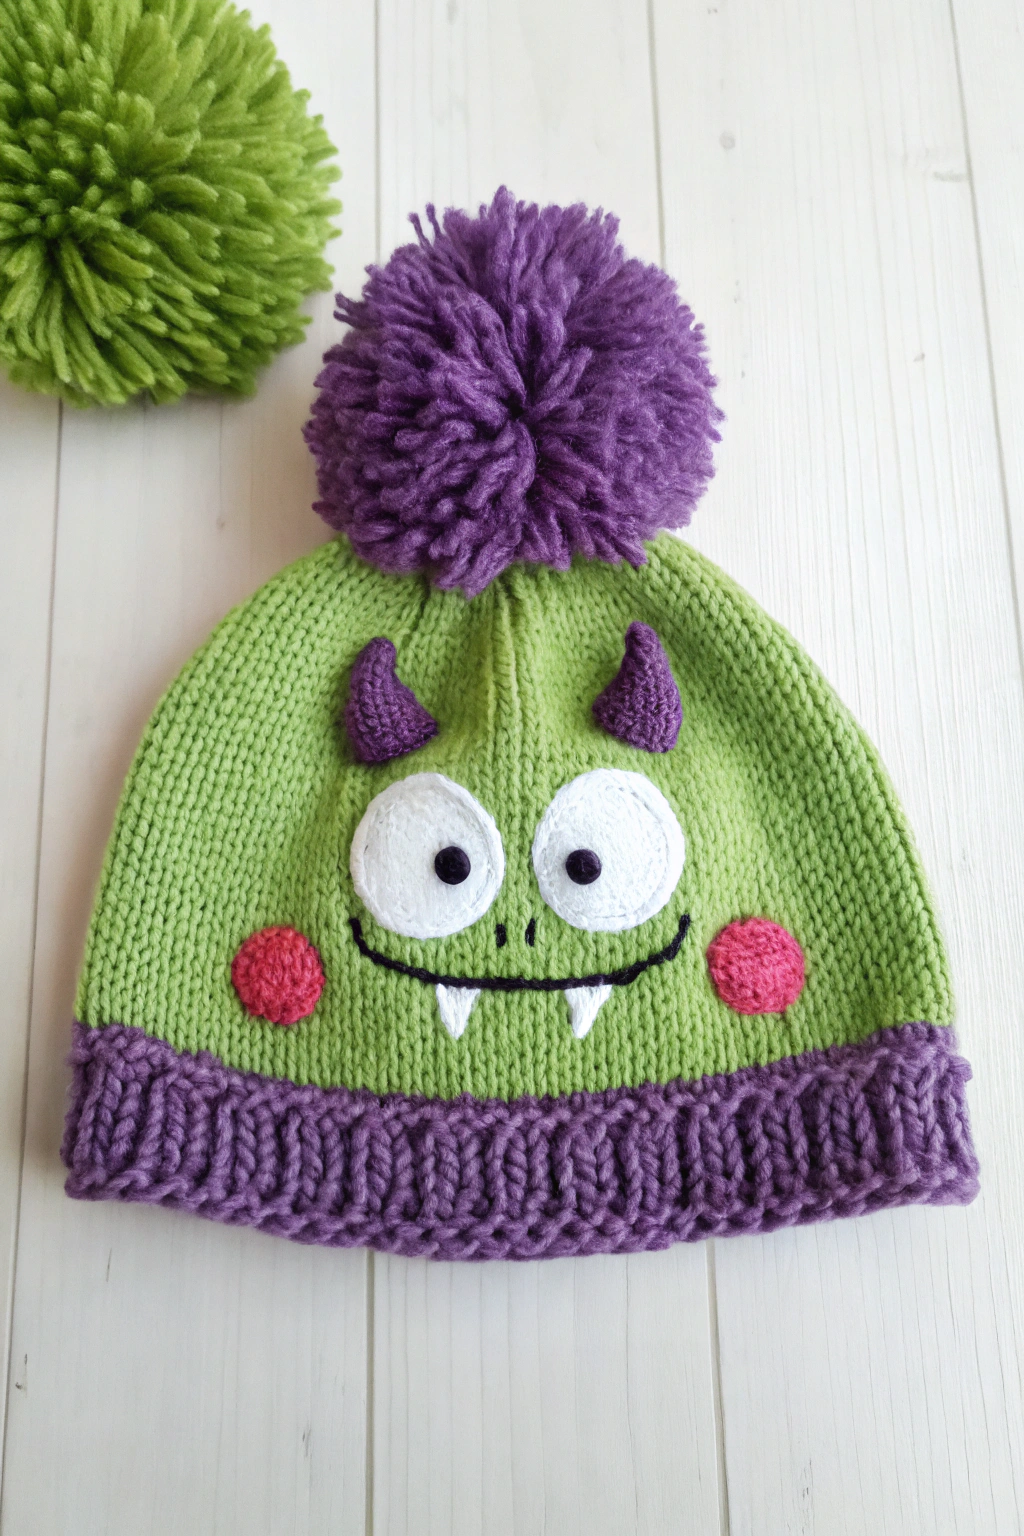
With your green yarn cast on, we’re ready to craft the main part of the hat. Look at the image – you can see the green section is smooth and consistent. This is made using the knit stitch for every row. This is called Garter stitch when you knit every row, and it creates a nice, slightly textured fabric. However, to get the smoother look in the image, we’ll actually use Stockinette stitch. Stockinette stitch is formed by knitting one row and then purling the next row, repeating these two rows. The knit rows will appear on the front of your work, giving you that smooth look.
So, for the body of the hat:
Round 1: Knit every stitch. Round 2: Purl every stitch.
Repeat Rounds 1 and 2 until your hat measures about 7 inches (18 cm) from the cast-on edge. Don’t worry about being perfectly precise – just aim for something close. As you knit, you’ll see the fabric start to fashion itself and grow longer. Remember to count your rows or use a ruler to check the length as you go.
Crafting the Ribbed Brim
Now, let’s assemble the purple brim at the bottom of the hat. Observe in the image how the brim is textured and looks ‘ribbed’. This ribbed texture is produced by alternating knit and purl stitches in the same row. This technique makes the fabric stretchy and snug, perfect for a hat brim!
To develop the ribbed brim, switch to your purple yarn. We will use a 2×2 rib. This means we will knit 2 stitches, then purl 2 stitches, and repeat this pattern across the entire row.
Round 1: (Knit 2 stitches, purl 2 stitches) – repeat from * to * until the end of the row. Round 2: Repeat Round 1.
Continue repeating Round 1 (which is the same as Round 2 in this case!) until the ribbed brim measures about 2 inches (5 cm). You can see in the image that the purple brim is clearly defined and adds a lovely contrast to the green.
Shaping the Top and Closing the Hat
To finish the top of the hat and form that rounded shape, we need to decrease stitches. Decreasing means we are reducing the number of stitches in each row, making the hat narrower at the top.
We will do decreases in knit rows only. In purl rows, just purl all stitches as they are.
Decrease Round 1 (Knit Row): Knit 2 stitches together, knit 7 stitches – repeat from * to * until the end of the row. (This means you knit two stitches as if they were one – effectively reducing one stitch). Decrease Round 2 (Purl Row): Purl every stitch. Decrease Round 3 (Knit Row): Knit 2 stitches together, knit 6 stitches – repeat from * to * until the end of the row. Decrease Round 4 (Purl Row): Purl every stitch. Decrease Round 5 (Knit Row): Knit 2 stitches together, knit 5 stitches – repeat from * to * until the end of the row.
Continue decreasing in this way, reducing the number of ‘knit stitches between decreases’ by one in each knit row, and purling plain in every purl row, until you only have about 10-15 stitches left.
Now, cut your yarn leaving a tail about 12 inches (30 cm) long. Thread this tail onto your tapestry needle. Carefully slip all the remaining stitches off your knitting needle and onto the tapestry needle, as if you are threading them onto the yarn. Once all stitches are on the yarn, pull the yarn tight to close the top of the hat like a drawstring bag. Weave in the yarn end securely to the inside of the hat to hide it.
Forming the Horns
Let’s craft those cute little purple horns! Refer to the image – you can see they are small and pointy. We will knit two of these. Using your purple yarn and knitting needles, cast on 10 stitches.
Row 1: Knit every stitch. Row 2: Purl every stitch. Row 3: Knit every stitch. Row 4: Purl every stitch. Row 5: Knit 2 stitches together, knit 6 stitches, knit 2 stitches together (decrease at the beginning and end of the row). Row 6: Purl every stitch. Row 7: Knit 2 stitches together, knit 4 stitches, knit 2 stitches together. Row 8: Purl every stitch. Row 9: Knit 2 stitches together, knit 2 stitches, knit 2 stitches together. Row 10: Purl every stitch. Row 11: Knit 2 stitches together, knit 2 stitches together. Row 12: Purl 2 stitches together.
You will now have only one stitch left. Cast off this last stitch. Fashion a second horn in the same way. Leave a yarn tail on each horn for sewing.
Sew the horns onto the top of the hat, positioning them as shown in the image – slightly angled and towards the front. Use your tapestry needle and purple yarn tail to sew them securely.
Making the Face Details
Now for the fun part – let’s assemble the monster’s face! We will develop the eyes, cheeks, smile, and teeth. You can knit or crochet small circles for the eyes and cheeks, or you can even use felt if you prefer. For a knitted look like in the image:
Eyes (make 2): With white yarn, cast on 10 stitches. Knit in garter stitch (knit every row) for about 6 rows, then cast off. This will form a small square. You can then sew around the edges to make it slightly rounded.
Pupils (make 2): With black yarn, cast on 4 stitches. Knit in garter stitch for about 4 rows, then cast off. These will be smaller black squares.
Cheeks (make 2): With pink yarn, cast on 8 stitches. Knit in garter stitch for about 5 rows, then cast off. These will be small pink squares.
Smile: With black yarn, fashion a simple smile shape by crocheting a chain or using a strand of yarn and shaping it into a curve.
Teeth (make 2): With white yarn, craft small triangles. You can knit tiny triangles or simply cut them from felt.
Sew the white eyes onto the hat, then sew the black pupils onto the white eyes. Sew the pink cheeks onto the hat below the eyes. Position and sew the black smile and white teeth as shown in the image to build the monster’s face.
Assembling the Pom-Pom
No monster hat is complete without a fun pom-pom! Let’s make a big, fluffy purple pom-pom to go on top. You can use a pom-pom maker for this, or you can use the classic cardboard circle method. Search online for “how to make a pom-pom with cardboard” for easy tutorials. The image shows a large, full pom-pom, so make sure to wind plenty of purple yarn to produce a nice and fluffy one.
Once your pom-pom is ready, securely attach it to the very top center of the hat, right where you closed the top. Sew it on firmly with purple yarn.
Finishing Touches & Tips
Congratulations! You’ve just crafted your very own monster hat! Here are a few extra tips as you admire your creation:
- Yarn Choice: Don’t worry too much about using the exact same yarn type. Any medium-weight yarn will work. Just make sure to adjust your needle size if needed to get a fabric you like.
- Tension: Try to keep your knitting tension even throughout the project. If your stitches are too tight or too loose, the hat might not fit or look quite right. Practice makes perfect!
- Counting: It’s helpful to count your rows and stitches, especially when you are decreasing. This will help ensure your hat shape is even.
- Mistakes Happen! Don’t be discouraged if you make a mistake. Everyone does, especially when learning! You can often undo stitches (this is called “unknitting” or “tinking” – knit spelled backwards!) to fix errors. There are lots of online resources to help you learn how to fix common knitting mistakes.
- Be Creative! Feel free to change the colors or add other fun details to your monster hat! Maybe different colored horns, or embroidered details around the eyes? Let your imagination run wild!
Share Your Monster-Piece!
We hope you had a blast making this fun monster hat! Knitting is such a rewarding hobby, and there’s nothing quite like the feeling of fashioning something unique with your own hands. We’d absolutely love to see your finished monster hats! Please share photos of your creations online and tag us – we can’t wait to see your monster-pieces! Happy knitting!