Knit a Cozy Stripe Hat for Baby
Giving something you’ve personally put together brings a unique joy, especially when it’s for a tiny new person! Picture this charming Knitted Baby Hat, featuring soft stripes and a cheerful pom-pom, keeping a little one snug – all fashioned through your own effort. Does knitting seem daunting? Not with this project! It’s a lovely introduction, and we’ll guide you through every part, explaining things simply. That wonderful ‘I finished this!’ feeling is just a few steps away.
What You’ll Need
Let’s gather your supplies first. For this hat, you’ll want a soft yarn suitable for babies.
- 🧶 Yarn: Worsted weight yarn (Category 4) in three colors: Peach (Main Color – MC), Cream (Color A), and Light Green (Color B). Choose something soft and washable. You won’t need a full skein of each.
- 🥢 Knitting Needles: Size US 8 (5.0 mm) straight needles are a good starting point, but check the yarn label for recommendations.
- ✂️ Scissors: For snipping yarn.
- 🪡 Yarn Needle (Tapestry Needle): One with a large eye for weaving in ends and seaming.
- 📏 Measuring Tape: Helpful for checking your progress.
- 🎀 Pom-pom Maker (Optional): You can use cardboard donuts or even your hand, but a maker simplifies things.
Getting Started: The Basics
Before we jump into the hat itself, let’s define a few key knitting actions you’ll be using.
- Cast On: This is how you get your first stitches onto the needle to begin knitting. There are many methods, but a simple Long-Tail Cast On is common and sturdy. (Look up a quick video tutorial if you’re unsure – seeing it helps!).
- Knit Stitch (k): The most basic stitch. Insert the right needle into the front of the first stitch on the left needle from left to right, wrap the yarn around the right needle tip, pull the yarn through the loop, and slide the original stitch off the left needle.
- Purl Stitch (p): The other fundamental stitch. Bring the yarn to the front of your work. Insert the right needle into the front of the first stitch on the left needle from right to left, wrap the yarn around the right needle tip, push the yarn back through the loop, and slide the original stitch off the left needle.
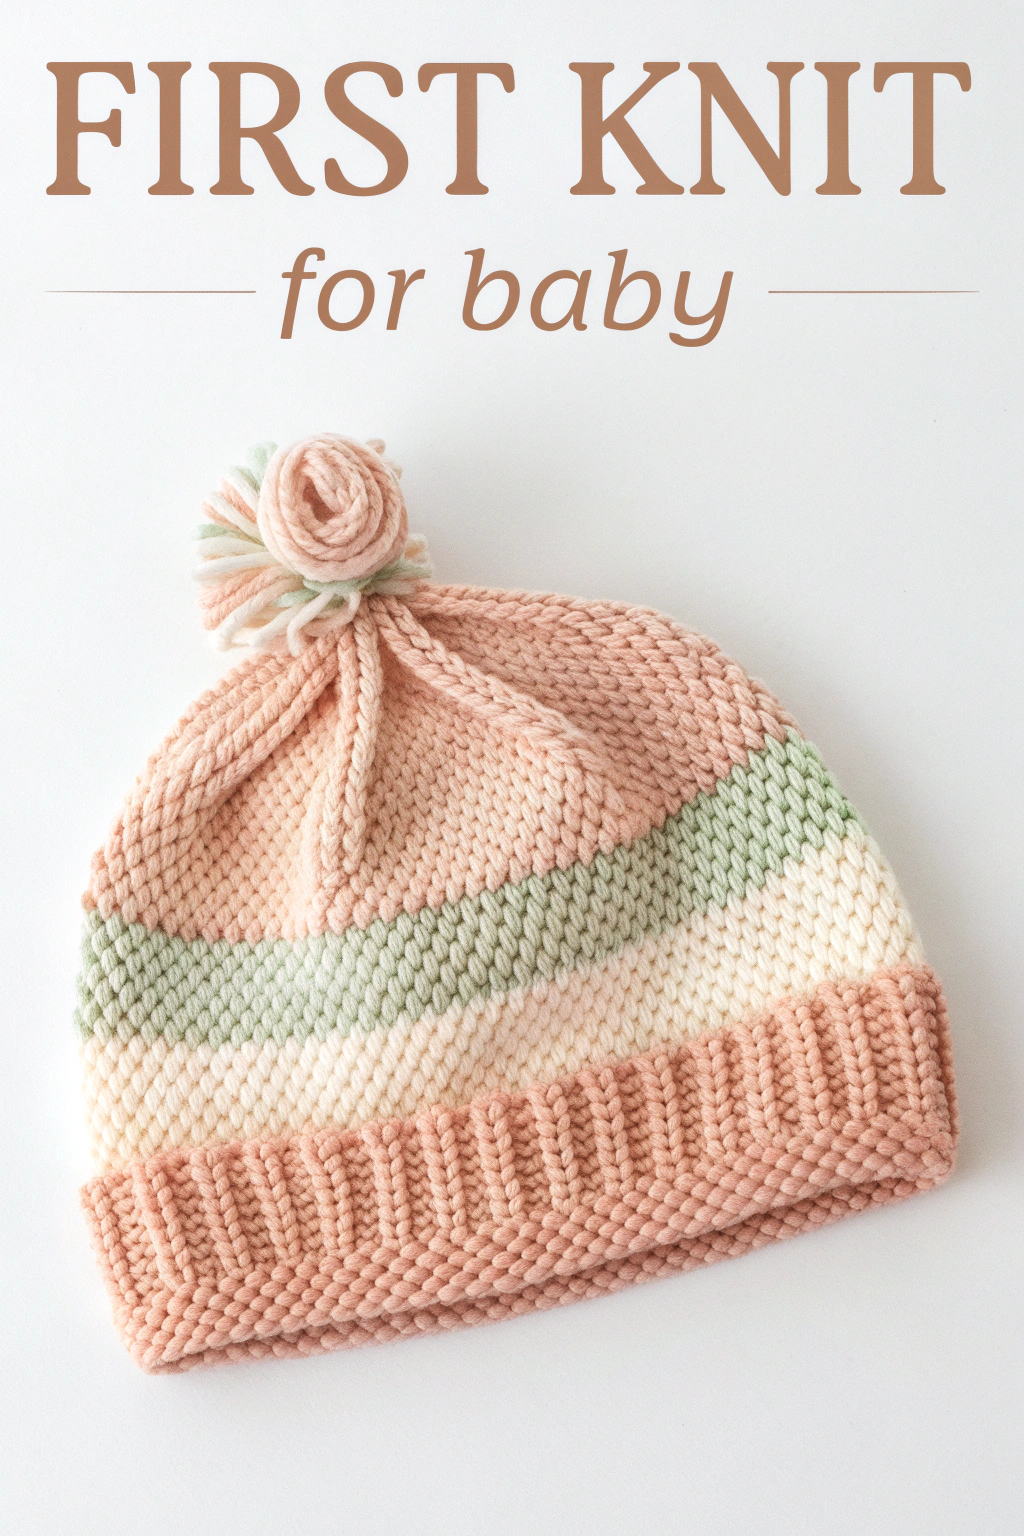
- Garter Stitch: This is the lovely bumpy texture you see on the main body of the hat in the image. It’s achieved by knitting every single row when working flat (back and forth). Super simple!
- 1×1 Rib Stitch: This makes the stretchy brim. It’s formed by alternating one knit stitch and one purl stitch (k1, p1) across the row. On the next row, you’ll knit the knit stitches and purl the purl stitches as they face you.
- Knit Two Together (k2tog): A basic decrease stitch. Insert the right needle into the next two stitches on the left needle as if to knit them normally, wrap the yarn, and pull through both loops at once. This turns two stitches into one.
A Note on Gauge: Gauge means how many stitches and rows fit into a certain measurement (like 4 inches). For a baby hat, being slightly off isn’t critical, but it’s good practice. If you knit a small square (maybe 20 stitches wide for 20 rows) in Garter Stitch, you can measure it to see if it matches the gauge suggested on your yarn label. If you have too many stitches per inch, use larger needles; too few, use smaller needles.
Knitting the Hat: Step-by-Step
We’ll knit this hat flat as a rectangle and then seam it up.
1. Knit the Brim
- Using your Main Color (Peach), cast on 56 stitches. (This is an estimate for a 3-6 month size; adjust slightly fewer for newborn or slightly more for 6-12 months if desired. Aim for a brim circumference that’s snug but stretchy).
- Row 1 (Right Side): Knit 1 stitch, Purl 1 stitch. Repeat from * to * across the entire row.
- Row 2 (Wrong Side): Knit 1 stitch, Purl 1 stitch. Repeat from * to * across the entire row. (You’ll be knitting the stitches that look like V’s and purling the ones that look like bumps from the previous row).
- Repeat Rows 1 and 2 until the ribbed brim measures about 1.5 inches (or your desired brim height). End having just finished a Wrong Side row.
2. Work the Body in Garter Stitch Stripes
Now we switch to the main body pattern and start adding colors! Remember, Garter Stitch means knitting every row.
- Switch to Cream (Color A): Cut the Peach yarn, leaving a 6-inch tail. Start knitting the next row with Cream yarn, also leaving a tail. You’ll weave these tails in later.
- Knit every row with Cream until the Cream stripe measures about 1 inch tall.
- Switch to Light Green (Color B): Cut the Cream yarn (leave a tail!). Start knitting with Light Green.
- Knit every row with Light Green until the Green stripe measures about 1 inch tall.
- Switch back to Peach (MC): Cut the Green yarn (leave a tail!). Start knitting with Peach.
- Knit every row with Peach until the Peach section measures about 2 inches tall.
Tip for Changing Colors: When starting a new color, just begin knitting the first stitch of the row with the new yarn, leaving a tail of both the old and new colors hanging at the edge. On the next row coming back, you can loosely tie the two tails together to secure them before weaving them in properly at the end.
3. Shape the Crown
This is where we decrease stitches to close the top of the hat. We’ll use the k2tog decrease. Continue using the Peach yarn.
- Decrease Row 1 (Right Side): Knit 6 stitches, k2tog. Repeat from * to * across the row. (You should have 49 stitches left).
- Row 2 (Wrong Side): Knit all stitches.
- Decrease Row 3: Knit 5 stitches, k2tog. Repeat from * to * across the row. (42 stitches).
- Row 4: Knit all stitches.
- Decrease Row 5: Knit 4 stitches, k2tog. Repeat from * to * across the row. (35 stitches).
- Row 6: Knit all stitches.
- Decrease Row 7: Knit 3 stitches, k2tog. Repeat from * to * across the row. (28 stitches).
- Row 8: Knit all stitches.
- Decrease Row 9: Knit 2 stitches, k2tog. Repeat from * to * across the row. (21 stitches).
- Row 10: Knit all stitches.
- Decrease Row 11: Knit 1 stitch, k2tog. Repeat from * to * across the row. (14 stitches).
- Decrease Row 12: K2tog. Repeat from * to * across the row. (7 stitches).
4. Finishing Touches
Almost there!
- Gather the Top: Cut the yarn, leaving a long tail (about 12 inches). Thread this tail onto your yarn needle. Carefully slip the needle through the remaining 7 stitches on your knitting needle as if to purl, sliding them off the knitting needle and onto the yarn tail. Pull the tail tight like a drawstring to close the hole at the top of the hat. Secure it with a knot on the inside.
- Seam the Hat: Fold the hat flat with the Right Sides facing each other (the inside is out). Use the long yarn tail (or a new piece of Peach yarn) and your yarn needle to sew the side edges together, starting from the brim up to the gathered top. A mattress stitch gives a nice invisible seam on garter stitch. (Look this up too – it alternates picking up the bar between stitches on each edge).
- Weave in Ends: Turn the hat right side out. Use your yarn needle to weave in all those yarn tails left from casting on, changing colors, and finishing. Thread each tail and weave it back and forth through the stitches on the inside of the hat for an inch or two before snipping the excess.
- Make the Pom-Pom: This hat has a lovely multi-color pom-pom using all three yarn colors (Peach, Cream, Light Green). Wrap all three strands together around your pom-pom maker, cardboard donut, or fingers until it’s nice and thick. Tie it tightly around the middle with a strong piece of yarn, leaving long tails for attaching. Cut the loops on both sides and trim the pom-pom into a neat ball shape. The image shows a swirled pom-pom, which happens naturally when wrapping multiple colors together randomly. It also has a unique rosette-like center, suggesting the strands might have been wrapped or tied in a specific way before fluffing, perhaps wrapping the core bundle tightly with one color before trimming. You can approximate this look by ensuring a good mix during wrapping and careful trimming.
- Attach the Pom-Pom: Use the long tails you left on the pom-pom and the yarn needle to securely sew the pom-pom to the gathered top of the hat. Tie knots on the inside.
Your Beautiful Handmade Hat!
Take a moment to admire your handiwork! You’ve taken yarn and needles and fashioned this adorable, practical Knitted Baby Hat. Feel the soft texture, see the neat stripes, and know that it was made with care. Knitting is a journey, and this is a fantastic first step (or early step!).
Don’t hesitate to try this pattern. If you get stuck, remember there are loads of videos online for specific techniques like casting on or the mattress stitch. Enjoy the process, the rhythm of the stitches, and the joy of producing something tangible and lovely. We’d love to see your finished hats – feel free to share photos! Happy knitting!