Knit a Classic Color Block Baby Cardigan
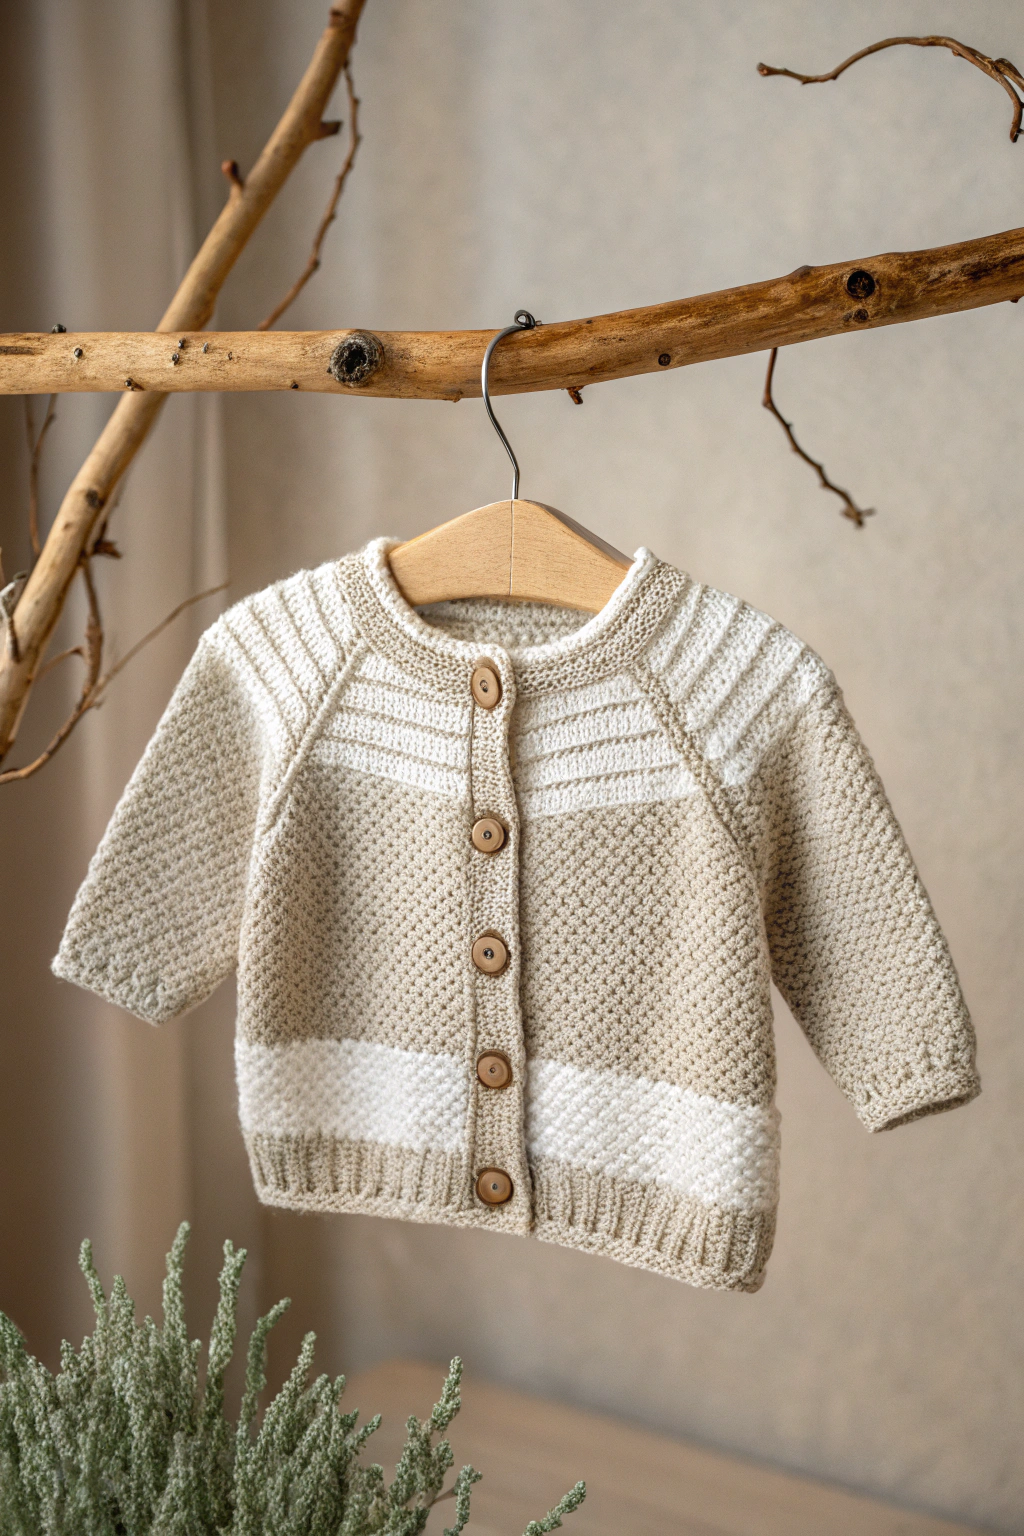
Welcome to our knitting tutorial for a classic color block baby cardigan. Hand-knitting is a rewarding craft, and this cardigan project is a wonderful way to experience the satisfaction of creating something beautiful and useful. In this guide, we will provide clear, step-by-step instructions to knit a charming baby cardigan, inspired by the elegant design you see in the image. Imagine the pleasure of gifting a cozy, handmade cardigan to a little one. Let’s begin this enjoyable and accessible project together.
Materials You’ll Need
Before starting, gather your materials. Having everything ready will make the knitting process smoother.
- 🧶 Yarn: Approximately 200 grams of DK weight yarn in two main colors: Main Color (Beige – approx. 150g) and Contrast Color (White – approx. 50g). A soft, baby-friendly yarn like merino wool or a cotton blend is recommended. You may also use a small amount of Cream color yarn for the yoke and button band (approx. 30g).
- 🪡 Knitting Needles: US size 6 (4.0 mm) knitting needles. Straight needles are recommended, but circular needles can be used if you prefer to knit flat.
- ✂️ Scissors: For cutting yarn.
- 📍 Tapestry Needle: For weaving in yarn ends and seaming.
- 🔘 Buttons: Five wooden buttons, approximately 0.5-inch (1.3 cm) in diameter.
- 📏 Measuring Tape: To check your gauge and measurements.
Let’s Get Knitting: Step-by-Step Guide
Now, let’s start knitting the baby cardigan. We will knit the cardigan in pieces and then seam them together. These instructions are designed to be easy to follow for beginner knitters. Refer to the image as a visual guide throughout the tutorial.
Knitting the Back Panel
Step 1: Cast On. Cast on 60 stitches using the long-tail cast-on method.
Step 2: Knit the Ribbing. With Main Color (Beige), work 1×1 ribbing for 6 rows.
Step 3: Knit the Lower Body in Moss Stitch and Color Block Stripe. Work in Moss Stitch (Row 1: *Knit 1, Purl 1; Row 2: *Purl 1, Knit 1; Repeat Rows 1 & 2). Knit 2 inches (5 cm) in Moss Stitch with Main Color (Beige). Change to Contrast Color (White). Knit 0.75 inches (1.9 cm) in Moss Stitch with Contrast Color (White). Change back to Main Color (Beige). Continue in Moss Stitch with Main Color (Beige) until the back panel measures 9 inches (23 cm) from the cast-on edge.
Step 4: Shape the Armholes. Bind off 3 stitches at the beginning of the next two rows. You will have 54 stitches remaining. Continue in Moss Stitch with Main Color (Beige) until the armhole measures 2.5 inches (6.5 cm) in height.
Step 5: Knit the Yoke in Garter Stitch. Change to Cream Color Yarn (or continue with Beige if you prefer a two-tone look). Work in Garter Stitch (knit every row) for 1.5 inches (4 cm) to create the yoke section with horizontal lines.
Step 6: Shape the Neck and Shoulders. Continue with Cream Color Yarn. Knit in garter stitch across 20 stitches, place center 14 stitches on a holder, and knit to the end of the row. Shape the neck by binding off 3 stitches at the neck edge, then 2 stitches on the following row. You will have 15 shoulder stitches. Knit one row straight, then bind off. Repeat for the other shoulder, mirroring the neck shaping.
Knitting the Front Panels (Two Pieces)
Step 1: Cast On. For each front panel, cast on 33 stitches.
Step 2: Knit the Ribbing. With Main Color (Beige), work 1×1 ribbing for 6 rows.
Step 3: Knit the Lower Body and Stripe. Follow the color block pattern: 2 inches (5 cm) Moss Stitch in Main Color (Beige), then 0.75 inches (1.9 cm) Moss Stitch in Contrast Color (White), and then continue in Main Color (Beige) Moss Stitch until the front panel matches the back panel length to the armhole (9 inches or 23 cm).
Step 4: Shape the Armhole. Bind off 3 stitches at the armhole edge of the next row. You will have 30 stitches remaining. Continue in Moss Stitch with Main Color (Beige) until the armhole measures 2.5 inches (6.5 cm).
Step 5: Knit the Yoke and Shape Neck/Front Edge. Change to Cream Color Yarn. Work in Garter Stitch, shaping the neck and front edge as described previously, keeping a 6-stitch garter stitch front band.
Knitting the Sleeves (Two Pieces)
Step 1: Cast On. Cast on 30 stitches for each sleeve with Main Color (Beige).
Step 2: Knit the Ribbing. Work 1×1 ribbing for 6 rows with Main Color (Beige).
Step 3: Knit the Sleeve Body and Increase. Work in Moss Stitch with Main Color (Beige). Increase 1 stitch at each end every 7th row, then every 8th row x5. You will have 42 stitches. Continue in Moss Stitch until the sleeve measures 7 inches (18 cm).
Step 4: Shape the Sleeve Cap. Shape the sleeve cap using bind-offs and decreases as described previously.
Finishing Touches: Assembly and Button Bands
Step 1: Seaming the Shoulders. Seam the shoulder seams.
Step 2: Setting in the Sleeves. Seam the sleeves into the armholes.
Step 3: Knitting the Button Band. With Cream Color Yarn, pick up stitches along the front edges and neckline. Knit in garter stitch for 6 rows. Bind off all stitches.
Step 4: Weaving in Ends and Attaching Buttons. Weave in all yarn ends. Sew the five wooden buttons evenly spaced onto the left front panel, about 1-1.5 inches apart.
Congratulations!
You have now knitted a classic color block baby cardigan! Observe the finished piece and appreciate the moss stitch texture, the white stripe, the garter stitch yoke, and the wooden buttons. This cozy cardigan is ready to be enjoyed. We encourage you to try this project and share your creations with the knitting community. Happy knitting!