How to Sharpen Knives Without a Sharpener
In the culinary world, a sharp knife is not just a tool; it’s an extension of the chef’s hand. The satisfying glide of a keen edge through a ripe tomato or the precise julienne of fresh herbs can elevate your cooking experience from mundane to magnificent. But what happens when your blades lose their edge, and you find yourself without a professional sharpener? Fear not, for we’re about to embark on a journey through the art of improvised knife sharpening.
Understanding Knife Sharpening Basics
Before we dive into the methods, let’s cut through the mystery of what actually happens when a knife gets dull. Over time, the microscopic teeth along a knife’s edge become misaligned or fold over, transforming your once-sharp blade into a frustratingly blunt tool. Sharpening, at its core, is the process of realigning these teeth and removing minute amounts of metal to recreate a fine edge.
Different knives sport various edge types, from the straight edge of a chef’s knife to the serrated teeth of a bread knife. Understanding your blade’s edge is crucial in choosing the right sharpening method. For instance, a santoku knife with its flat grind will respond differently to sharpening than a Western-style chef’s knife with its double bevel.
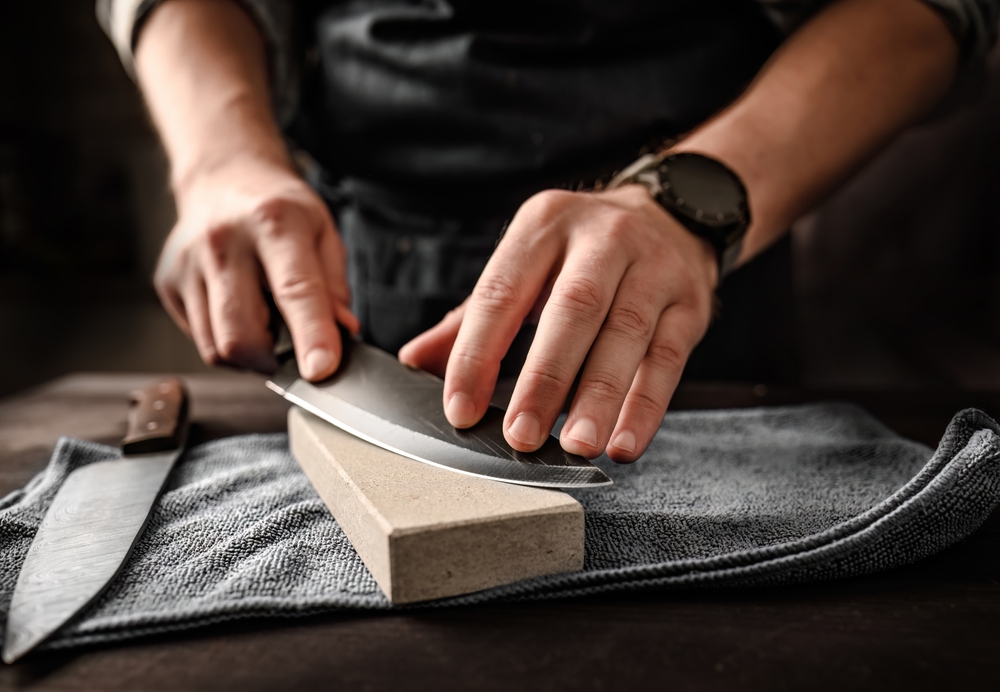
Safety First: Precautions When Sharpening Knives
Before we start turning everyday objects into impromptu sharpening tools, let’s talk safety. Sharpening knives is inherently risky, but with the right precautions, you can minimize the danger.
- Hand Placement: Always keep your fingers away from the blade’s edge. Use a pinch grip on the spine of the knife for better control.
- Protective Gear: Consider wearing cut-resistant gloves. Your fingers will thank you.
- Work Area: Set up in a well-lit, stable area. A cluttered or dimly lit space is a recipe for accidents.
Remember, a sharp knife is safer than a dull one – it requires less force and is more predictable. Now, let’s explore our DIY sharpening methods.
Method 1: Using a Coffee Mug
That morning brew companion hiding in your cupboard doubles as an excellent makeshift sharpener. The unglazed bottom of a ceramic mug is coarse enough to hone your knife’s edge effectively.
Step-by-step guide:
- Flip your mug upside down on a stable surface.
- Hold your knife at a 20-degree angle against the unglazed ring.
- Draw the blade across the ring from heel to tip, maintaining the angle.
- Repeat 10-15 times on each side of the blade.
Pro tip: Older mugs with a more worn bottom ring work best for this method.
Method 2: Sandpaper Technique
Sandpaper isn’t just for smoothing wood; it’s a versatile tool for knife sharpening too. This method allows for a progression of grits, mimicking professional sharpening stones.
Materials needed:
- Various grits of sandpaper (220, 400, and 1000 grit)
- A flat, hard surface like a wooden block or thick glass
Detailed process:
- Secure the coarsest grit (220) to your flat surface.
- Hold the knife at a consistent angle (around 20 degrees) and draw it across the sandpaper from heel to tip.
- Repeat 10-15 times on each side.
- Progress to finer grits, repeating the process.
- Finish with the finest grit for a polished edge.
Grit selection guide:
- 220 grit: For very dull or damaged edges
- 400 grit: For general sharpening
- 1000 grit and above: For refining and polishing the edge
Method 3: Leather Strop Method
Stropping is the secret finishing touch used by barbers and chefs alike. It aligns the microscopic edge of your blade for hair-splitting sharpness.
What is a strop? A strop is traditionally a strip of leather used to finish and maintain a keen edge on straight razors. For our purposes, any thick leather strap will do.
DIY strop creation:
- Find a piece of thick, smooth leather (an old belt works great).
- Secure one end to a stable surface.
- Apply a fine abrasive compound if desired (though not necessary for basic maintenance).
Stropping technique explained:
- Hold the knife at a shallow angle against the leather (around 15 degrees).
- Draw the blade spine-first along the strop, from heel to tip.
- Flip the blade and repeat on the other side.
- Aim for 20-30 strokes per side.
This method is excellent for maintaining already sharp knives and putting a final polish on your edge after using other sharpening methods.
Method 4: Sharpening with a Car Window
Believe it or not, the uncoated edge of a car window can serve as an emergency sharpener. The smooth, hard surface acts similarly to a fine-grit sharpening stone.
How it works: The top edge of a car window is often uncoated glass, providing a suitable surface for honing a knife edge.
Step-by-step instructions:
- Ensure the car window is clean and dry.
- Roll the window down slightly to expose the top edge.
- Hold your knife at a 20-degree angle against the exposed edge.
- Draw the blade along the window edge from heel to tip.
- Repeat 10-15 times on each side of the blade.
Cautions and considerations:
- Only use this method in emergencies to avoid damaging your car.
- Be mindful of your surroundings and others’ property.
- This method is best for touch-ups rather than major resharpening.
Method 5: Using a Nail File
That emery board in your manicure kit isn’t just for nails – it can breathe new life into your dull blades too.
Choosing the right nail file: Opt for a high-quality, durable emery board or metal nail file. Avoid glass nail files, as they’re too smooth for effective sharpening.
Technique breakdown:
- Hold the nail file steady on a flat surface.
- Place the knife blade against the file at a 20-degree angle.
- Draw the knife across the file from heel to tip, maintaining the angle.
- Repeat 15-20 times on each side of the blade.
Effectiveness and limitations: While not as effective as dedicated sharpening tools, a nail file can provide a quick edge in a pinch. It’s best for small knives or quick touch-ups.
Method 6: The Brick Method
A common brick can be transformed into a makeshift whetstone with a bit of know-how.
Selecting the right type of brick: Look for a smooth-faced brick. Avoid overly porous or rough-textured bricks, as these can damage your blade.
Proper technique:
- Thoroughly clean and dry the brick.
- If possible, soak the brick in water for 10-15 minutes for better results.
- Hold the knife at a consistent 20-degree angle against the brick’s smooth side.
- Draw the blade across the brick from heel to tip, applying gentle pressure.
- Repeat 15-20 times on each side of the blade.
Safety considerations:
- Wear gloves to protect your hands from the rough brick surface.
- Work in a well-ventilated area to avoid inhaling brick dust.
- Clean your knife thoroughly after sharpening to remove any brick particles.
Method 7: Using River Stones
Nature provides its own sharpening tools in the form of smooth river stones. This method connects us to ancient sharpening techniques used for millennia.
How to select suitable stones: Look for flat, smooth stones with a fine-grained surface. Ideal stones are about the size of your hand and have a consistent texture.
Preparing the stone:
- Clean the stone thoroughly to remove any dirt or debris.
- Soak the stone in water for about 15 minutes before use.
- Optional: Create a slurry by rubbing two stones together to enhance sharpening.
Sharpening process:
- Place the wet stone on a stable, non-slip surface.
- Hold the knife at a 20-degree angle against the stone.
- Draw the blade across the stone in a sweeping motion, from heel to tip.
- Repeat 15-20 times on each side, alternating sides every few strokes.
- If available, progress to a smoother stone for refining the edge.
This method requires patience but can produce excellent results with practice.
Method 8: Cardboard Stropping
Surprisingly, that corrugated cardboard box in your recycling bin can help maintain your knife’s edge.
Materials needed:
- A piece of corrugated cardboard (about 12 inches long)
- A flat, stable surface
Creating a cardboard strop:
- Cut a strip of cardboard about 2 inches wide and 12 inches long.
- Secure one end of the cardboard to your work surface.
Technique and effectiveness:
- Hold the knife at a very shallow angle (about 15 degrees) against the cardboard.
- Draw the knife spine-first along the cardboard, from heel to tip.
- Flip the blade and repeat on the other side.
- Aim for 40-50 strokes per side.
While not as effective for major sharpening, this method is excellent for maintaining an already sharp edge and works well as a finishing step after other sharpening methods.
Method 9: Glass Bottle Edge
In a survival situation or when options are limited, the edge of a glass bottle can serve as an impromptu sharpening surface.
How it works: The lip of a glass bottle provides a hard, slightly abrasive edge that can help realign and sharpen a knife blade.
Step-by-step guide:
- Ensure the bottle is clean and dry.
- Hold the bottle securely on a stable surface.
- Place the knife blade against the rounded edge of the bottle’s lip at a 20-degree angle.
- Draw the knife across the edge from heel to tip, maintaining the angle.
- Repeat 15-20 times on each side of the blade.
Precautions and limitations:
- This method carries a higher risk of injury due to potential glass breakage.
- It’s best suited for emergency situations rather than regular maintenance.
- The effectiveness can vary greatly depending on the bottle and technique.
Method 10: Ceramic Plate Technique
That ceramic dinner plate in your cupboard isn’t just for serving; it’s a hidden sharpening tool waiting to be discovered.
Choosing the right plate: Look for an unglazed ceramic plate or the unglazed ring on the bottom of a glazed plate. The rougher this surface, the more effective it will be for sharpening.
Proper sharpening motion:
- Flip the plate upside down on a stable, non-slip surface.
- Hold the knife at a 20-degree angle against the unglazed ring.
- Draw the blade across the ring from heel to tip, maintaining the angle.
- Repeat 15-20 times on each side of the blade.
Pros and cons: Pros:
- Readily available in most kitchens
- Effective for light touch-ups and maintenance
Cons:
- May not be abrasive enough for very dull knives
- Risk of damaging the plate if not done carefully
Maintaining Your Knife’s Edge
Sharpening is only half the battle; proper maintenance keeps your edge keen between sharpenings.
Regular honing techniques:
- Use a honing steel before each use to realign the edge.
- Draw the blade along the steel at a 20-degree angle, alternating sides.
- 5-10 strokes per side is usually sufficient.
Proper knife storage:
- Use a knife block or magnetic strip to protect the edge.
- Avoid storing knives loosely in drawers where they can knock against other utensils.
Cutting surface recommendations:
- Opt for wooden or soft plastic cutting boards.
- Avoid glass, ceramic, or stone surfaces that can quickly dull your edge.
When to Seek Professional Sharpening
While these DIY methods are effective, there comes a time when professional intervention is necessary.
Signs that DIY methods aren’t enough:
- Visible nicks or chips in the blade
- Extreme dullness that doesn’t improve with home sharpening
- Unevenly worn blade edge
Benefits of professional sharpening:
- Precision angle maintenance
- Access to high-quality sharpening materials
- Ability to repair more serious blade damage
How often to professionally sharpen knives: For home cooks, once or twice a year is usually sufficient. Professional chefs may need monthly or even weekly professional sharpenings.
Conclusion
Maintaining a sharp knife doesn’t require expensive equipment or professional services. With these ten DIY methods, you can keep your blades in top condition using everyday objects found around your home. Remember, the key to a sharp knife is regular maintenance and proper technique. Practice these methods, and you’ll never have to endure the frustration of a dull knife again.
Whether you’re using the unglazed bottom of a coffee mug, the smooth surface of a river stone, or the ingenuity of a cardboard strop, each of these techniques connects you to the age-old craft of blade maintenance. So the next time you find your knife struggling to slice through a ripe tomato, don’t reach for the takeout menu – reach for one of these creative sharpening solutions instead.
FAQs
Q: Can I use these methods on serrated knives? A: Most of these methods are best suited for straight-edged knives. Serrated knives require specialized tools and techniques for proper sharpening.
Q: How often should I sharpen my knives? A: For home cooks, sharpening every 2-3 months is usually sufficient. However, regular honing between sharpenings will maintain the edge longer.
Q: What’s the difference between honing and sharpening? A: Honing realigns the edge of a slightly dulled blade without removing material. Sharpening actually removes small amounts of metal to create a new edge.
Q: Are there any knives that shouldn’t be sharpened at home? A: Very expensive or specialized knives, such as high-end Japanese knives or those with unique blade geometries, are best left to professionals.
Q: How can I tell if my knife is sharp enough? A: A sharp knife should easily slice through a piece of paper without tearing. For a more practical test, it should effortlessly slice through a ripe tomato without squashing it.
Remember, a sharp knife is a safe knife. It requires less force, provides more control, and ultimately makes your time in the kitchen more enjoyable. Happy sharpening!