How to Repot a Plant: Explained Step by Step
Plants need light, nutrients, water and enough space to grow! You can find out how to give your plant more space and repot it here.
Why do you have to repot plants?
Repotting allows the roots of the plants to continue growing. This promotes the stability of the houseplant and promotes general growth. In addition, the new soil provides the plants with nutrients: Fertilization is therefore not necessary for the next six weeks after repotting. In addition, a larger pot creates an improved water buffer. So if too much water is given, the water can be stored at the bottom of the pot and the plants do not run the risk of the roots rotting. Thanks to the new soil, plants continue to receive more air after repotting, which has a positive effect on growth.
Repotting plants: When is the right time?
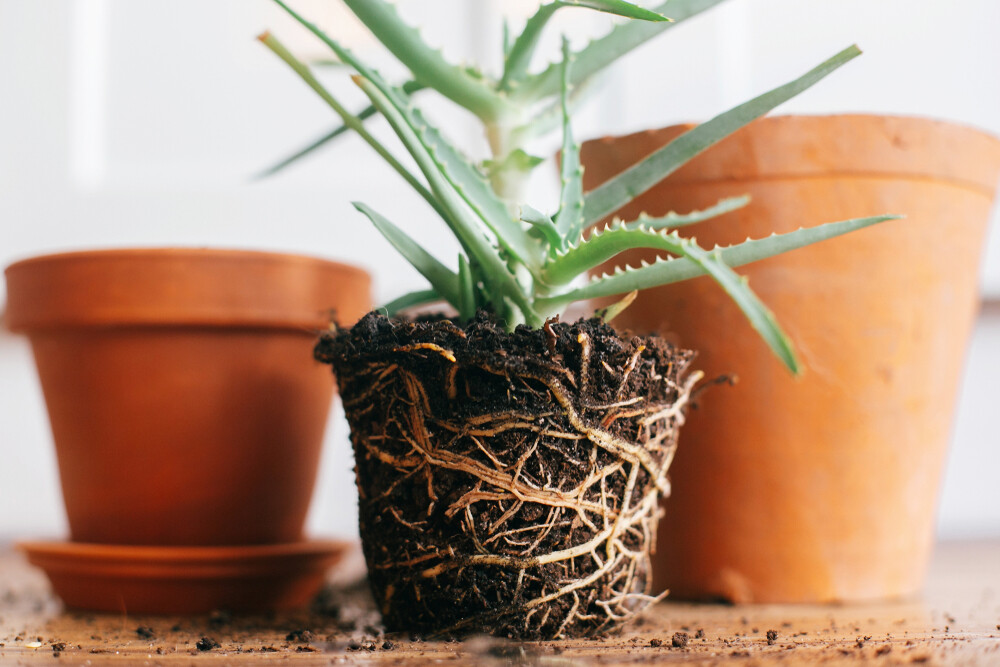
- Depending on how fast the plant grows, it should be repotted after one or at the latest after three years. If roots have already spread through the entire soil or if roots emerge at the surface, this is a sign that the houseplant must be repotted as quickly as possible.
- The optimum time is considered to be the beginning of the growth phase, which extends from February to April. At this time of year, temperatures and light intensity increase. In principle, however, the plants can always be repotted.
- If you have bought a new houseplant, you must always put it in a new pot, because the pots from the shop are too small.
- If the plants are in flower, you should wait until they have flowered and then repot them.
Repotting plants: How large must the container be?
- The new pot should be two to three cm larger than the previous one.
- If the plants are older, a pot five to six cm larger should be selected, as older plants generally do not need to be repotted as frequently.
- Never use a pot that is too large, as otherwise all the energy of the plants will flow into the formation of roots and not into the development of the leaves.
Repotting plants: How it works!
Make sure that the plants have neither spider mites nor aphids – otherwise you will have to treat them first!
Pot with drain hole
- Before repotting, you must prepare the new pot: To do this, you pour a layer of pebbles, plant granules or shards of clay into the pot. This kills two birds with one stone: Firstly, waterlogging is avoided and ventilation is improved by the loose material.
- Now the plant is removed from the container, the old soil is gently shaken off and the roots are examined: If individual roots are dried out or even show signs of rot, they are separated. Very long roots should be trimmed and the root ball loosened up a little.
- Then put some potting soil into the new pot and position the plant on top of it so that it stands straight. Tip: It is advisable to loosen the potting soil, as it often clumps together in the packaging.
- Now the pot has to be filled with soil so that there is only two centimetres of space left towards the edge. Press the soil and, if necessary, add a little more soil – so that there is still some space between the edge of the container and the plant soil. Otherwise the watering water may overflow.
- Finally, the plant is watered with a light shower of lukewarm water and placed on a coaster or in a cachepot.
Repotting hydroponics
Hydroponics is a planting system in which the plants are rooted in water-filled containers or even in wetlands. This system is used, for example, for expanded clay pellets.
Plants from hydroponics must also be repotted:
- Remove the old expanded clay from the original pot.
- In the new pot, a layer of new clay balls is moistened, the plant is placed on top of them and the pot is filled with balls. The general irrigation and fertilization is done later in the cachepot in which the plant is placed.