How to Make Homemade Sugar Scrubs: The Ultimate Guide for Softer, Smoother Skin
Sugar scrubs are hands down one of the best DIY pampering treatments you can make for your skin. The gentle yet effective exfoliation helps remove dead skin cells, while the oils moisturize and leave your skin feeling unbelievably soft and smooth.
Even better – sugar scrubs are so easy and affordable to make at home using ingredients you likely already have in your pantry. With just some sugar and oil as the base, you can customize your own signature scrub with different scents, oils, colors and exfoliating add-ins.
In this comprehensive guide, you’ll discover:
- The base ingredients needed for simple and advanced sugar scrub recipes
- Step-by-step instructions showing you how to make basic and custom scrubs
- Tips for tailoring your scrub with different moisturizing oils, scents, and exfoliants
- How to properly use your homemade scrubs for optimal results
- Proper storage so you can enjoy your scrubs for months
So if you’re ready to nourish your skin with a spa-like exfoliating treatment made from natural ingredients, let’s dive into the world of sugar scrubs!
Why Exfoliate with a Homemade Sugar Scrub?
Before we get to the recipes, let’s look at why a good scrub is so important for your skincare routine.
Dead skin cells, dirt, and oil build up on the surface of your skin every day. Over time, this dulls your complexion and clogs your pores. Exfoliation removes this build-up to reveal the fresh, radiant skin underneath.
Dermatologists recommend exfoliating your body 1-2 times per week for the smoothest, healthiest looking skin. Sugar scrubs provide the perfect gentle exfoliation. Here’s why they work so well:
1. Remove Dead Skin Cells
The granulated sugar acts as a natural exfoliant, scrubbing away the dulling dead skin to reveal your gorgeous glow.
2. Moisturize While Exfoliating
The oil in sugar scrubs helps lubricate the skin. This prevents the sugar from feeling too harsh or abrasive. The oils also deliver nourishing moisture.
3. Improve Circulation
Gentle scrubbing increases blood flow under the skin, leaving you with a healthy, vibrant appearance.
4. Soften Skin
Getting rid of dead cells allows moisturizers and oils to better penetrate for super soft, smooth skin all over.
5. Deep Clean Pores
Exfoliation cleans deep into pores, dislodging clogs and preventing breakouts.
So your skin gets a deep clean, gentle scrub, and a dose of hydration all at once. No wonder sugar scrubs leave you looking and feeling amazing!
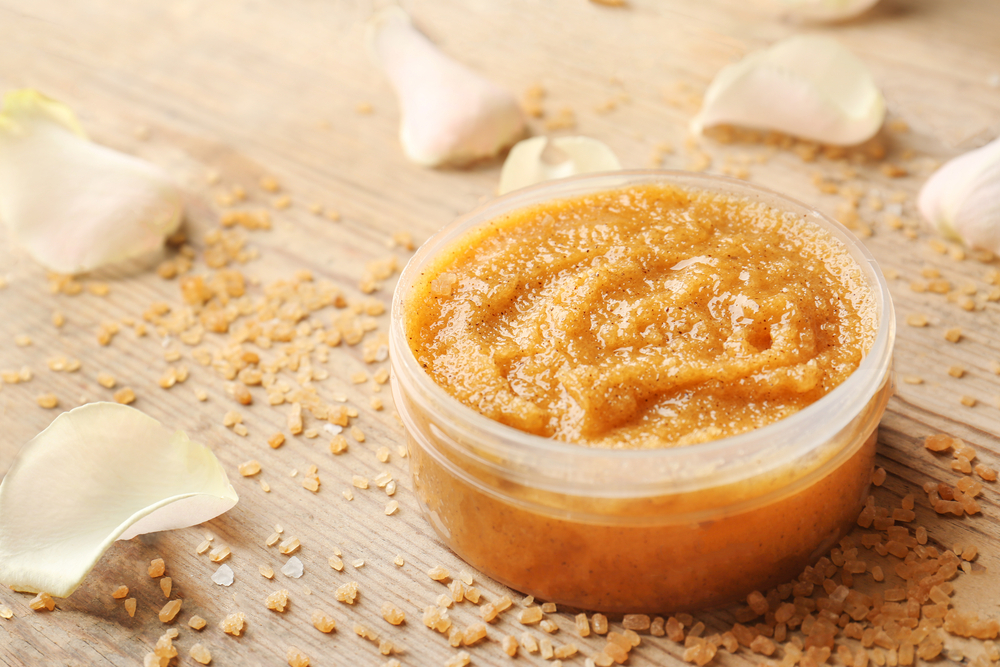
Sugar Scrub Base Ingredients
Now that you know why sugar scrubs are so great, let’s get familiar with the core ingredients that go into making them:
Granulated Sugar
This provides the gritty texture that sloughs off dull skin cells. White sugar is the classic choice with a balanced grain size not too fine or too coarse. But you can also use brown sugar or even natural sugars like coconut.
Here’s a closer look at the best options for sugar scrub sugar:
White Sugar – This common white cane sugar has medium grain size perfect for scrubbing. Opt for organic white sugar if possible.
Brown Sugar – The molasses content gives it a finer grain, so brown sugar is a bit less abrasive than white sugar. It also contains glycolic acid to help brighten skin.
Coconut Sugar – This natural sugar made from coconut palm sap has a slightly coarser grain perfect for rigorous exfoliation. It also lends a subtle tropical fragrance.
Raw Sugar – Unrefined and less processed than white sugar, raw sugar shares a coarser grain similar to coconut sugar. It’s packed with vitamins, minerals and antioxidants to nourish skin.
No matter which you choose, look for organic, unrefined sugar for the highest quality scrub experience.
Oil
Oils provide moisturizing properties to offset the exfoliating sugars. Look for skin nourishing oils high in fatty acids like:
Olive Oil – Extra virgin olive oil is rich in antioxidants and vitamin E to deeply hydrate.
Coconut Oil – The tropical oil has antibacterial properties to keep pores clean as it moisturizes.
Sweet Almond Oil – Ultra-hydrating and great for sensitive skin thanks to its vitamin A content.
Grapeseed Oil – This lightweight oil is easily absorbed by skin and adds a satiny texture.
Jojoba Oil – Mimics skin’s natural sebum so it absorbs rapidly to soothe and soften.
Avocado Oil – The thick, ultra-hydrating oil is perfect for very dry areas like elbows and feet.
For your base oil, stick to gentle, unscented varieties free of added perfumes. Use about 1 part oil to 2 parts sugar. Too much oil will make the scrub oily rather than gritty.
Basic Sugar Scrub Recipe
Once you understand the basics of sugar and oil, you’re ready for the fun part – actually making your first simple sugar scrub!
Here’s the basic recipe and simple instructions:
Ingredients:
- 1 cup white or brown sugar
- 1⁄2 cup olive oil, coconut oil, almond oil, or grapeseed oil
Directions:
- Add the sugar to a small mixing bowl first. Granulated white or brown sugar both work well for starters.
- Pour in the oil and stir thoroughly with a spoon or fork until a wet sandy texture forms.
- Mix just until a gritty paste comes together. Avoid overmixing into a liquid.
- For fragrance, add 5-10 drops of essential oils like lavender, lemon, peppermint, etc.
- Transfer finished scrub to an airtight jar or container.
- Exfoliate in the shower by gently massaging a tablespoon or so over damp skin using circular motions.
- Rinse thoroughly and follow up with moisturizer.
And with that, you’ve made your first easy, spa-worthy sugar scrub! Now let’s look at ways to customize your scrub…
Customizing Your Sugar Scrubs
Once you’ve mastered basic sugar scrub making, the fun really begins by tailoring the recipes to your preferences. Let your creativity run wild playing with different exfoliants, moisturizing oils, scents, and colors to design your own signature blends.
Exfoliating Add-Ins
Add 2-3 tablespoons of any of these bonus exfoliants to transform a basic scrub into a personalized powerhouse formula:
Coffee Grounds – The gritty grounds provide an invigorating texture while the caffeine stimulates blood flow.
Oats – Gently buff away dead skin cells while also soothing and calming irritation.
Sea Salt – Minerals like magnesium tighten pores and balance skin’s moisture levels.
Vitamin C Tablets – Crush up tablets and mix in for extra cell turnover and brightening properties.
Dry Flowers – Gently ground dried flowers like rose petals, lavender, and chamomile soften, soothe, and scent skin.
Green Tea – Contains antioxidants that protect skin from environmental damage.
Play around with combining 2-3 of the add-ins to create your own signature scrub.
Moisturizing Oils
Swap out the base oil or experiment by blending a few for added skin nourishment:
Avocado Oil – The thick, ultra-hydrating oil is great for very dry areas.
Jojoba Oil – This antioxidant oil mimics skin’s natural sebum so it absorbs rapidly.
Argan Oil – Repairs and rejuvenates damaged skin cells leaving skin supple.
Hemp Seed Oil – Loaded with omega-3 and omega-6 fatty acids to hydrate and calm sensitive skin.
Pomegranate Seed Oil – Helps reverse signs of aging and environmental damage with powerful antioxidants.
Rosehip Oil – Natural retinoids rejuvenate skin by stimulating collagen production reducing scars.
Create your own signature oil blend like:
- 1/4 cup coconut oil
- 2 tbsp jojoba oil
- 1 tbsp pomegranate seed oil
Color and Scent
The simplest way to add natural color and scent is with:
Dried Flowers & Herbs – Chamomile, lavender, rose petals, etc.
Essential Oils – 10-15 drops per cup of scrub. Favorites are lavender, grapefruit, lemon, and peppermint.
Spices – 1 tsp cinnamon or nutmeg quickly infuses color and scent.
Citrus Zest – Zest an orange, lemon, grapefruit, or lime before juicing.
Vanilla Extract – Use 1 tsp per cup of scrub for scent without drying oils.
Cocoa Powder – 1-2 tbsp makes a lovely brown sugar-chocolate scrub.
Experiment to design your own perfect aroma blending 2-3 of these ingredients.
Containers
How you store and present your sugar scrub comes down to personal preference and usage.
- Wide mouth mason jars are ideal for making lots to use in the shower
- Smaller jars can be filled for gifting or use on hands and feet
- Lip balm style tubes are great for travel or keeping in your purse
- Refillable plastic tubes with twist caps allow neat, mess-free application in the bath
Using Your Homemade Sugar Scrub
Now comes the really fun part – using your custom-designed sugar scrub! Here are tips for usage:
- Shower Steam – The hot water helps open your pores and soften skin ready for exfoliation.
- Scrub Wet Skin – Scrubbing dry can cause discomfort. Wet your skin first for smooth gliding.
- Gentle Pressure – Massage your scrub over skin gently using small circular motions. Never aggressively rub!
- Avoid Sensitive Zones – Carefully avoid the face, underarms and delicate areas. Use a specially formulated facial scrub instead.
- Rinse Thoroughly – Rinse with warm water until the oiliness is gone to avoid clogged pores.
- Moisturize After – Lock in the benefits by applying body lotion or moisturizing oil after toweling dry.
- Start Slowly – Use once or twice a week at first, working up to 2-3 uses max to avoid over-exfoliating.
Follow these tips and your homemade scrub will leave your skin baby soft and glowing!
Storing Your Sugar Scrubs
Like any homemade beauty product, proper storage is key to maximizing how long your scrub lasts. Follow these guidelines:
- Airtight Container – Choose containers that seal completely to keep out moisture and prevent dried out scrubs.
- Dark Cool Place – Store in a cabinet or pantry away from direct light and heat to maintain freshness.
- Clean Utensils – Always use a freshly cleaned spoon or spatula each time you scoop out scrub to prevent cross-contamination.
- Smaller Batches – Consider dividing large batches into smaller containers that you can use up quicker before the ingredients lose potency.
- Natural Preservatives – Adding a few drops of vitamin E or rosemary extract helps extend shelf life a few extra weeks by preventing oxidation.
By keeping your scrubs in ideal conditions, they should last 1-2 months no problem!
Conclusion
Hopefully this comprehensive guide has removed any intimidation about making your own luxury sugar scrubs at home. As you’ve discovered, it’s so easy to whip up basic effective recipes or customize indulgent scrubs using ingredients you probably already have on hand.
Not only are homemade sugar scrubs far gentler and safer than store-bought varieties, they allow you to control every aspect of quality and scent. Why settle for generic scrubs when you can craft your own spa-worthy skin treat?
Sugar scrubs make excellent gifts too. Make batches of your signature scrub in pretty jars to give friends and family. Just be sure to include instructions to prolong shelf life.
So what are you waiting for? Get mixing and enjoy conditioning your skin with lush, all-natural sugar scrub recipes. Your body will thank you for taking the pampering to the next level!