How to Keep Your Windowsill Clean and Tidy
Have you ever noticed how a sparkling clean windowsill can transform the entire look of a room? Or how a neglected, dusty windowsill can make even the most well-decorated space feel unkempt? Welcome to your comprehensive guide on maintaining pristine windowsills. Whether you’re a cleaning enthusiast or someone who’s just starting to take home maintenance seriously, this post will equip you with all the knowledge and techniques you need to keep your windowsills spotless.
Before we dive into the cleaning process, it’s crucial to understand what we’re working with. Windowsills come in various materials, each with its unique cleaning requirements.
Types of Windowsills
- Wood: Classic and warm, but prone to moisture damage.
- Vinyl: Low-maintenance and water-resistant.
- Stone: Durable and elegant, but can be porous.
- Tile: Easy to clean but watch out for grout lines.
- Metal: Modern look, resistant to most damage.
Identifying your windowsill material is the first step in effective cleaning. For instance, a wooden windowsill will require different care compared to a vinyl one. Wood is sensitive to excess moisture, while vinyl can handle more water-based cleaning methods.
Common Problem Areas
Regardless of the material, certain areas of windowsills are more prone to dirt accumulation:
- Corners: Dust and debris love to hide here.
- Crevices: Especially in ornate or textured windowsills.
- The junction between the windowsill and the window frame: A common spot for mold growth.
By understanding these problem areas, you can focus your cleaning efforts more effectively.
Preparation for Cleaning
Before you start scrubbing away, proper preparation is key to efficient and safe cleaning.
Gathering Cleaning Supplies
Here’s a list of items you’ll need:
- Microfiber cloths
- Soft-bristled brush
- All-purpose cleaner
- Material-specific cleaner (e.g., wood cleaner for wooden sills)
- Vacuum with brush attachment
- Bucket
- Sponge
- Old toothbrush for crevices
- White vinegar
- Baking soda
Safety Precautions
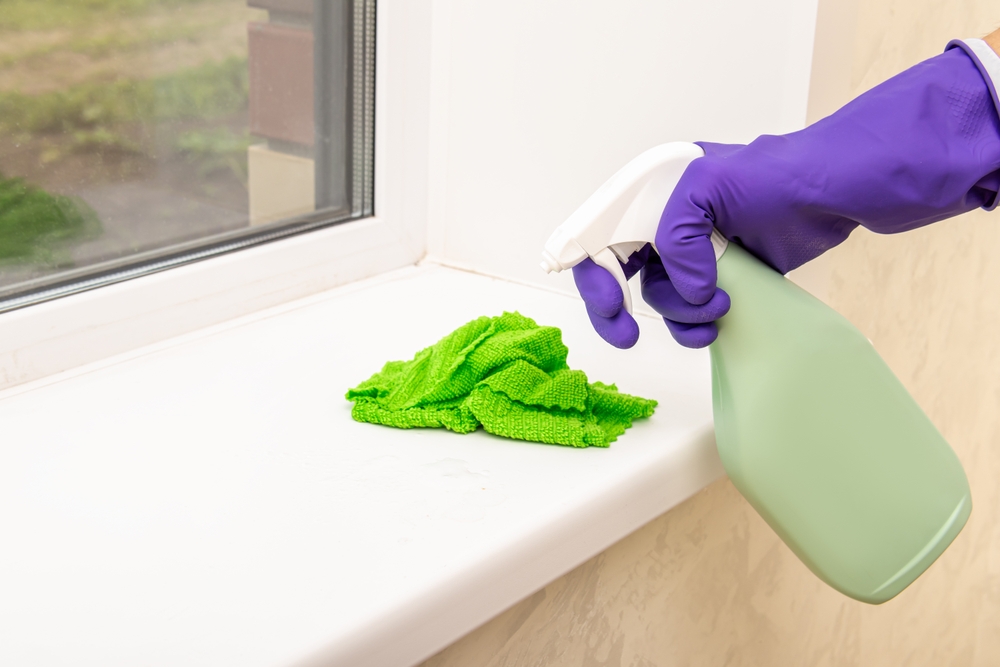
- Always wear gloves to protect your hands from cleaning chemicals.
- Ensure good ventilation by opening windows or using a fan.
- If using a ladder to reach high windowsills, make sure it’s stable and have someone spot you.
Protecting Surrounding Areas
- Remove any items from the windowsill.
- Cover nearby furniture with old sheets or plastic covers.
- Place towels on the floor beneath the windowsill to catch any drips.
Step-by-Step Cleaning Process
Now that we’re prepared, let’s dive into the cleaning process.
A. Dusting and Debris Removal
- Start with a dry clean. Use your vacuum’s brush attachment to remove loose dust and debris.
- For stubborn cobwebs, use a microfiber duster or a soft-bristled brush.
- Pay special attention to corners and the area where the windowsill meets the window frame.
B. Deep Cleaning Techniques
General Cleaning Solution Recipe
For most windowsills, a simple solution of warm water and mild dish soap works wonders. For tougher grime, try this all-purpose cleaner:
- 1 cup white vinegar
- 1 cup water
- 1 tablespoon dish soap
Mix in a spray bottle and you’re ready to go!
Material-Specific Cleaning Methods
- Wood:
- Use a wood-specific cleaner or a mixture of warm water and mild soap.
- Avoid excessive water. Damp-clean, don’t soak.
- For stubborn stains, mix baking soda with water to form a paste. Apply, let sit for a few minutes, then wipe clean.
- Vinyl:
- Use the all-purpose cleaner mentioned above.
- For tough stains, a mixture of baking soda and water works well.
- Stone:
- Use a pH-neutral cleaner to avoid damaging the stone.
- Avoid acidic cleaners like vinegar.
- Tile:
- Use the all-purpose cleaner for the tiles.
- For grout lines, make a paste with baking soda and water. Apply with an old toothbrush, scrub gently, then rinse.
- Metal:
- Use a mixture of warm water and mild dish soap.
- For shine, polish with a solution of equal parts water and white vinegar.
C. Drying and Polishing
- After cleaning, immediately dry the windowsill with a clean, dry microfiber cloth.
- For wooden sills, follow the grain when wiping to avoid streaks.
- For extra shine on non-wooden surfaces, buff with a clean, dry cloth.
Maintaining Clean Windowsills
Keeping your windowsills clean is easier with regular maintenance.
Regular Cleaning Schedule
- Daily: Quick dust with a microfiber cloth
- Weekly: Thorough dusting and spot-cleaning of visible dirt
- Monthly: Deep clean following the steps outlined above
Quick Daily Maintenance Tips
- Keep a microfiber cloth near each window for quick dusting.
- Wipe away any visible spots or spills immediately.
- Open windows regularly to prevent moisture buildup.
Seasonal Deep Cleaning Advice
- Spring: Focus on removing winter grime and checking for any moisture damage.
- Summer: Clean more frequently due to open windows bringing in more dust.
- Fall: Prepare for winter by ensuring all seals are clean and intact.
- Winter: Pay extra attention to condensation and potential mold growth.
Preventing Future Dirt and Damage
Prevention is always better than cure. Here are some strategies to keep your windowsills cleaner for longer:
Weatherstripping and Sealing
- Check the seals around your windows annually.
- Replace any cracked or worn weatherstripping.
- Use caulk to seal any gaps between the windowsill and the wall.
Using Windowsill Covers or Mats
- Consider using plastic, fabric, or silicone windowsill covers.
- These can be easily removed and washed, protecting the actual sill from dirt and moisture.
Managing Indoor Plants on Windowsills
- Use saucers or trays under plant pots to catch water and dirt.
- Rotate plants regularly to check for any moisture or dirt buildup underneath.
- Consider using pot feet to elevate plants and improve air circulation.
Troubleshooting Common Windowsill Issues
Even with the best care, issues can arise. Here’s how to tackle them:
Dealing with Mold and Mildew
- Mix equal parts water and white vinegar in a spray bottle.
- Spray the affected area and let sit for an hour.
- Scrub with a soft brush, then wipe clean with a damp cloth.
- For persistent mold, consider using a commercial mold remover.
Addressing Paint Chips or Wood Rot
- For paint chips, sand the area lightly, clean thoroughly, and touch up with matching paint.
- For minor wood rot, remove the rotted area, treat with a wood hardener, fill with wood filler, then sand and paint.
- Extensive wood rot may require professional repair or replacement of the windowsill.
Fixing Minor Damages and Scratches
- For wooden sills, use a matching color wood filler for small scratches and dents.
- For vinyl or metal sills, try using a color-matched epoxy filler.
- Always sand and clean the area before and after applying any filler.
Eco-Friendly Cleaning Options
For the environmentally conscious, here are some green cleaning solutions:
Natural Cleaning Solution Recipes
- All-Purpose Cleaner: Mix equal parts water and white vinegar with a few drops of essential oil for fragrance.
- Degreaser: Make a paste with baking soda and water.
- Disinfectant: Mix 2 cups of water with 3 tablespoons of castile soap and 20-30 drops of tea tree essential oil.
Sustainable Cleaning Tool Alternatives
- Replace paper towels with reusable microfiber cloths.
- Use a compostable scrub brush with natural bristles instead of plastic.
- Opt for a steam cleaner for chemical-free deep cleaning.
Benefits of Eco-Friendly Cleaning
- Reduces exposure to harsh chemicals, benefiting your health and indoor air quality.
- Minimizes environmental impact by reducing plastic waste and chemical runoff.
- Often more cost-effective in the long run.
Enhancing Your Windowsill’s Appearance
A clean windowsill is a perfect canvas for decoration. Here’s how to beautify your windowsills without compromising cleanliness:
Decorating Ideas That Don’t Compromise Cleanliness
- Use decorative tiles or a mosaic as a windowsill cover.
- Apply a clear, protective finish to wooden sills for easier cleaning and a polished look.
- Install a slim floating shelf slightly above the windowsill for decorations, keeping the actual sill clear for easy cleaning.
Choosing Easy-to-Clean Decor Items
- Opt for smooth, non-porous items that don’t collect dust easily.
- Choose washable fabric for any cushions or seat pads.
- Use plants known for their air-purifying qualities, like snake plants or spider plants.
Balancing Aesthetics with Practicality
- Rotate decorative items regularly to make thorough cleaning easier.
- Use trays or decorative plates under items for easy removal during cleaning.
- Consider the window’s function – ensure decorations don’t interfere with opening or closing.
Expert Tips and Tricks
To elevate your windowsill cleaning game, here are some professional insights:
Time-Saving Cleaning Hacks
- Use a lint roller for quick dust removal between deep cleans.
- Apply a thin layer of car wax to non-porous windowsills after cleaning to repel dirt and make future cleaning easier.
- Use a squeegee wrapped in a microfiber cloth to quickly clean tight corners.
Professional Cleaner Insights
- Clean your windows and windowsills on a cloudy day to prevent the cleaning solution from drying too quickly and leaving streaks.
- Always clean from top to bottom to avoid drips on already cleaned areas.
- Use distilled water for cleaning solutions to prevent mineral deposits, especially in areas with hard water.
Innovative Tools and Products for Windowsill Maintenance
- Ultrasonic cleaning tools can be effective for intricate or carved windowsills.
- Consider using a handheld steam cleaner for eco-friendly deep cleaning.
- Try a gel-based cleaner that adheres to vertical surfaces for tough stains on the inside of window frames.
Conclusion
Maintaining clean and tidy windowsills might seem like a small detail, but it can significantly impact the overall cleanliness and appearance of your home. By understanding your windowsill material, following a regular cleaning schedule, and implementing preventive measures, you can keep your windowsills in top condition with minimal effort.
Remember, consistency is key. A little attention each day can prevent the need for time-consuming deep cleans. And don’t forget, clean windowsills not only look great but also contribute to a healthier living environment by reducing dust, allergens, and preventing mold growth.
So, roll up your sleeves, gather your cleaning supplies, and give your windowsills the attention they deserve. Your home (and your health) will thank you for it!
FAQ Section
Q: How often should I clean my windowsills? A: For general maintenance, dust your windowsills weekly and perform a deep clean monthly. However, adjust this schedule based on your environment and the amount of dirt accumulation.
Q: Can I use bleach to clean my windowsills? A: While bleach is effective for disinfecting, it’s harsh and can damage some materials. It’s best to use gentler, material-appropriate cleaners unless dealing with severe mold issues.
Q: How do I remove sticky residue from my windowsill? A: Apply a small amount of cooking oil or a commercial adhesive remover to the sticky area. Let it sit for a few minutes, then gently scrape with a plastic scraper. Clean the area afterward with your regular cleaning solution.
Q: Is it normal to have condensation on my windowsills? A: Some condensation is normal, especially in humid environments or during significant temperature differences between indoors and outdoors. However, excessive or constant condensation could indicate poor ventilation or window seal issues.
Q: How can I prevent water damage on wooden windowsills? A: Regularly apply a water-resistant sealant to wooden windowsills. Always wipe up any water immediately, ensure good ventilation, and consider using windowsill covers in high-moisture areas.
By following these guidelines and tips, you’ll be well on your way to maintaining beautifully clean and tidy windowsills that enhance the overall appeal of your home. Happy cleaning!