How To Fix Clumpy Lashes For Good
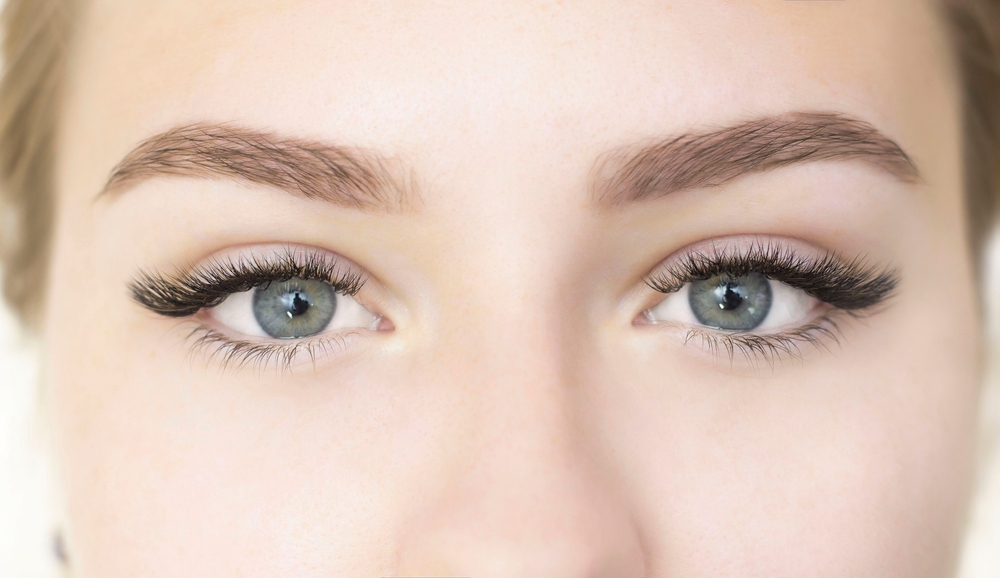
Clumpy, sticky lashes that stubbornly stick together can ruin an otherwise flawless makeup application. When your lashes become an unruly, spider leg-looking mess, it has real beauty consequences beyond just frustrating your intricate cat eye or lash lift efforts.
Mascara is often blamed as the main clump culprit, but the true offender lies much deeper. Buildup along the lash line from old mascara, oil residue, makeup waxes, insufficient cleansing, and brittle lashes are the root causes of chronic lash clumping.
By understanding what creates clumps in the first place and targeting these factors through proper removal, fortifying lash treatments, ideal curling technique and smart mascara choices, we can fix the problem for good.
Here is a complete step-by-step guide to understand why you get clumpy lashes and how to resolve it through getting to the root of the problem.
What Causes Lashes to Clump Together?
In order to remedy clumpy lashes at their origin, we must first unpack the key culprits that cause lashes to cluster together rather than fanning out to beautiful, long-lash effect:
Old, Dried Out Mascara
The number one cause of clump-inducing madness is mascara that has outlived its prime. Over time, even the best quality mascara starts to dry out as moisture evaporates from the formula. This causes the creamy texture to thicken and clump up.
Most quality mascaras have a printed expiration timeline around the 3 month mark for this exact reason. Yet, many of us hold onto our favorite tubes far beyond their prime. Using mascara that is older than 3 months is a recipe for clumpy, hard to manage lashes.
Beyond clumping, old mascara also risks eye infections and irritation as preservatives wear off. So for clump-free lashes, respect your mascara’s expiration date and toss tubes older than 3 months.
Using the Wrong Mascara Formula
Many times clumping arises from using a formula not suited for your particular lash type. Those made specifically for straight, hard-to-curl lashes are often extra thick or contain clump-creating waxes and resins to hold a curl.
Yet, if you have naturally curly lashes, these heavy-duty formulas are overkill and cause unnecessary clumping. Seek out lightweight, conditioning formulas made for your lash type instead.
Similarly, waterproof mascaras are prone to clumping due to their tenacious formulas required to withstand moisture, tears or humidity without running. Unless you absolutely require a waterproof formula, choose a washable mascara.
Using a formula designed specifically for your lash type and preferences minimizes the risk of clumping from formulas that are too heavy, conditioning or prone to smearing.
Buildup Along The Lash Line
When eye makeup isn’t properly removed, residue, oil and dirt builds up along the lash line over time. With each additional coat of mascara applied on top of leftover residue, a thicker layer accumulates.
This buildup not only weights lashes down but essentially glues them together. No amount of combing through clumped up lashes will de-clump them if adhesive-like buildup is the culprit.
Proper makeup removing techniques are essential to prevent gradual lash line buildup over time leading to inevitably clumpy lashes.
Weak, Brittle Lashes
The structural integrity of lashes also impacts clumping and how well they hold a curl. Weak, brittle lashes are more prone to clumping, stubborn split ends and have difficulty fanning nicely.
Lack of proper nutrition, lash extensions damage, eyelash curling mishaps, makeup remover residue, contact irritation and even thyroid dysfunction can all weaken lashes.
Targeting lash vitality through conditioning treatments, vitamins and avoiding damage improves structural weakness and ability to separate.
Now that we understand the root causes of chronic lash clustering, we can fix it through a multi step process:
Step 1: Remove All Traces of Eye Makeup
Proper eye makeup removal is essential to eliminate product buildup along the lash line over time. To dissolve every trace of makeup, oil and debris, begin with an oil-based eye makeup remover.
Choose a high quality formula like Clinique Take The Day Off Cleansing Balm or Bioderma Sensibio H2O Micellar Water. These contain conditioning oils plus skin loving ingredients like mineral oils, aloe vera, chamomile and vitamins C and E to remove even stubborn makeup and waterproof mascara easily.
Start the removal process by soaking a cotton round with product then gently hold over closed eyes for at least 30 seconds to allow the formula to fully dissolve all traces of makeup. Next, slowly wipe outward along upper and lower lash lines without rubbing the delicate eye area.
To eliminate all remaining residue, debris and cleansing oils from lashes, always follow with a gentle facial cleanser paying special attention to the eye area. This clears debris and ensures oil remnants don’t trigger future clumping.
Make proper makeup removal the crucial first step of your evening skincare routine. It purges the lash line creating a clean canvas for healthy, separated lashes.
Step 2: Fortify Lashes Through Conditioning
Once eye makeup residues are fully eliminated, the next phase involves consistently conditioning and strengthening lashes through serums, oils and internal nutrition.
A. Serums
High quality lash enhancing serums use peptides, hyaluronic acid, biotin, botanical extracts and proprietary complexes to improve thin, weak lashes. By targeting lash vitality where clumping begins, they enhance thickness, strength and separation ability.
Apply along upper and lower lash lines nightly focusing the wand or brush application on the lash roots for maximizing impact. Consistency is key so commit to using your serum nightly.
The gold standard lash enhancing serum remains GrandeLASH-MD which boosts lash health dramatically within 6 weeks. Its formula contains a complex mix of vitamins, amino acids, antioxidants and expensize compounds for luxurious lashes.
For a budget buy, L’Oreal Paris Revitalift Lash Serum also works to condition and improve lash health over time. Use serums a minimum of 12 weeks to see full results.
B. Natural Oils
Pure, nourishing oils also fortify lashes when used regularly. Natural options like olive oil, castor oil, coconut oil and almond oil condition lashes, prevent breakage and split ends and moisturize for flexibility.
Use a cleaned mascara spooly wand or disposable brush to apply along the lash roots before bedtime or removing eye makeup. Let the oils fully absorb then wipe away any excess before going to sleep. This avoids oil getting into eyes while retaining all of their conditioning and strengthening benefits.
C. Nutrition
Support lash health from the inside out by ensuring your diet provides key vitamins and nutrients or taking a supplement. Focus on foods or vitamins containing:
- Biotin
- Folic acid
- Vitamin C
- Vitamin E
- Zinc
- Iron
- Lean proteins
- Omega-3s
- Silica
In particular, biotin is essential for hair and nail health while folic acid, C and zinc all support lash vitality. Consider adding a hair, skin and nails vitamin with these key ingredients into your daily regimen for improved thickness and shine.
The foundation of healthy, flake-free lashes lies in conditioning. Implement serums, oils and nutrition to boost lash strength, flexibility and separation abilities.
Step 3: Master Proper Lash Curling Technique
Curling grabs lashes at the root to fan them upward for visible length, lift and separation. When done incorrectly, curling risks breakage, crimps or clumps.
But when done properly, it builds the base for fanned out, lifted lashes that make eyes dazzle. Follow these pro curling tips:
Curler Investment
The quality of your eyelash curler matters for lasting curls without clumping or pinching. Look for curlers designed specifically to fit your eye shape. For example, those made for almond eyes versus round.
Invest in a high-end eyelash curler like Surratt or Tweezerman for precision performance. And remember to swap curler rubber pads every 3 months when oils diminish their stick and effectiveness.
Curling Motion
Start by running your curler under warm water for 30 seconds before use. This heats the metal and helps set the curl better. Position curler at the base of lashes, gently squeeze counting to 5 then hold for another 5 seconds.
Slowly pinch and roll up the lash line to curl from base to tip being careful not to crimp or tug. Curl lashes completely before mascara application then repeat curling after mascara dries for lifted separation all day.
Properly curling clean lashes creates visible length, lift and the base for clump-free mascara application.
Step 4: Choose a Clump-Free Mascara
With makeup residues removed, fortified lashes and expert curling technique, the final step lies in choosing ideal mascara formulas for clump and flake-free wear. Seek out conditioning, clump-free formulas suited specifically to your lashes.
A. Conditioning Formulas
Clean, conditioner-enhanced mascaras avoid clumps through lightweight, flexible textures that uniformly coat each lash with pigment. They nourish and define rather than glop together into a sticky mess.
Top options include:
- L’Oreal Voluminous Original Mascara
- Maybelline Great Lash Clear Mascara
- CoverGirl LashBlast Clean Mascara
B. Avoid Waterproof Formulas
Waterproof mascaras tend to clump more on lashes due to their resigns and waxes that resist smudging. Unless absolutely needed, stick to washable conditioning formulas for flexibility.
C. Application Before sweeping on coats of mascara, wipe excess product back into tube using a tissue. This prevents overload on brush leading to clumps. Then apply using a zig-zag motion from roots to tips to evenly coat each lash.
Let each layer dry fully before adding another to prevent wet clumps forming together.
Choosing ideal mascara formulas complement your properly prepped lashes for a flawless, fanned out lash effect that resists annoying clusters.
Finally—No More Clumpy Lashes!
While clumpy lashes seem inevitable, they don’t have to be. Now that you understand the root causes like residue buildup, formula mismatches, oil production, inadequate removal and lash damage, we can target and treat them!
The step-by-step process begins with thoroughly removing makeup traces. Fortify lashes through serums, oils and diet. Master proper curling technique. And finish by choosing lightweight, conditioning mascara for uniform color without clusters or flakes.
Implementing a complete lash care ritual addresses clump causes at their core. Your eyes will dazzle with long, separated, lush lashes that endure all day—free of the dreaded clumpy spider leg effect. No more frustration when you treat lashes right!