How to Clean a Showerhead with Vinegar
Have you ever stood under your shower, expecting a refreshing burst of water, only to be greeted by weak, misdirected sprays? If so, it’s time to give your showerhead some much-needed attention. In this comprehensive guide, we’ll explore the art of cleaning your showerhead using a simple yet powerful solution: vinegar. By the end of this article, you’ll be equipped with the knowledge to transform your shower experience and maintain a clean, efficient showerhead for years to come.
Why Clean Your Showerhead?
Before we dive into the cleaning process, let’s understand why a clean showerhead is crucial for your daily routine and overall well-being.
Health Risks of a Dirty Showerhead
A neglected showerhead can become a breeding ground for harmful bacteria and mold. Research conducted by the University of Colorado Boulder found that showerheads can harbor mycobacteria, which may cause lung infections. By regularly cleaning your showerhead, you’re not just improving your shower experience – you’re protecting your health.
Impact on Water Pressure and Efficiency
Mineral deposits, particularly in areas with hard water, can clog the tiny holes in your showerhead. This buildup reduces water flow, leading to:
- Decreased water pressure
- Uneven spray patterns
- Increased water usage (as you spend more time trying to rinse)
By maintaining a clean showerhead, you’ll enjoy optimal water pressure and potentially lower your water bills.
Signs That Your Showerhead Needs Cleaning
Look out for these telltale signs that indicate it’s time to clean your showerhead:
- Visible mineral deposits or discoloration
- Reduced water flow or pressure
- Uneven spray patterns
- Water spraying in odd directions
If you notice any of these signs, it’s time to reach for the vinegar!
The Power of Vinegar as a Cleaning Agent
Vinegar, a common household item, is a powerhouse when it comes to cleaning. But what makes it so effective?
Chemical Properties of Vinegar
Vinegar’s cleaning prowess comes from its main component: acetic acid. This organic compound has several properties that make it an excellent cleaner:
- Low pH level (typically around 2.4): This acidity helps break down mineral deposits and kill bacteria.
- Solvent properties: Vinegar can dissolve a wide range of substances, including soap scum and hard water deposits.
- Natural deodorizer: It neutralizes odors rather than masking them.
Benefits of Using Vinegar Over Commercial Cleaners
- Cost-effective: Vinegar is significantly cheaper than most commercial cleaners.
- Environmentally friendly: It’s biodegradable and doesn’t release harmful chemicals into the water system.
- Non-toxic: Safe to use around children and pets.
- Versatile: Can be used for various cleaning tasks around the home.
- No harsh fumes: Unlike many chemical cleaners, vinegar doesn’t produce noxious fumes.
Types of Vinegar Suitable for Cleaning
While various types of vinegar exist, white distilled vinegar is the best choice for cleaning. It’s colorless, which means it won’t stain surfaces, and it typically has a higher acidity (usually 5-8%) compared to other vinegar types.
Materials Needed
Before we start the cleaning process, gather these materials:
- White distilled vinegar (1-2 cups)
- Plastic bag (large enough to cover your showerhead)
- Rubber band or tape
- Old toothbrush or small cleaning brush
- Microfiber cloth
- Optional: Spray bottle (for light cleaning)
Alternatives:
- If you don’t have a plastic bag, you can use a small bucket or bowl for removable showerheads.
- A hair tie can substitute for a rubber band.
Step-by-Step Guide to Cleaning Your Showerhead
Now that we’ve covered the basics, let’s dive into the cleaning process. We’ll explore two methods: the vinegar soak method (ideal for deep cleaning) and the spray bottle method (for quick, light cleaning).
1. Preparation
Before you begin, ensure your bathroom is well-ventilated. While vinegar is non-toxic, its strong smell can be overwhelming in enclosed spaces.
2. The Vinegar Soak Method
For Removable Showerheads:
- Unscrew the showerhead from the shower arm.
- Fill a bowl or bucket with equal parts white vinegar and warm water.
- Submerge the showerhead in the solution, ensuring all spray holes are covered.
- Let it soak for 6-8 hours or overnight for heavily soiled showerheads.
For Fixed Showerheads:
- Fill a plastic bag with equal parts white vinegar and warm water.
- Carefully place the bag over the showerhead, ensuring it’s fully submerged.
- Secure the bag with a rubber band or tape around the shower arm.
- Leave it in place for 6-8 hours or overnight.
3. The Spray Bottle Method (for Light Cleaning)
- Mix equal parts white vinegar and warm water in a spray bottle.
- Spray the solution generously over the showerhead, focusing on the spray holes.
- Let it sit for 30 minutes to an hour.
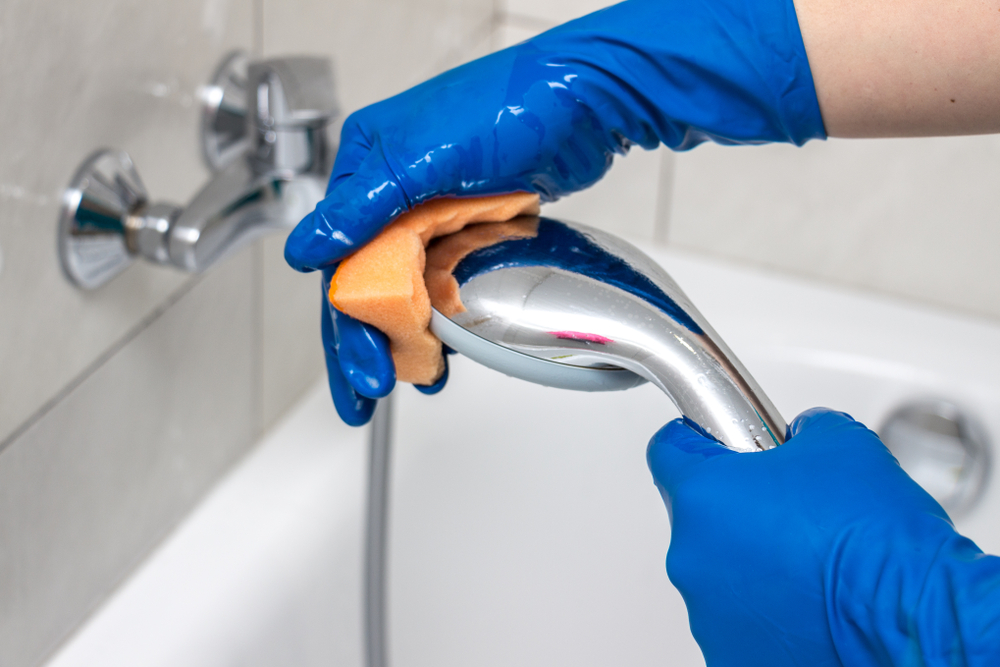
4. Scrubbing and Rinsing
After soaking or spraying:
- Remove the plastic bag or take the showerhead out of the solution.
- Use an old toothbrush or small cleaning brush to gently scrub away any remaining deposits.
- Pay special attention to the spray holes – you can use a toothpick to clear out stubborn clogs.
- Rinse the showerhead thoroughly with clean water.
- For removable showerheads, reattach it to the shower arm.
5. Testing and Final Touches
- Turn on the shower and let it run for a minute to flush out any remaining vinegar or debris.
- Check for any missed spots or still-clogged holes.
- Wipe down the showerhead with a microfiber cloth for a sparkling finish.
Tips for Maintaining a Clean Showerhead
Prevention is key to keeping your showerhead in top condition. Here are some tips to maintain that freshly-cleaned state:
- Regular Cleaning Schedule:
- For areas with hard water, clean your showerhead monthly.
- In areas with softer water, every 2-3 months should suffice.
- Quick Daily Habits:
- After each shower, wipe down the showerhead with a microfiber cloth to remove water droplets.
- Once a week, use a soft brush to gently scrub away any visible buildup.
- Consider a Water Softener:
- If you live in an area with very hard water, installing a water softener can significantly reduce mineral buildup.
Troubleshooting Common Issues
Dealing with Stubborn Mineral Deposits
If vinegar alone doesn’t cut it:
- Create a paste using baking soda and water.
- Apply the paste to the affected areas and let it sit for an hour.
- Rinse with vinegar (it will fizz), then scrub and rinse with water.
What to Do If Vinegar Doesn’t Work
For extremely stubborn buildup:
- Try a commercial descaling product designed for showerheads.
- Always follow the manufacturer’s instructions and safety precautions.
- If all else fails, it might be time to replace your showerhead.
Environmental Impact and Safety Considerations
Eco-friendliness of Vinegar Cleaning
Choosing vinegar as your cleaning agent has several environmental benefits:
- Biodegradable: Vinegar breaks down naturally without harming ecosystems.
- Reduces plastic waste: You can refill a spray bottle instead of buying new cleaning products.
- No harmful chemicals: Unlike many commercial cleaners, vinegar doesn’t introduce toxins into the water system.
Precautions When Using Vinegar
While vinegar is generally safe, keep these points in mind:
- Never mix vinegar with bleach or other cleaning products – it can create harmful fumes.
- Avoid using vinegar on natural stone surfaces like marble or granite, as it can etch the stone.
- If you have sensitive skin, wear gloves when handling vinegar solutions.
Comparing Vinegar to Other Cleaning Methods
To give you a comprehensive view, let’s compare vinegar to other common cleaning methods:
Chemical Cleaners
Pros:
- Often more potent for heavy-duty cleaning
- May work faster than vinegar
Cons:
- Can be harsh on plumbing and the environment
- Often more expensive
- May produce harmful fumes
Baking Soda
Pros:
- Gentle abrasive action
- Deodorizing properties
Cons:
- May not be as effective on heavy mineral deposits
- Can be messy to use
Commercial Descaling Products
Pros:
- Specifically formulated for hard water deposits
- May work faster than vinegar for severe buildup
Cons:
- Often more expensive
- May contain harsh chemicals
While each method has its place, vinegar strikes an excellent balance between effectiveness, cost, and environmental impact.
FAQs
Q: Can I use apple cider vinegar instead of white vinegar? A: While apple cider vinegar has similar properties, it’s best to stick with white vinegar for cleaning. It’s colorless and typically more acidic, making it more effective for cleaning purposes.
Q: How often should I clean my showerhead? A: In areas with hard water, aim for monthly cleaning. For softer water areas, every 2-3 months should suffice. However, if you notice reduced water flow or uneven spray patterns, it’s time for a clean.
Q: Is it safe to use vinegar on all types of showerheads? A: Vinegar is safe for most showerheads, including those made of brass, stainless steel, and plastic. However, for gold-plated or nickel-coated fixtures, dilute the vinegar further or use a gentler cleaning method to avoid potential damage.
Conclusion
Cleaning your showerhead with vinegar is a simple, cost-effective, and environmentally friendly way to maintain optimal shower performance and protect your health. By following this guide, you can easily incorporate this task into your regular cleaning routine, ensuring a refreshing and hygienic shower experience every time.
Remember, a clean showerhead isn’t just about comfort – it’s about water efficiency, hygiene, and prolonging the life of your bathroom fixtures. So why not grab that vinegar and give your showerhead the attention it deserves? Your future self will thank you as you step into a revitalized shower stream tomorrow morning.
We’d love to hear about your experiences with cleaning your showerhead! Have you tried the vinegar method? Do you have any additional tips or tricks? Share your thoughts in the comments below.
For more eco-friendly home cleaning tips, check out our related articles on natural cleaning solutions for every room in your house. Happy cleaning!