How to Clean a Grater with Raw Potato
Have you ever found yourself staring at a cheese-caked grater, wondering how on earth you’re going to clean it without shredding your sponge (or worse, your fingers)? If so, you’re not alone. Cleaning a grater can be a frustrating and sometimes dangerous task. But what if I told you there’s a simple, effective, and surprisingly fun way to clean your grater using nothing more than a humble potato? Welcome to the world of potato power!
In this comprehensive guide, we’ll explore the ingenious method of cleaning a grater with a raw potato. We’ll delve into the science behind this kitchen hack, provide a step-by-step tutorial, and offer tips to keep your grater in top-notch condition. So, grab a spud, and let’s get started on this grate adventure!
Understanding the Challenge of Cleaning Graters
Before we dive into our potato-powered solution, let’s take a moment to appreciate why cleaning a grater can be such a headache. Graters, with their multitude of sharp holes or blades, are designed to shred and slice. This makes them excellent at their primary job but turns them into kitchen nightmares when it’s time to clean up.
Common Issues with Cleaning Graters
- Trapped Food Particles: The tiny holes and crevices in graters are perfect for trapping small bits of cheese, vegetables, or whatever else you’ve been grating.
- Risk of Injury: Those sharp edges that make short work of your cheddar can just as easily slice your fingers or destroy your cleaning tools.
- Soap Ineffectiveness: Simply running your grater under soapy water often isn’t enough to dislodge stuck-on food particles.
- Time-Consuming: Cleaning each individual hole or blade can be a tedious and time-consuming process.
Risks of Improper Cleaning
Failing to clean your grater properly isn’t just about aesthetics. It can lead to several problems:
- Bacterial Growth: Food particles left on the grater can become a breeding ground for harmful bacteria.
- Cross-Contamination: Residue from previous use can mix with and contaminate your next grating project.
- Dulling of Blades: Over time, built-up residue can actually dull the sharp edges of your grater, making it less effective.
Why Traditional Cleaning Methods Fall Short
While you might be tempted to attack your grater with a sponge or brush, these methods often prove ineffective and potentially dangerous. Sponges can tear, leaving bits stuck in the grater, while brushes might not reach all the nooks and crannies. Enter our hero: the potato.
The Science Behind the Potato Cleaning Method
You might be wondering, “Why a potato?” It turns out, this common tuber has some uncommon cleaning powers when it comes to graters. Let’s break down the science behind this surprising kitchen hack.
How Potato Starch Works to Clean Graters
Potatoes contain a high amount of starch, which is a natural abrasive. When you rub a potato against a grater:
- The starch granules act like tiny scrubbers, dislodging stuck-on food particles.
- The moisture in the potato helps to loosen dried-on residue.
- The soft texture of the potato allows it to mold into the grater’s holes and crevices, reaching areas that other cleaning tools might miss.
Comparison with Other Cleaning Agents
While commercial cleaning products might seem like the go-to solution, they often come with drawbacks:
- Chemical Residue: Many cleaning agents can leave behind chemical residues that you might not want near your food.
- Environmental Impact: Harsh cleaning chemicals can be harmful to the environment when washed down the drain.
- Cost: Over time, specialized cleaning products can be expensive.
In contrast, potatoes are inexpensive, environmentally friendly, and food-safe.
Benefits of Using a Natural, Food-Based Cleaner
Using a potato to clean your grater offers several advantages:
- Non-Toxic: It’s completely safe to use on surfaces that come into contact with food.
- Eco-Friendly: Potatoes are biodegradable and won’t harm the environment.
- Cost-Effective: Potatoes are inexpensive and readily available in most kitchens.
- Multifunctional: The part of the potato used for cleaning can still be used in cooking, reducing food waste.
Step-by-Step Guide to Cleaning Your Grater with a Potato
Now that we understand why the potato method works, let’s roll up our sleeves and get cleaning! Follow these steps for a squeaky-clean grater:
1. Gathering Necessary Materials
You’ll need:
- A raw potato (any variety will do)
- Your dirty grater
- Running water
- A clean cloth or paper towels
2. Preparing the Potato
- Wash the potato thoroughly to remove any dirt.
- Cut the potato in half to create a flat surface.
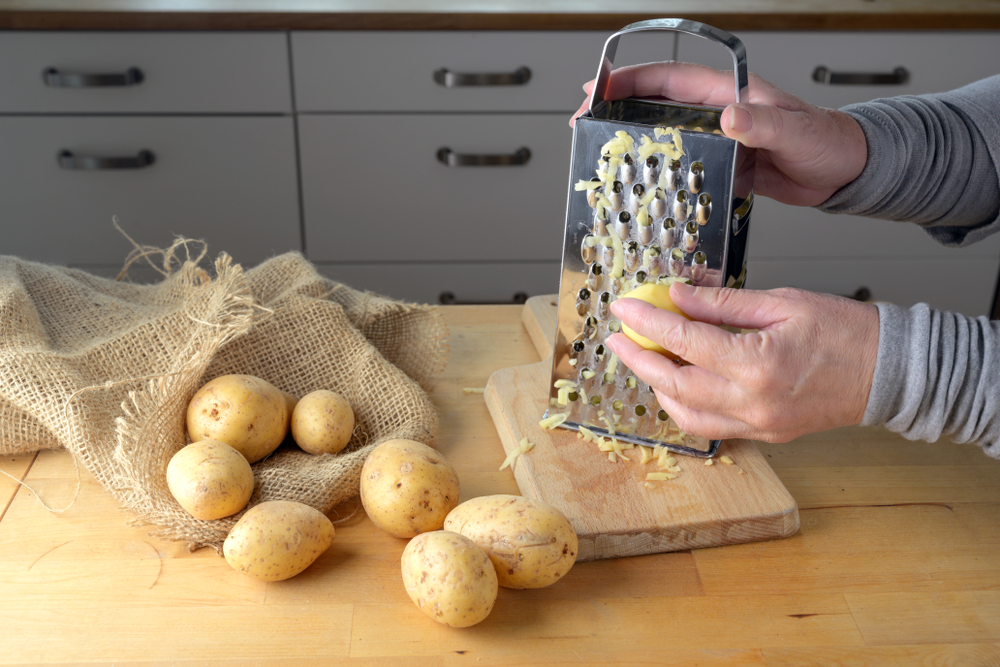
3. The Cleaning Process
- Hold your grater over the sink.
- Take your halved potato and rub it firmly against the grater in the opposite direction you’d usually grate. This ensures the potato reaches all the nooks and crannies.
- Apply firm, even pressure as you rub the potato up and down the grater.
- You’ll notice bits of potato and loosened food particles falling into the sink.
- Continue this process, rotating the potato as needed, until you’ve covered the entire surface of the grater.
4. Rinsing and Drying the Grater
- Once you’ve scrubbed the entire grater with the potato, rinse it thoroughly under running water.
- Check for any remaining food particles and remove them if necessary.
- Shake off excess water and dry the grater with a clean cloth or paper towel.
5. Tips for Maximum Effectiveness
- For stubborn residue, let the potato sit on the grater for a few minutes before scrubbing.
- If your grater is exceptionally dirty, you might need to use more than one potato half.
- For best results, clean your grater immediately after use when possible.
Types of Graters and Their Specific Cleaning Needs
Graters vary in design, and each type may need a slightly different technique. Let’s look at some common grater types and how to best clean them with the potato method:
Box Graters
Box graters typically have multiple sides with different grating surfaces. When cleaning these:
- Clean one side at a time, starting from the top and working your way down.
- Pay extra attention to the corners where food particles can accumulate.
Microplane Graters
These fine graters require a gentle touch:
- Use light pressure with the potato to avoid bending the delicate blades.
- Clean in the direction of the blades to prevent damage.
Rotary Graters
For these cylindrical graters:
- Disassemble the grater if possible.
- Use a smaller piece of potato to clean the interior drum.
- Clean the exterior housing separately.
Electric Graters
When cleaning electric graters:
- Always unplug the device before cleaning.
- Only clean the removable, washable parts with the potato method.
- Never submerge the electrical components in water.
Alternative Natural Cleaning Methods for Graters
While the potato method is our star player, there are other natural cleaning methods you can try:
Lemon and Salt Method
- Sprinkle coarse salt over the grater.
- Rub a halved lemon over the salted surface.
- The acid in the lemon combined with the abrasiveness of the salt can effectively clean the grater.
Vinegar Soak
- For very stubborn residue, soak the grater in white vinegar for 30 minutes.
- Scrub with a brush or potato after soaking.
- Rinse thoroughly and dry.
When to Use Each Method
- Use the potato method for regular cleaning and mild to moderate residue.
- Try the lemon and salt method for graters used with fatty cheeses.
- Opt for the vinegar soak when dealing with very stubborn, dried-on food particles.
Maintaining Your Grater for Longevity
A clean grater is a long-lasting grater. Here are some tips to keep your grater in prime condition:
Proper Storage Techniques
- Store your grater in a dry place to prevent rust.
- If possible, hang your grater or store it vertically to allow any moisture to drain.
- For box graters, consider storing them with a paper towel inside to absorb any lingering moisture.
Regular Cleaning Habits
- Clean your grater immediately after use when possible.
- For quick clean-ups between major cleanings, rinse the grater under hot water and wipe with a clean cloth.
- Perform a deep clean with the potato method at least once a month, depending on usage.
Rust Prevention Tips
- Dry your grater thoroughly after each use and cleaning.
- For stainless steel graters, occasionally rub with a small amount of mineral oil to prevent rust.
- If you notice any rust, clean it immediately with a mixture of baking soda and water, then re-season with mineral oil.
Frequently Asked Questions
To help you become a true grater-cleaning pro, let’s address some common questions:
Q: Can this method work on all types of graters? A: Yes, the potato cleaning method is safe for most grater types, including stainless steel, ceramic, and plastic graters. However, always check your grater’s care instructions first.
Q: Is it safe to use a potato on non-stainless steel graters? A: Generally, yes. The potato method is gentle enough for most materials. However, for graters with special coatings, it’s best to check with the manufacturer’s guidelines.
Q: How often should I clean my grater using this method? A: For regular household use, cleaning your grater with a potato once a week or after every few uses should suffice. For commercial or heavy use, you might want to clean it after each use.
Cost Comparison with Commercial Cleaning Products
Let’s break down the costs:
- A typical kitchen cleaning spray costs around $3-$5 and lasts about a month with regular use.
- A 5lb bag of potatoes costs about $3-$4 and can provide numerous cleanings, plus be used for cooking.
Over a year, you could save $30-$50 by switching to the potato method, not to mention the environmental benefits!
Conclusion
Who knew that the humble potato could be such a kitchen cleaning superhero? By using this simple, effective, and eco-friendly method, you can say goodbye to the frustration of cleaning your grater and hello to a sparkling clean kitchen tool.
Let’s recap the benefits of the potato cleaning method:
- Safe and non-toxic
- Environmentally friendly
- Cost-effective
- Efficient and easy to use
We encourage you to give this kitchen hack a try. Not only will you have a beautifully clean grater, but you’ll also be doing your part for the environment and your wallet.
We’d love to hear about your experiences with this method! Have you tried cleaning your grater with a potato? Do you have any additional tips or tricks? Share your thoughts in the comments below or on our social media channels. And don’t forget to subscribe to our newsletter for more innovative kitchen hacks and cooking tips!