How to Make Your Own Nut Butters at Home
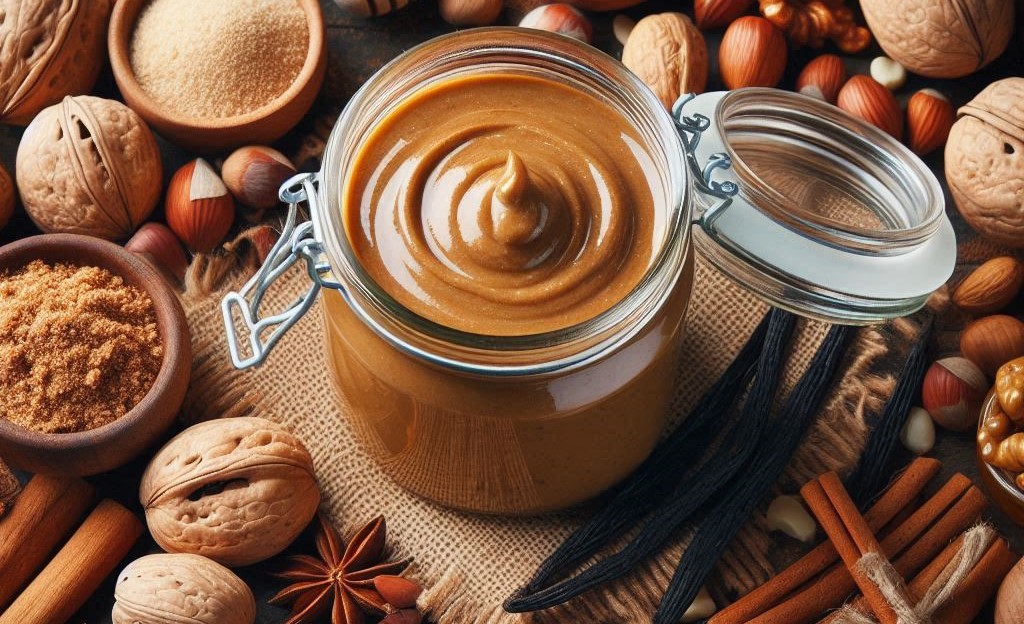
Creamy, nutty, and bursting with rich flavors – there’s nothing quite like a spoonful of decadent nut butter. Whether you’re a die-hard peanut butter fan or prefer the indulgent taste of almond or cashew butter, homemade nut butters are a game-changer. Not only are they incredibly fresh and flavorful, but they also offer a level of customization that store-bought varieties simply can’t match.
In this comprehensive guide, we’ll dive deep into the art of making your own nut butters at home. From exploring the variety of nuts you can use to mastering the step-by-step process, you’ll soon be whipping up batches of creamy, dreamy nut butter perfection. So, get ready to elevate your snacking game and impress your friends and family with your newly acquired nut butter-making skills!
Types of Nuts for Homemade Nut Butters
The beauty of homemade nut butters lies in the endless possibilities. While peanut butter is undoubtedly the classic choice, there’s a whole world of nuts waiting to be transformed into creamy, spreadable deliciousness. Here are some of the most popular options:
Peanuts
Ah, the humble peanut – the foundation of the beloved peanut butter. Affordable, easily accessible, and packed with flavor, peanuts make for a rich and satisfying nut butter. Whether you prefer a smooth or crunchy texture, peanut butter is a versatile staple that works well in both sweet and savory dishes.
Almonds
Almonds are a nutritional powerhouse, and their buttery, creamy texture makes them an excellent choice for homemade nut butter. Almond butter is a fantastic alternative for those with peanut allergies or those seeking a slightly sweeter, nutty flavor. It’s also a great base for adding various mix-ins and flavors.
Cashews
If you’re a fan of richness and indulgence, cashew butter is a must-try. These creamy nuts create a luxuriously smooth nut butter that’s perfect for spreading on toast, drizzling over oatmeal, or using as a dip for fresh fruit. Cashew butter’s mild flavor also makes it a great canvas for experimenting with different spices and seasonings.
Hazelnuts
Hazelnut butter is a decadent treat that will transport you to the heart of Europe with its delightful, Nutella-esque flavor. These nuts have a distinct, slightly sweet taste that pairs beautifully with chocolate, making them ideal for creating indulgent spreads or dips.
Pecans
If you’re a fan of smoky, rich flavors, pecan butter is sure to become a new favorite. These nuts have a unique, buttery taste that lends itself well to both sweet and savory applications. Pecan butter is particularly delicious when combined with maple syrup or warm spices like cinnamon.
Macadamia Nuts
For a truly luxurious nut butter experience, look no further than macadamia nuts. These creamy, tropical nuts create a dreamy, almost decadent nut butter that’s perfect for special occasions or when you’re in the mood to indulge. Macadamia nut butter is divine on its own or paired with flavors like honey or vanilla.
Tools and Equipment Needed
Before you embark on your nut butter-making journey, it’s essential to have the right tools and equipment on hand. While you don’t need an extensive collection of gadgets, a few key items will make the process smoother and more efficient.
Food Processor or High-Powered Blender
A food processor or high-powered blender is the workhorse of nut butter-making. These appliances have the power and strength to grind nuts into a smooth, creamy paste. If you’re using a blender, make sure it’s a high-powered model designed for tough blending tasks.
Spatula
A sturdy spatula is a must-have for scraping down the sides of your food processor or blender as you blend the nuts. This will ensure that all the nut particles are fully incorporated, resulting in a smooth, consistent texture.
Airtight Containers for Storage
Once you’ve made your homemade nut butter, you’ll want to store it in airtight containers to preserve its freshness and prevent oxidation. Glass jars or BPA-free plastic containers work well for this purpose.
Optional: Nut Mill or Nut Butter Machine
While not strictly necessary, a nut mill or dedicated nut butter machine can make the process even more efficient and hassle-free. These specialized appliances are designed specifically for grinding nuts into smooth, creamy butters, often with minimal effort or supervision required.
Step-by-Step Guide to Making Homemade Nut Butter
Now that you’ve gathered your ingredients and tools, it’s time to dive into the step-by-step process of making homemade nut butter. Follow these simple steps, and you’ll be well on your way to nut butter bliss:
- Roast the Nuts (Optional): While roasting the nuts is an optional step, it can greatly enhance the flavor and aroma of your nut butter. Spread the nuts in a single layer on a baking sheet and roast them in a preheated oven at 350°F (175°C) for 8-12 minutes, or until fragrant and lightly golden. Be sure to keep an eye on them, as nuts can go from perfectly roasted to burnt in a matter of minutes.
- Process the Nuts: Transfer the roasted (or raw) nuts to your food processor or high-powered blender. Start by pulsing the nuts in short bursts to break them down into smaller pieces. Then, switch to a continuous blend, scraping down the sides as needed, until the nuts release their oils and form a smooth, creamy butter. This process can take anywhere from 5 to 15 minutes, depending on the type of nuts and the power of your appliance.
- Add Mix-Ins: Once your nut butter has reached the desired consistency, it’s time to get creative with mix-ins. Salt is a classic addition that enhances the flavor of the nuts, but you can also experiment with sweeteners like honey, maple syrup, or brown sugar, as well as spices and extracts like cinnamon, vanilla, or cocoa powder.
- Adjust Consistency: If your nut butter seems too thick or dry, you can thin it out by adding a small amount of neutral-tasting oil (such as grapeseed or avocado oil) or a splash of milk or plant-based milk alternative. Conversely, if the nut butter is too runny, you can thicken it by processing in a little more nuts or adding a tablespoon or two of nut flour or powdered milk.
- Transfer and Store: Once your nut butter is perfectly smooth and flavorful, transfer it to an airtight container. Homemade nut butters can be stored at room temperature for up to two weeks or in the refrigerator for up to three months.
Creative Flavoring Ideas
While plain nut butters are delicious in their own right, there’s no limit to the flavors you can create by adding various mix-ins and seasonings. Here are some tasty ideas to get you started:
Sweet Flavors
- Honey-Almond Butter: Combine creamy almond butter with a drizzle of honey and a pinch of cinnamon for a delightfully sweet and warmly spiced spread.
- Chocolate-Hazelnut Butter: Satisfy your Nutella cravings with a homemade version made by blending hazelnut butter with cocoa powder, vanilla extract, and a touch of maple syrup.
- Cinnamon-Pecan Butter: Embrace the rich, nutty flavor of pecans by blending them with brown sugar, cinnamon, and a pinch of salt for a decadent treat.
Savory Flavors
- Smoked Paprika Almond Butter: Add a smoky depth to creamy almond butter by blending in smoked paprika, garlic powder, and a pinch of cayenne for a deliciously savory spread.
- Curry Cashew Butter: Transform cashew butter into a flavorful dip or spread by mixing in curry powder, cumin, and a touch of lime juice.
- Garlic-Herb Walnut Butter: Elevate the earthy flavor of walnuts by blending them with fresh garlic, parsley, and a drizzle of olive oil for a savory and herbaceous nut butter perfect for spreading on crusty bread or using as a dip.
Combination Flavors
- Salted Maple Pecan Butter: Combine the rich, buttery taste of pecans with the sweet and smoky flavors of maple syrup and a sprinkle of flaky sea salt for a truly decadent treat.
- Espresso Almond Butter: Give your almond butter a bold, caffeinated twist by blending in a shot of espresso or strong brewed coffee, along with a touch of cocoa powder and vanilla extract.
- Coconut-Cashew Butter: Transport your taste buds to the tropics with a creamy blend of cashew butter and shredded coconut, lightly sweetened with a drizzle of maple syrup or honey.
Tips and Tricks
While making homemade nut butter is generally a straightforward process, there are a few tips and tricks that can help ensure consistent, delicious results every time:
Troubleshooting
- Separation: If your nut butter separates into a dry, crumbly mixture and a pool of oil, simply keep processing it. The friction from the blades will eventually bring the mixture back together into a smooth, emulsified butter.
- Grittiness: If your nut butter has a gritty texture, it likely needs more processing time. Continue blending, scraping down the sides as needed, until the nuts release their oils and become smooth and creamy.
- Overprocessing: On the other hand, if your nut butter becomes extremely dry and stiff, you may have overprocessed it. Try adding a splash of oil or milk to reintroduce moisture and bring it back to a spreadable consistency.
Storage Guidelines
Proper storage is key to ensuring your homemade nut butters stay fresh and flavorful. Here are some tips:
- Room Temperature: Nut butters can be stored at room temperature for up to two weeks, but be sure to keep them in an airtight container away from direct sunlight and heat sources.
- Refrigeration: For longer shelf life, store nut butters in the refrigerator, where they can last up to three months.
- Freezing: You can also freeze nut butters for up to six months. Simply portion them into airtight containers or freezer bags, leaving a bit of headspace for expansion.
Variations and Nut Butter “Milks”
Don’t stop at just spreads and dips! Homemade nut butters can also be used to create delicious variations and nut butter “milks”:
- Nut and Seed Blends: Experiment with combining different nuts and seeds, such as almonds and flaxseeds or cashews and pumpkin seeds, for added texture and nutritional benefits.
- Nut Butter “Milks”: Blend your favorite nut butter with water and a pinch of salt to create a creamy, dairy-free nut milk alternative that’s perfect for smoothies, baking, or enjoying on its own.
Conclusion
Making your own nut butters at home is a rewarding and delicious endeavor that puts you in control of the ingredients and flavors. With this comprehensive guide, you now have the knowledge and tools to explore the vast world of homemade nut butters, from classic peanut butter to indulgent macadamia nut spreads.
So, what are you waiting for? Gather your favorite nuts, fire up your food processor, and get ready to experience the pure, unadulterated joy of fresh, homemade nut butter perfection. Whether you prefer sweet or savory, smooth or crunchy, the possibilities are endless – and the results are sure to be nothing short of nutty nirvana.
Get creative, experiment with flavors, and most importantly, have fun! Your taste buds (and your wallet) will thank you for embracing the art of homemade nut butter-making.