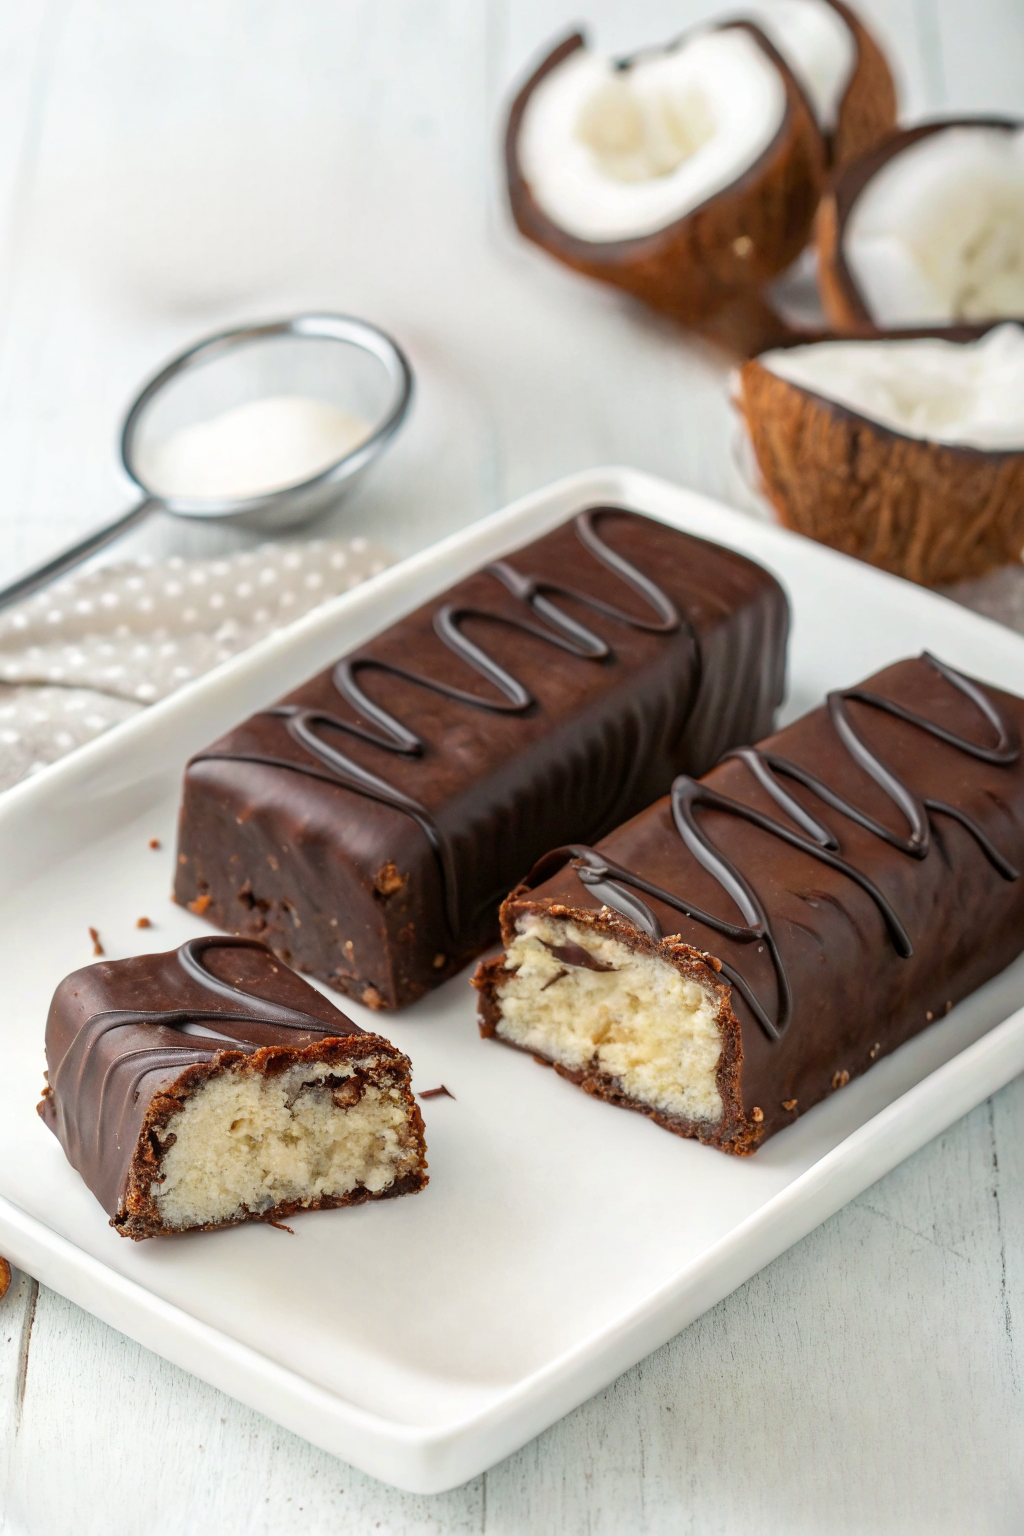
Dive into the delightful world of homemade candy bars with this simple yet utterly satisfying recipe! Imagine biting through a crisp, dark chocolate shell to find a soft, chewy, and wonderfully sweet coconut filling. These bars capture that classic combination perfectly, offering a little piece of tropical paradise right in your kitchen. Preparing these beauties is surprisingly straightforward, making it a fantastic project for anyone new to candy making or just looking for a rewarding sweet treat. The result is a batch of gorgeous bars, just like the ones pictured, complete with an elegant chocolate drizzle – perfect for sharing or savoring solo.
Ingredients
- 🥥 3 cups (about 250g) Unsweetened Shredded Coconut
- 🥛 1 can (14 oz / 396g) Sweetened Condensed Milk (ensure halal if concerned about processing aids)
- 🍚 ½ cup (60g) Powdered Sugar (sifted)
- 💧 1 tsp alcohol free Vanilla Extract
- 🧂 ¼ tsp Salt
- 🍫 12 oz (about 340g) Good Quality Dark Chocolate, chopped (ensure halal-suitable, free from alcohol/animal derivatives)
- ✨ 1 tbsp Coconut Oil or Vegetable Shortening (optional, for glossier chocolate)
Equipment
- 🥣 Large Mixing Bowl
- 🥄 Rubber Spatula or Wooden Spoon
- ◼️ 8×8 inch (20×20 cm) Baking Pan
- 📄 Parchment Paper
- 🔪 Sharp Knife
- 🥣 Saucepan and Heatproof Bowl (for double boiler) OR Microwave-safe Bowl
- 🍴 Two Forks (for dipping)
- ✨ Wire Rack
Instructions
- Prepare the Pan: Line the 8×8 inch baking pan with parchment paper, leaving some overhang on two opposite sides. This overhang will function as handles, making it easy to lift the coconut mixture out later.
- Mix the Coconut Filling: In the large mixing bowl, combine the shredded coconut, sweetened condensed milk, sifted powdered sugar, vanilla extract, and salt. Stir everything together thoroughly with the spatula or spoon until the mixture is evenly moistened and holds together. It should be sticky and thick.
- Press and Chill the Filling: Transfer the coconut mixture to the prepared baking pan. Using the back of the spoon or clean, slightly damp hands, press the mixture down firmly and evenly into the base of the pan. Aim for a compact layer. Cover the pan with plastic wrap and place it in the refrigerator for at least 1 hour, or in the freezer for 30 minutes, until the mixture is very firm. This chilling step is crucial for easy cutting.
- Cut the Bars: Once firm, use the parchment paper overhangs to lift the entire coconut slab out of the pan and onto a cutting board. With a sharp knife, cut the slab into rectangular bars. Aim for roughly 1.5 inches wide and 3-4 inches long, or your desired size (similar to the bars shown in the image). You should get about 10-12 bars. Place the cut bars onto a parchment-lined baking sheet or tray. For cleaner dipping, place the tray of cut bars back into the freezer for another 15-20 minutes while preparing the chocolate.
- Melt the Chocolate: Set up a double boiler by placing the heatproof bowl over a saucepan filled with about an inch of simmering water (the bottom of the bowl should not touch the water). Add the chopped dark chocolate (and coconut oil/shortening, if using) to the bowl. Stir frequently until the chocolate is completely melted and smooth. Alternatively, melt the chocolate in a microwave-safe bowl in 30-second intervals, stirring well after each, until smooth. Be careful not to overheat the chocolate, as this can cause it to seize (become thick and grainy).
- Coat the Bars: Remove the chilled coconut bars from the freezer. Working one at a time, drop a bar into the melted chocolate. Use two forks to turn the bar, ensuring it’s fully coated. Lift the bar out with one fork, allowing excess chocolate to drip back into the bowl for a few seconds. Gently scrape the bottom of the fork against the rim of the bowl to remove excess drips.
- Set the Chocolate: Carefully place the chocolate-coated bar onto the wire rack placed over a sheet of parchment paper (to catch drips). Repeat the dipping process with the remaining bars.
- Add the Drizzle (Optional but Pretty!): Once all bars are coated, you might have some leftover melted chocolate. If it has thickened slightly, gently reheat it. Transfer the remaining chocolate to a small piping bag with a tiny hole snipped off, or use a small zip-top bag with a corner snipped. Drizzle the chocolate back and forth over the tops of the bars, mimicking the elegant pattern seen in the photograph.
- Final Chill: Let the bars sit at room temperature for about 15-20 minutes for the chocolate to begin setting, then transfer the wire rack (or the bars carefully moved back to a parchment-lined tray) to the refrigerator for about 30 minutes, or until the chocolate shell is completely firm and hardened. The bars in the picture have that lovely, solid chocolate shell.
- Serve and Store: Once set, the coconut chocolate bars are ready! Notice the delightful contrast between the smooth, dark coating and the dense, sweet coconut filling visible where the bar is broken in the photo. Store the finished bars in an airtight container in the refrigerator for up to a week. They are often best enjoyed slightly chilled or at cool room temperature.
Making these coconut chocolate bars brings such a sense of accomplishment. The aroma of coconut and chocolate filling the kitchen is wonderful, and the final product is a truly irresistible treat that tastes even better knowing it was prepared by hand. Enjoy every delicious bite!

