Handmade Crochet Crossbody Bag Step by Step
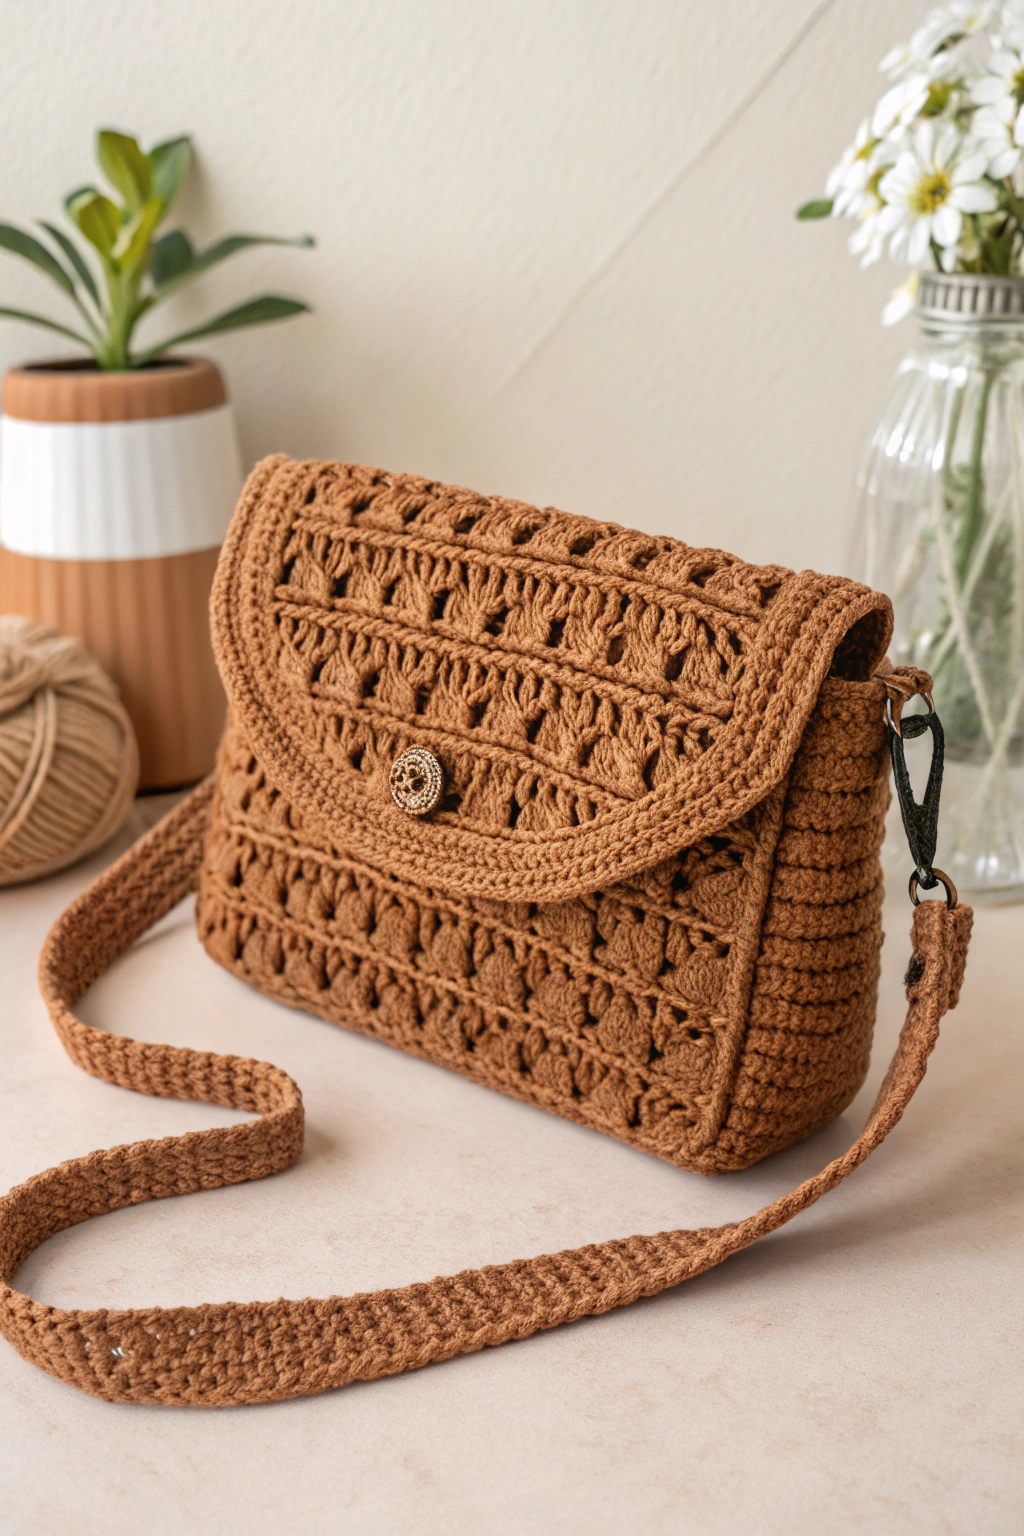
Today, we’re going to make a beautiful crossbody bag, perfect for adding a touch of handmade charm to your everyday style. If you’ve been wanting to try crocheting, or you’re looking for a delightful new project, you’ve come to the right place! Get ready to pick up your hook and yarn, and let’s fashion something truly special together. This guide will walk you through each step, making it easy and enjoyable to construct your very own crocheted crossbody bag just like the gorgeous one you see in the image!
Materials You’ll Need
Before we begin, let’s gather all the materials you’ll need for this exciting project. Having everything ready beforehand will ensure a smooth and relaxing crafting experience.
- 🧶 Medium-weight yarn in your favorite color (cotton or acrylic works wonderfully!)
- 🪡 Crochet hook, size 4.0 mm (or size recommended for your yarn)
- ✂️ Scissors
- 🧵 Yarn needle for weaving in ends
- 🔘 One button (approximately 20-25mm in diameter)
- 📎 Stitch markers (optional, but helpful for beginners!)
Let’s Get Started: Crafting Your Crochet Crossbody Bag
Now for the fun part! We’re going to make this stylish crossbody bag step by step. Don’t worry if you’re completely new to crochet. We’ll explain everything in simple terms, just like chatting with a friend over coffee. Remember, the most important thing is to enjoy the process of forming something beautiful with your own hands! Refer to the image to see how your work should look at each stage.
Making the Base of the Bag
First, we’ll build the foundation of our bag – the base. This part will be the bottom of your crossbody bag.
Round 1: To begin, we need to fashion a starting chain. Think of this chain as the very first row of bricks when you’re building a wall. Make a slip knot (this is like tying a loose knot in your yarn to put on your hook). Then, chain 25 stitches. A chain stitch is the most basic stitch in crochet, it’s like making a simple loop and pulling yarn through it again and again.
Round 2: Now, we’re going to work around the chain to produce a rectangle. We’ll be using single crochet stitches for the base. Single crochet is a short, tight stitch that makes a solid fabric – perfect for the bottom of a bag! In the second chain from your hook, make a single crochet stitch. To do this, insert your hook into the stitch, yarn over (wrap the yarn around your hook), pull up a loop (you’ll have two loops on your hook), yarn over again, and pull through both loops. Continue to single crochet in each chain across. When you reach the end of the chain, you’ll have fashioned one side of your rectangle.
Round 3: At the end of the row, chain 1 (this is called a turning chain – it helps you start the next row at the right height). Now, we’re going to work back along the other side of the starting chain. Single crochet in each stitch across the other side of the chain. When you reach the end, chain 1 again, and join with a slip stitch to the first single crochet of the round. A slip stitch is a very simple stitch used to join rounds or rows neatly. To make a slip stitch, insert your hook into the stitch, yarn over, and pull through both the loop on your hook and the stitch you inserted into. You’ve now assembled the first round of your base!
Rounds 4-15: Repeat Round 3, continuing to single crochet in rounds to develop the base of your bag. You can adjust the number of rounds to make your base wider or longer, depending on how big you want your bag to be. Refer to the image – you can see the base is a neat, solid rectangle.
Constructing the Sides of the Bag
Now that we’ve built the base, it’s time to start constructing the sides of the bag! This is where the lovely openwork pattern comes in, giving the bag its unique look as seen in the image.
Round 16: Chain 3 (this counts as your first double crochet). A double crochet stitch is a taller stitch than single crochet, and it makes a more open fabric, like building a slightly taller brick in a wall. To make a double crochet, yarn over, insert your hook into the stitch, yarn over, pull up a loop (three loops on hook), yarn over, pull through two loops (two loops on hook), yarn over, pull through the last two loops. Then, chain 1. Skip the next stitch. In the stitch after that, make a double crochet. Chain 1, skip the next stitch, double crochet in the next stitch. Repeat this pattern (double crochet, chain 1, skip 1 stitch) all the way around. Join with a slip stitch to the top of the beginning chain-3.
Rounds 17-45 (or desired height): Repeat Round 16. Continue working in this double crochet and chain-1 pattern in rounds to fashion the sides of your bag. As you go, you’ll see the beautiful openwork texture developing, just like in the image! You can make the sides as tall as you like. Check the image to get an idea of the height.
Tip for Beginners: If you find it tricky to keep track of your rounds, use a stitch marker! Place it at the beginning of each round. This will help you know where each round starts and ends.
Fashioning the Flap
Next, we’ll fashion the flap of the bag. This part will fold over the top and close the bag. We’ll continue using the same openwork stitch pattern for the flap to keep the design consistent.
Row 1: To start the flap, we will no longer be working in rounds. We will work in rows back and forth. Chain 3 (counts as first double crochet), turn your work. Now, work across approximately half of the last round you just completed to form the back of the bag and the flap. You can count the stitch repeats to ensure you’re working roughly in the middle section for the flap. Work the double crochet, chain 1, skip 1 stitch pattern across this section.
Rows 2-15 (approximately): Chain 3, turn. Continue working the double crochet, chain 1, skip 1 stitch pattern in rows. Each row will be slightly shorter than the last to develop the rounded shape of the flap, as seen in the image. To achieve this rounded shape, decrease stitches at the beginning and end of each row. A simple way to decrease is to work two double crochet stitches together. For example, at the beginning of a row, skip the first stitch space, and start your double crochet in the next. At the end of the row, leave the last stitch space unworked. Refer to the image; you can see the flap curves nicely.
Scalloped Edge (Optional): For a pretty scalloped edge like in the image, after you’ve fashioned the flap to the desired shape, you can add a final row of scallops. Chain 1, turn. Work single crochet stitches evenly along the edge of the flap. To make a scallop, work 5 double crochet stitches into one stitch, skip a stitch or two, and then single crochet in the next stitch to anchor the scallop. Repeat this scallop pattern along the edge.
Developing the Strap
Now, let’s develop the strap so you can wear your lovely bag crossbody style! A sturdy strap is important to hold the weight of your bag’s contents.
Row 1: Chain 6. This will be the width of your strap.
Row 2: Single crochet in the second chain from the hook and in each chain across. Chain 1, turn.
Rows 3- (until desired length): Repeat Row 2. Continue single crocheting in rows until your strap reaches the desired length. A good length for a crossbody strap is usually around 45-50 inches, but you can adjust this to suit your preference. You are producing a long, narrow strip of fabric.
Attaching the Strap: Once your strap is the right length, fasten off (cut the yarn and pull the loop to secure it). Now, we need to attach the strap to the sides of the bag. Using your yarn needle, sew each end of the strap securely to the inside top edges of the bag on each side. Make sure the strap is attached evenly so the bag hangs nicely.
Assembling and Finishing
We’re almost there! Now for the final touches to assemble and finish our beautiful crochet crossbody bag.
Adding the Button: Place the flap over the front of the bag to decide where you want to position your button. Sew the button securely onto the center front of the bag, underneath the flap. The open stitches in the flap itself will act as the buttonhole – how clever is that! You can see in the image that the button is placed so it fastens through the openwork.
Weaving in Ends: The last step is to weave in all those loose yarn ends! Use your yarn needle to carefully weave each end back and forth through the stitches on the wrong side of your work. This hides the ends and makes your bag look neat and professional. Trim any excess yarn.
Congratulations! You have now crafted your very own Crochet Crossbody Bag! Isn’t it satisfying to make something so beautiful with your own hands?
Enjoy Your Handmade Treasure!
You’ve done it! You’ve successfully made a gorgeous crochet crossbody bag. Take a moment to admire your handiwork. You fashioned this beautiful and functional accessory with your own two hands! Imagine the joy of using your handmade bag or giving it as a thoughtful gift.
We hope you enjoyed this crochet journey. Don’t be afraid to experiment with different yarn colors and button styles to make each bag uniquely yours. And most importantly, have fun with it!
We’d absolutely love to see your finished bags! Please share photos of your bags online – we can’t wait to see what you make! Happy crocheting!