Fudgy Halal Brownies: Easy Recipe
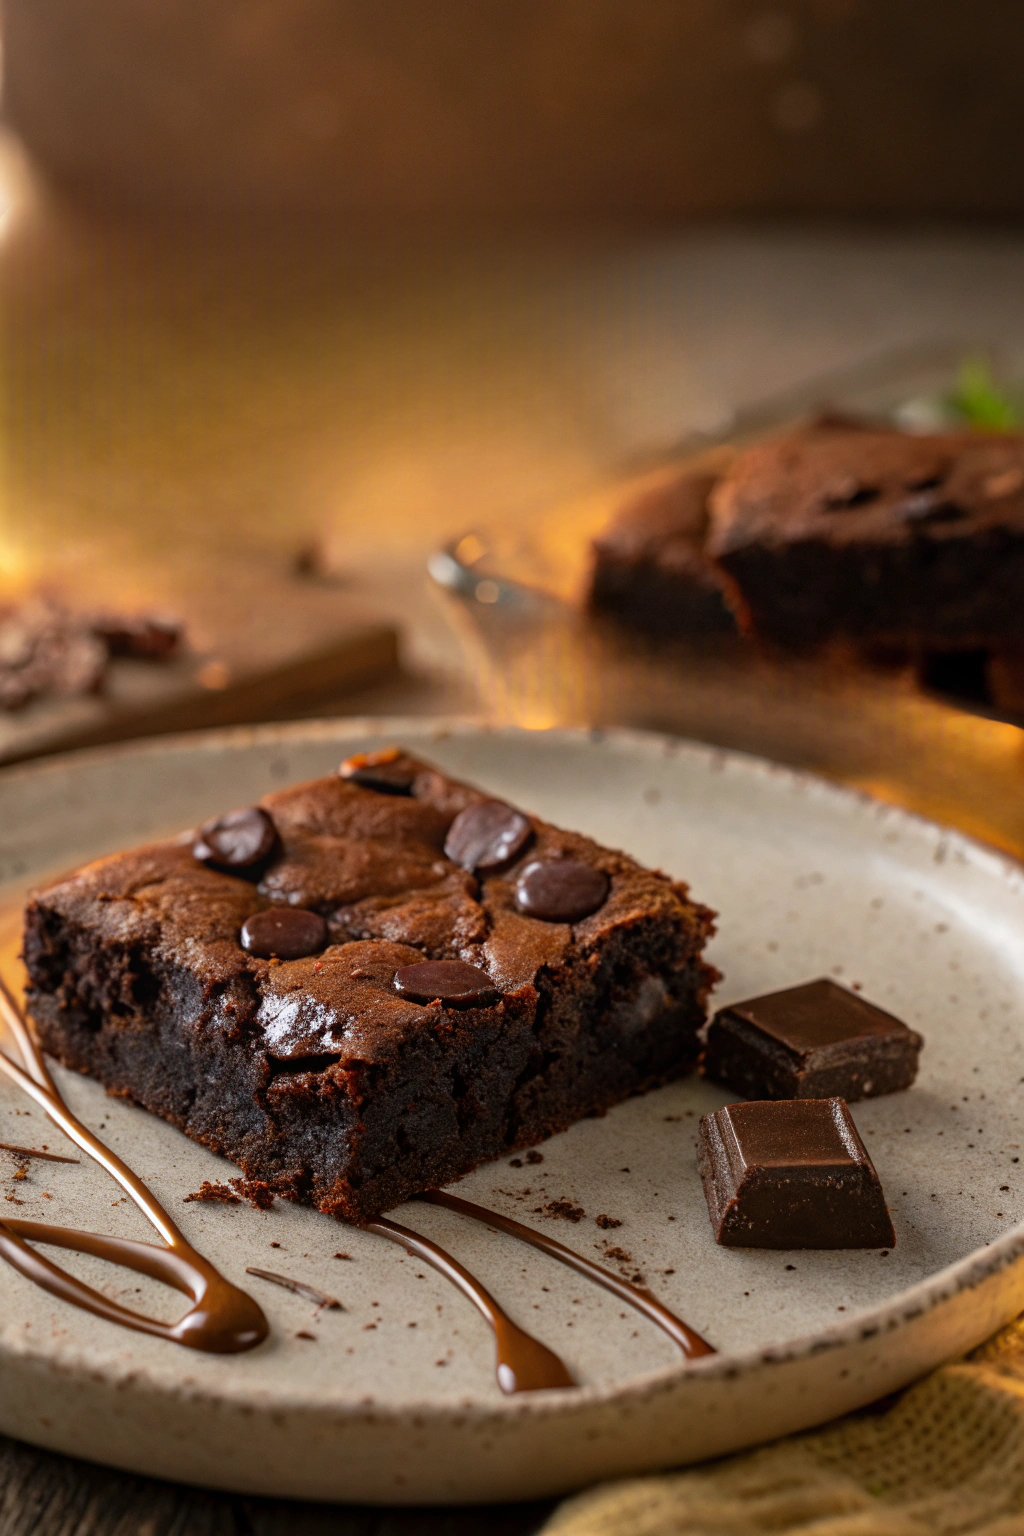
Making delicious homemade brownies is simpler than one might think! This recipe guides even those who have never baked before to prepare fudgy, chocolatey halal brownies right in their own kitchen. Follow along, step-by-step, and discover the joy of baking. Refer to the image to see how these brownies should look – rich, dark, and irresistible.
Halal Ingredients You’ll Need
Here is a list of everything needed to put together these delightful brownies. Make sure all ingredients are certified halal if you are strictly following halal guidelines, especially for items like vanilla extract and chocolate, though most readily available brands are halal-suitable.
- 🍫 1/2 cup (1 stick) unsalted butter, plus more for greasing the baking pan
- 🍫 1 cup granulated sugar
- 🥚 2 large eggs
- 🥄 1 teaspoon alcohol free vanilla extract
- 🥄 1/2 cup all-purpose flour
- 🥄 1/3 cup unsweetened cocoa powder
- 🥄 1/4 teaspoon baking powder
- 🥄 1/4 teaspoon salt
- 🍫 1/2 cup semi-sweet chocolate chips
Essential Kitchen Tools
Having the right tools makes the baking process much smoother. These are the basic items needed to prepare these brownies.
- 🥣 Large mixing bowl
- 🥄 Measuring spoons
- 🥛 Measuring cups
- Whisk or spoon
- 8×8 inch baking pan
- Parchment paper (optional, for easier removal)
- Oven
Let’s Make Fudgy Halal Brownies – Step by Step
This section breaks down each step to prepare these yummy brownies. Each step is explained simply, perfect for beginner bakers.
Step 1: Getting Started
First, it’s important to get the oven ready. Preheat the oven to 350°F (175°C). To preheat means to turn the oven on ahead of time so it reaches the correct temperature before putting the brownies in to bake. This ensures even baking. While the oven is heating, prepare the baking pan. Grease an 8×8 inch baking pan with butter. Greasing prevents the brownies from sticking to the pan. For even easier removal after baking, line the pan with parchment paper, leaving some paper hanging over the sides to use as handles later. This step can be skipped if parchment paper is unavailable; greasing the pan well is sufficient.
Step 2: Melting the Chocolate and Butter
In the large mixing bowl, place the butter. It is easiest to work with butter that is slightly softened but not fully melted. Add the cocoa powder to the butter. This recipe uses unsweetened cocoa powder, which gives the brownies a rich, deep chocolate flavor. Now, this mixture needs to be melted. There are a couple of ways to melt butter and cocoa. One method is to use a microwave. If using a microwave, heat in 30-second intervals, stirring in between, until the butter is melted and the cocoa powder is well combined. Be careful not to overheat, as burned chocolate can taste bitter. Another method is to melt it over a double boiler, which is a gentler way to melt chocolate. However, for this simple recipe, microwaving is perfectly acceptable and quicker. Stir the melted butter and cocoa together until it is smooth and there are no lumps of cocoa powder.
Step 3: Mixing Dry Ingredients
In the same bowl with the melted butter and cocoa mixture, add the sugar. Granulated sugar is used in this recipe for sweetness and texture. Stir the sugar into the warm chocolate mixture until it is well combined. Next, add the eggs one at a time, mixing well after each addition. Eggs help to bind the ingredients together and add richness to the brownies. After the eggs are mixed in, add the vanilla extract. Vanilla extract enhances the chocolate flavor. Stir it in until everything is smoothly combined.
Step 4: Combining Wet and Dry
Now it’s time to incorporate the dry ingredients. Sift the flour, baking powder, and salt into the bowl. To sift means to pass dry ingredients through a fine-mesh sieve or sifter. This helps to remove any lumps and makes the ingredients lighter and easier to mix into the batter. If a sifter is not available, simply whisk the flour, baking powder, and salt together in a separate small bowl to combine them and break up any lumps before adding them to the wet ingredients. Gently fold the dry ingredients into the wet ingredients. To fold means to combine ingredients gently without stirring or beating vigorously. Use a spoon or spatula and make a gentle scooping motion from the bottom of the bowl upwards, turning the mixture over. Do this until the flour is just combined and no white streaks of flour remain. Be careful not to overmix at this stage, as overmixing can make the brownies tough instead of fudgy. Finally, stir in the chocolate chips. These add extra chocolatey goodness and little pockets of melted chocolate in the finished brownies.
Step 5: Baking to Perfection
Pour the brownie batter into the prepared baking pan, spreading it evenly with a spatula or spoon. Place the pan in the preheated oven. Bake for 20-25 minutes. Baking time can vary slightly depending on ovens, so it’s important to check for doneness. To check if the brownies are done, insert a toothpick or a wooden skewer into the center. If it comes out with moist crumbs attached, the brownies are done and will be fudgy. If it comes out clean, they might be slightly overbaked and less fudgy. Observe the brownies in the image – they have a slightly cracked top and a moist-looking center, which is the desired texture.
Step 6: Cooling and Cutting
Once baked, remove the pan from the oven and let the brownies cool completely in the pan on a wire rack. Cooling completely is crucial, as brownies are easier to cut neatly when they are fully cooled. Resist the temptation to cut them while they are still warm, as they will be too soft and may crumble. Once completely cool, cut the brownies into squares. If parchment paper was used, lift the brownies out of the pan using the paper overhang and place them on a cutting board to cut. Refer to the image to see how the brownies are cut into neat squares and arranged on a plate.
Tips for Perfect Brownies
- Don’t Overbake: Overbaked brownies will be dry. Aim for fudgy brownies by slightly underbaking them. Moist crumbs on a toothpick indicate perfect fudginess.
- Use Good Quality Cocoa: The quality of cocoa powder impacts the flavor. Using a good quality unsweetened cocoa powder will result in richer, more flavorful brownies.
- Cool Completely: Patience is key! Cooling brownies completely before cutting makes for cleaner cuts and a better texture.
- Variations: Feel free to add nuts, dried fruits, or different types of chocolate chips to customize these brownies to personal preference. Ensure any additions are also halal.
Share Your Brownie Joy!
Congratulations on preparing your own batch of fudgy halal brownies! Baking is a rewarding experience, and sharing homemade treats is even more so. These brownies are perfect for enjoying with family and friends, or as a sweet treat any time. Imagine the smiles when you present these warm, chocolatey delights. Enjoy the wonderful aroma and even better taste of your freshly baked brownies. And don’t hesitate to share pictures of your brownie creations with others – let everyone see your baking success!