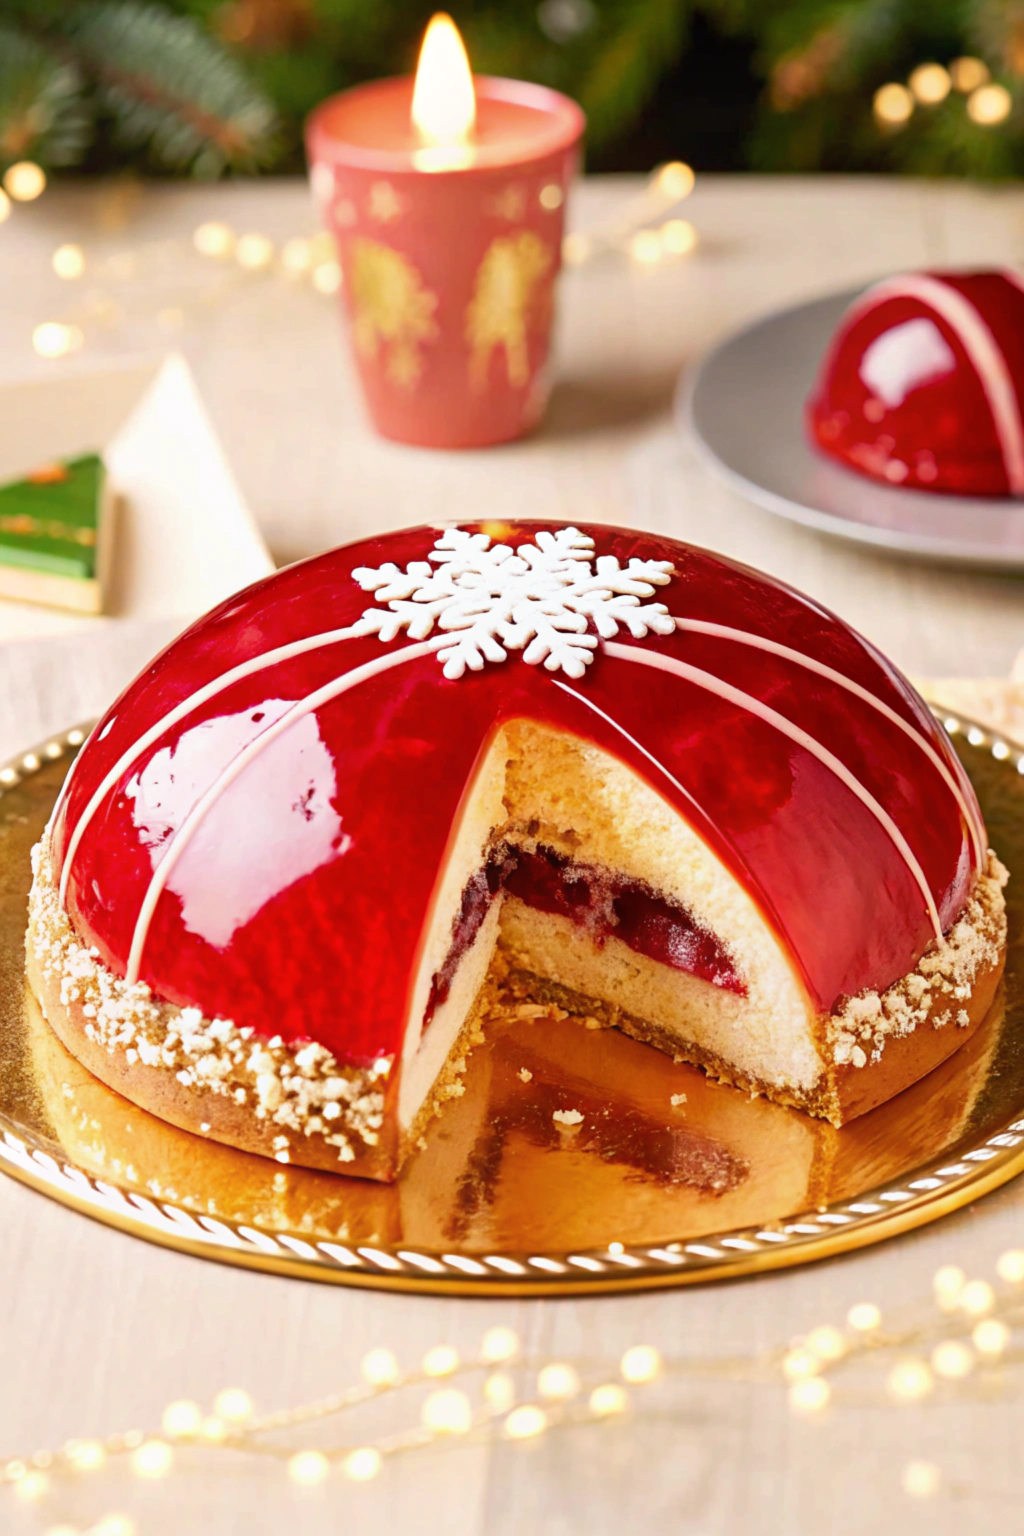
Today We’re excited to share a recipe that’s sure to make jaws drop at your next special occasion. This stunning raspberry mirror glaze dome isn’t just about looks – it’s a perfect harmony of vanilla sponge, creamy mousse, tangy raspberry filling, and that show-stopping mirror glaze. Let’s dive in!
The Story Behind This Recipe
We’ve always believed that some desserts should be both a feast for the eyes and the palate. This mirror glaze dome is inspired by French entremet techniques, combining multiple textures and flavors in one elegant package. The result? A dessert that’s guaranteed to be the centerpiece of any celebration.
Prep Time: 2 hours
Cook Time: 30 minutes
Additional Time: 4 hours for setting
Total Time: 6.5 hours
Servings: 8-10
Equipment Needed
- 8-inch dome mold (silicon works best)
- Stand mixer or hand mixer
- Candy thermometer
- Offset spatula
- Fine-mesh strainer
- Immersion blender (for mirror glaze)
- Baking sheet
- 8-inch cake pan
- Acetate strips
- Small piping bag
- Digital scale
Ingredients
For the Vanilla Sponge:
- 180g all-purpose flour
- 6 large eggs, room temperature
- 150g granulated sugar
- 2 tsp alcohol free vanilla extract
- 113g unsalted butter, melted and cooled
- 1½ tsp baking powder
- ¼ tsp salt
For the Raspberry Filling:
- 300g fresh raspberries
- 100g granulated sugar
- 4 halal/beef gelatin sheets (8g)
- 60ml water
- 1 tbsp lemon juice
For the Vanilla Mousse:
- 300g white chocolate, chopped
- 500ml heavy cream (divided)
- 5 halal/beef gelatin sheets (10g)
- 2 tsp alcohol free vanilla extract
- Pinch of salt
For the Mirror Glaze:
- 300g white chocolate, chopped
- 200g condensed milk
- 300g granulated sugar
- 150ml water
- 15g halal/beef gelatin sheets (about 8 sheets)
- Red gel food coloring
- White food coloring (optional, for opacity)
For Decoration:
- 100g white chocolate, melted and tempered
- 100g shortbread cookies, finely crushed
Additional Decoration Tip:
- Use tempered white chocolate to pipe snowflake designs on parchment paper. Once hardened, gently place the snowflakes on top of the dome for an elegant winter touch.
Instructions
Day 1: Prep Work
Make the Vanilla Sponge:
- Preheat oven to 350°F (175°C). Grease and line an 8-inch cake pan.
- Sift flour, baking powder, and salt together.
- In a stand mixer, beat eggs and sugar until pale and tripled in volume (about 8 minutes).
- Fold in vanilla extract.
- Gradually fold in dry ingredients, being careful not to deflate the batter.
- Stream in cooled melted butter while folding.
- Pour into prepared pan and bake for 20-25 minutes until springy to touch.
- Cool completely and slice horizontally into two layers.
Prepare the Raspberry Filling:
- Soak gelatin sheets in cold water.
- Combine raspberries, sugar, and lemon juice in a saucepan.
- Cook until berries break down and mixture thickens (about 10 minutes).
- Strain through fine-mesh sieve.
- Heat 60ml of puree until hot, squeeze out gelatin and stir in until dissolved.
- Mix back into remaining puree, cool until slightly thickened.
Day 2: Assembly
Make the Vanilla Mousse:
- Soak gelatin sheets in cold water.
- Heat 200ml cream until just simmering.
- Squeeze out gelatin and stir into hot cream.
- Pour over white chocolate, let sit 1 minute, then stir until smooth.
- Whip remaining 300ml cream to medium peaks.
- Once chocolate mixture is room temperature, fold in whipped cream.
Assembly:
- Line dome mold with acetate strips if not using silicon.
- Pour 1/3 of mousse into mold, pushing up sides with spatula.
- Place in freezer for 10 minutes to set slightly.
- Place one cake layer on top (trimmed to fit), pressing gently.
- Pour in raspberry filling, leaving a border.
- Add second cake layer.
- Fill with remaining mousse.
- Freeze minimum 6 hours or overnight.
Day 3: Glazing and Decoration
Mirror Glaze:
- Soak gelatin sheets in cold water.
- Combine sugar and water in saucepan, heat to 223°F (106°C).
- Remove from heat, add squeezed gelatin sheets.
- Pour over white chocolate and condensed milk.
- Blend with immersion blender until smooth.
- Add red gel color gradually until desired shade is achieved.
- Strain and let cool to 90-95°F (32-35°C).
Final Assembly:
- Remove dome from freezer and unmold onto wire rack over baking sheet.
- Pour glaze evenly over dome in one continuous motion.
- Let excess drip off.
- Before glaze sets, pipe white chocolate decoration on top, such as snowflakes.
- Press crushed cookies around base.
- Refrigerate 4-6 hours before serving.
Pro Tips
- Temperature is crucial! Use a thermometer for the mirror glaze.
- All components should be well-chilled before assembly.
- Work quickly when glazing – the dome should be frozen solid and the glaze at the perfect temperature.
- Make extra glaze to ensure good coverage.
- Pipe and harden snowflake designs a day ahead for convenience.
Storage
Store in the refrigerator for up to 3 days. The dome can be frozen (unglazed) for up to 2 weeks.
Troubleshooting
- If glaze is too thick: warm slightly
- If glaze is too thin: let cool more
- Bubbles in glaze: tap container on counter and strain again
- Uneven coating: check temperature and ensure dome is frozen solid
Remember, making a mirror glaze dome takes practice, so don’t get discouraged if your first attempt isn’t perfect. The taste will still be amazing! Happy baking! 🍰✨

