Easy Ways to Remove Limescale from Faucets
Is your once-shiny faucet now covered in a stubborn white crust? You’re not alone. Limescale buildup is a common issue that plagues many households, affecting not only the appearance of faucets but also the efficiency of your water flow. Imagine turning on your tap, only to be greeted by a trickle instead of a steady stream. Frustrating, right? This blog post will guide you through easy and effective ways to remove limescale from faucets, helping you restore their shine and functionality. Let’s dive in and say goodbye to those pesky white deposits!
What is Limescale?
Limescale is a chalky, white deposit that accumulates on surfaces that come into frequent contact with hard water. Hard water contains high levels of calcium and magnesium, which precipitate out and form limescale. These deposits are particularly common in areas where the water supply is rich in minerals.
Causes
Limescale forms when hard water evaporates, leaving behind calcium carbonate and magnesium carbonate. Over time, these minerals accumulate, creating the stubborn crust we know as limescale. Factors contributing to limescale buildup include:
- High mineral content in the water supply
- Frequent use of hot water, which accelerates evaporation
- Poor maintenance and cleaning habits
Impact
Limescale can have several negative effects, including:
- Reduced Water Flow: Limescale can clog faucet aerators and reduce water flow.
- Damage to Appliances: It can shorten the lifespan of appliances like dishwashers and washing machines.
- Increased Energy Consumption: Limescale buildup in heating elements can make them less efficient, increasing energy usage.
- Aesthetic Issues: It detracts from the appearance of your faucets and other fixtures.
Common Signs of Limescale Buildup
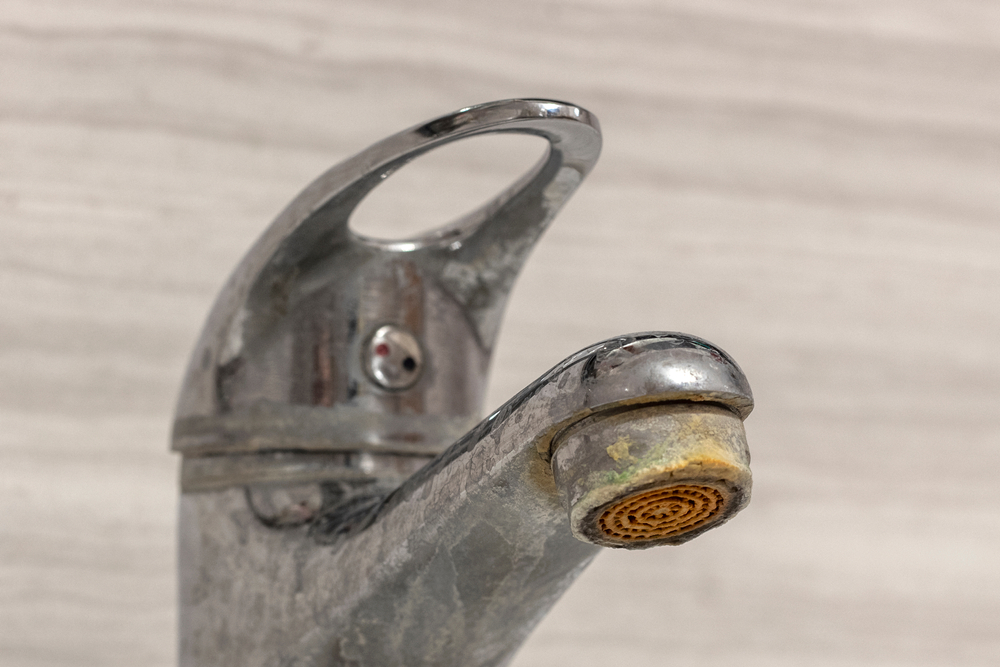
Visual Indicators
Limescale is typically white or off-white and can have a chalky texture. It often forms around the base of faucets, on aerators, and inside kettle spouts. You might also notice it on showerheads and in your toilet bowl.
Performance Issues
Limescale doesn’t just look bad; it also affects performance. Common signs include:
- Reduced Water Pressure: Limescale clogs faucet aerators, leading to decreased water flow.
- Inefficient Heating: Appliances that heat water, such as kettles and water heaters, take longer to reach the desired temperature.
- Faucet Drips: Limescale can cause faucets to drip or fail to shut off completely.
DIY Methods to Remove Limescale
Using Vinegar
Vinegar is a natural and effective way to dissolve limescale. Here’s how you can use it:
Step-by-Step Guide
- Gather Materials: White vinegar, a plastic bag, a rubber band, a cloth, and an old toothbrush.
- Prepare the Vinegar Solution: Fill the plastic bag with enough vinegar to submerge the faucet’s affected areas.
- Soak the Faucet: Attach the bag of vinegar to the faucet using the rubber band. Ensure the limescale-covered areas are fully submerged. Leave it for at least one hour.
- Scrub the Faucet: Remove the bag and use the old toothbrush to scrub away the softened limescale. For stubborn spots, dip the toothbrush in vinegar and scrub.
- Rinse and Dry: Rinse the faucet with water and wipe it dry with a cloth.
Tips and Warnings
- Test First: Test the vinegar on a small, inconspicuous area first to ensure it doesn’t damage the finish.
- Avoid Prolonged Exposure: Prolonged exposure to vinegar can damage certain finishes, so don’t leave it on for too long.
- Use Protective Gear: Wear gloves to protect your skin from prolonged contact with vinegar.
Using Lemon Juice
Lemon juice is another natural limescale remover. Its acidity helps dissolve mineral deposits effectively.
Step-by-Step Guide
- Gather Materials: Fresh lemons or bottled lemon juice, a cloth, and an old toothbrush.
- Apply Lemon Juice: Squeeze lemon juice directly onto the limescale or soak a cloth in lemon juice and wrap it around the faucet. Leave it for an hour.
- Scrub the Faucet: Use the old toothbrush to scrub away the softened limescale.
- Rinse and Dry: Rinse the faucet with water and dry it with a cloth.
Advantages
- Natural and Non-Toxic: Lemon juice is safe for the environment and your household.
- Pleasant Scent: It leaves a fresh, clean scent behind.
Using Baking Soda
Baking soda is an excellent abrasive cleaner that can tackle limescale effectively.
Step-by-Step Guide
- Gather Materials: Baking soda, water, a cloth, and an old toothbrush.
- Make a Paste: Mix baking soda with water to create a thick paste.
- Apply the Paste: Apply the paste to the limescale-affected areas and let it sit for 30 minutes.
- Scrub the Faucet: Use the old toothbrush to scrub away the limescale.
- Rinse and Dry: Rinse the faucet with water and dry it with a cloth.
Combination Methods
For more stubborn limescale, combine baking soda with vinegar:
- Apply Vinegar First: Soak the limescale in vinegar as described earlier.
- Scrub with Baking Soda: After soaking, apply baking soda paste and scrub with an old toothbrush.
Commercial Products for Limescale Removal
Overview of Products
Several commercial products are designed specifically for limescale removal. Some popular ones include:
- CLR (Calcium, Lime, and Rust Remover): A powerful cleaner that dissolves limescale quickly.
- Lime-A-Way: Another effective solution for tackling limescale, rust, and hard water deposits.
- Bar Keepers Friend: A versatile cleaner that works well on various surfaces, including faucets.
Product Comparisons
Effectiveness
- CLR: Highly effective for severe limescale.
- Lime-A-Way: Great for moderate to heavy limescale buildup.
- Bar Keepers Friend: Best for light to moderate limescale and multi-surface cleaning.
Cost
- CLR: Generally more expensive but offers strong performance.
- Lime-A-Way: Moderately priced and effective.
- Bar Keepers Friend: Affordable and versatile.
Safety
- CLR: Use with caution on certain surfaces.
- Lime-A-Way: Follow safety instructions to avoid skin irritation.
- Bar Keepers Friend: Generally safe for most surfaces, but always test first.
Usage Instructions
- Read the Label: Always read and follow the manufacturer’s instructions.
- Apply the Product: Apply the limescale remover to the affected area.
- Allow Time to Work: Let the product sit for the recommended time.
- Scrub if Necessary: Use a brush to scrub away any remaining limescale.
- Rinse Thoroughly: Rinse the area with water to remove any residue.
Preventing Limescale Buildup
Regular Maintenance
Preventing limescale is easier than removing it. Incorporate these habits into your routine:
- Wipe Faucets Dry: After using faucets, wipe them dry to prevent mineral deposits from forming.
- Regular Cleaning: Clean faucets weekly with a mild cleaner to keep limescale at bay.
Water Softening Solutions
Investing in a water softener can significantly reduce limescale buildup:
- How Water Softeners Work: They replace calcium and magnesium ions with sodium ions, which don’t form limescale.
- Types of Softeners: Choose between salt-based, salt-free, and magnetic water softeners.
Filter Installation
Installing water filters can help reduce the mineral content in your water:
- Point-of-Use Filters: These filters attach to faucets and reduce minerals in the water.
- Whole-House Filters: Installed at the water main, these filters treat all the water entering your home.
Frequently Asked Questions (FAQs)
Common Questions
- Can limescale damage my faucets permanently?
- Yes, over time, limescale can cause corrosion and permanent damage to faucets.
- Is it safe to use vinegar and lemon juice on all types of faucets?
- It’s safe for most faucets, but always test on a small area first, especially if your faucets have a delicate finish.
- How often should I clean my faucets to prevent limescale?
- Cleaning weekly can help prevent significant buildup.
Expert Tips
- Preventive Measures: Use preventive measures like wiping faucets dry and using water softeners to minimize limescale buildup.
- Stubborn Limescale: For stubborn limescale, a combination of methods (e.g., vinegar soak followed by baking soda scrub) can be more effective.
- Protective Gear: When using commercial cleaners, wear gloves and ensure good ventilation.
Conclusion
Limescale buildup can be a persistent and frustrating issue, but with the right methods, you can restore your faucets to their former glory. Whether you prefer natural solutions like vinegar and lemon juice or commercial products designed for heavy-duty cleaning, there’s an option for every situation. Regular maintenance and preventive measures can also go a long way in keeping limescale at bay.
By incorporating these simple yet effective cleaning techniques into your routine, you can ensure your faucets remain free of limescale, maintaining both their functionality and aesthetic appeal. Regular cleaning not only helps in preventing limescale but also extends the life of your fixtures, saving you from potential costly repairs or replacements in the future.
Don’t let limescale take over your home. Start implementing these easy methods today, and enjoy the benefits of clean, efficient, and aesthetically pleasing faucets. Remember, consistency is key. With a little effort and the right approach, you can keep limescale at bay and ensure your faucets stay sparkling clean for years to come.
Feel free to share your own tips and experiences in the comments below. If you have any questions or need further advice, don’t hesitate to ask. Happy cleaning!