Easy Homemade Halal Banoffee Pie
Prepare to make a truly irresistible dessert: Banoffee Pie! Featuring layers of rich toffee, smooth bananas, and fluffy whipped cream, this sweet treat is surprisingly easy to put together at home. Perfect for beginners, it’s guaranteed to impress with its delicious flavor. Plus, the recipe is completely halal, so everyone can enjoy a slice. Let’s start this fun baking adventure together!
Ingredients You’ll Need
Here is a list of all the halal ingredients needed to make this wonderful Banoffee Pie. Make sure to gather everything before starting.
- 🍪 250g Graham Crackers: These form the base of your pie. You can find these in most supermarkets.
- 🧈 100g Unsalted Butter: This will bind the graham cracker crumbs together to make the crust.
- 🍬 400g Sweetened Condensed Milk: This is the magic ingredient that transforms into delicious toffee.
- 🍚 50g Brown Sugar: This adds a rich, caramel flavor to the toffee.
- 🍌 3-4 Ripe Bananas: Choose bananas that are ripe but still firm for the best texture.
- 🥛 300ml Heavy Whipping Cream: This will be whipped into a light and airy topping. Ensure it is halal-certified if needed.
- 🥄 1 tsp Vanilla Extract: This enhances the flavor of the whipped cream. Use a halal-certified and alcohol free extract.
- 🍫 50g Halal Chocolate: For shaving over the top and adding a final touch of indulgence. Any halal dark or milk chocolate works well.
Kitchen Equipment You’ll Need
These are the basic kitchen tools you’ll need to prepare your Banoffee Pie.
- 🥧 9-inch Pie Dish: This will be the vessel for your beautiful pie.
- 🥣 Large Mixing Bowl: For mixing the graham cracker crust ingredients.
- 🥄 Wooden Spoon or Spatula: For stirring the toffee and whipped cream.
- 🥣 Medium Saucepan: For cooking the toffee filling.
- 🥄 Measuring Cups and Spoons: For accurate ingredient measurements.
- 🔪 Knife: For slicing bananas and chocolate.
- 🥄 Whisk or Electric Mixer: For whipping the cream. A whisk works perfectly well, but an electric mixer will make it faster.
- 🥄 Rolling Pin or Food Processor (Optional): To crush the graham crackers. A zip-top bag and rolling pin work just as well as a food processor.
Let’s Get Started: Making Your Banoffee Pie Step-by-Step
Now, let’s go through each step to put together this amazing Banoffee Pie. Don’t worry if you’ve never baked before; these instructions are designed to be easy for everyone to follow.
Step 1: Preparing the Biscuit Base
First, you need to prepare the crust. The crust in the image looks golden and crumbly, providing a perfect base for the soft fillings.
- Crush the graham crackers: Take your graham crackers and place them in a zip-top bag. Seal the bag and then use a rolling pin to crush the crackers into fine crumbs. If you have a food processor, you can pulse the crackers until they become crumbs. You need about 1 and 1/2 cups of graham cracker crumbs.
- Melt the butter: Place the unsalted butter in a microwave-safe bowl or a small saucepan. If using a microwave, heat it in short 20-second intervals until completely melted. If using a saucepan, melt it over low heat on the stovetop. “Melted butter” simply means butter that has been heated until it turns from a solid to a liquid.
- Combine crumbs and butter: In the large mixing bowl, put the crushed graham cracker crumbs. Pour the melted butter over the crumbs. Mix them together thoroughly using a spoon or your hands until all the crumbs are moistened and the mixture resembles wet sand. This mixture will hold together to form your pie crust.
- Press into pie dish: Take the graham cracker crumb mixture and press it evenly into the bottom and up the sides of your 9-inch pie dish. Use your fingers or the back of a spoon to firmly press the crumbs. Make sure the base is even and slightly thicker than the sides. This creates the foundation for your pie.
- Chill the crust: Place the pie dish with the crust in the refrigerator. Let it chill for at least 30 minutes. Chilling helps the crust to firm up and hold its shape when you add the fillings.
Step 2: Cooking the Toffee Filling
Next, you will prepare the luscious toffee filling. The image shows a rich, caramel-colored toffee layer that looks incredibly tempting.
- Combine condensed milk and brown sugar: In the medium saucepan, pour in the sweetened condensed milk and add the brown sugar. “Sweetened condensed milk” is a thick, sweet milk product, not the same as evaporated milk. “Brown sugar” is sugar with molasses added, giving it a caramel-like flavor.
- Cook over low heat: Place the saucepan over low heat on your stovetop. Stir the mixture constantly with a wooden spoon or spatula. “Low heat” means a gentle heat setting that prevents burning. “Stirring constantly” means you need to keep stirring without stopping to prevent the mixture from sticking to the bottom and burning.
- Simmer and thicken: Continue to cook and stir for about 10-15 minutes, or until the mixture thickens and turns into a rich caramel color, similar to what you see in the image. The toffee is ready when it’s thick enough to coat the back of a spoon. Be patient and keep stirring!
- Cool slightly: Once the toffee is ready, remove the saucepan from the heat and let it cool slightly for about 10 minutes before pouring it into the crust. This prevents the hot toffee from melting the chilled crust too much.
Step 3: Assembling the Banoffee Pie
Now it’s time to assemble the layers of your Banoffee Pie. This is where it really starts to look like the delicious treat in the image!
- Pour toffee into crust: Take the chilled graham cracker crust from the refrigerator. Pour the slightly cooled toffee filling evenly over the crust. Spread it out with a spatula to ensure it covers the base completely.
- Chill again: Return the pie with the toffee filling to the refrigerator and chill for at least 1 hour, or until the toffee is firm. This chilling step is important to set the toffee properly.
- Slice the bananas: Just before you are ready to assemble the next layer, peel the bananas and slice them into rounds about 1/4 inch thick. It’s best to slice them just before using to prevent them from browning.
- Arrange bananas over toffee: Take the pie from the refrigerator. Arrange the banana slices evenly over the firm toffee layer. You can arrange them in overlapping circles as seen in the image, or in any pattern you like.
Step 4: Whipping the Cream Topping
The final layer before decoration is the light and fluffy whipped cream. The image shows a generous topping of beautifully whipped cream.
- Chill the bowl and cream (Optional but recommended): For the best whipped cream, it helps to chill your mixing bowl and the heavy whipping cream for about 15-20 minutes in the refrigerator before you start. Cold ingredients whip up better.
- Pour cream and vanilla into bowl: Pour the chilled heavy whipping cream and vanilla extract into the chilled mixing bowl.
- Whip the cream: Using a whisk or an electric mixer, begin to whip the cream. If using a whisk, whip vigorously in a circular motion. If using an electric mixer, start on low speed and gradually increase to medium speed. “Whipping cream” means beating air into the cream to make it thick and fluffy. Continue whipping until stiff peaks form. “Stiff peaks” means when you lift the whisk or mixer out of the cream, the cream forms points that stand up straight and hold their shape briefly, as shown in the image. Be careful not to overwhip, or it will become grainy.
- Spread whipped cream over bananas: Take the pie from the refrigerator. Gently spread the whipped cream evenly over the banana slices. You can use a spatula to create swirls or simply smooth it out.
Step 5: Finishing Touches
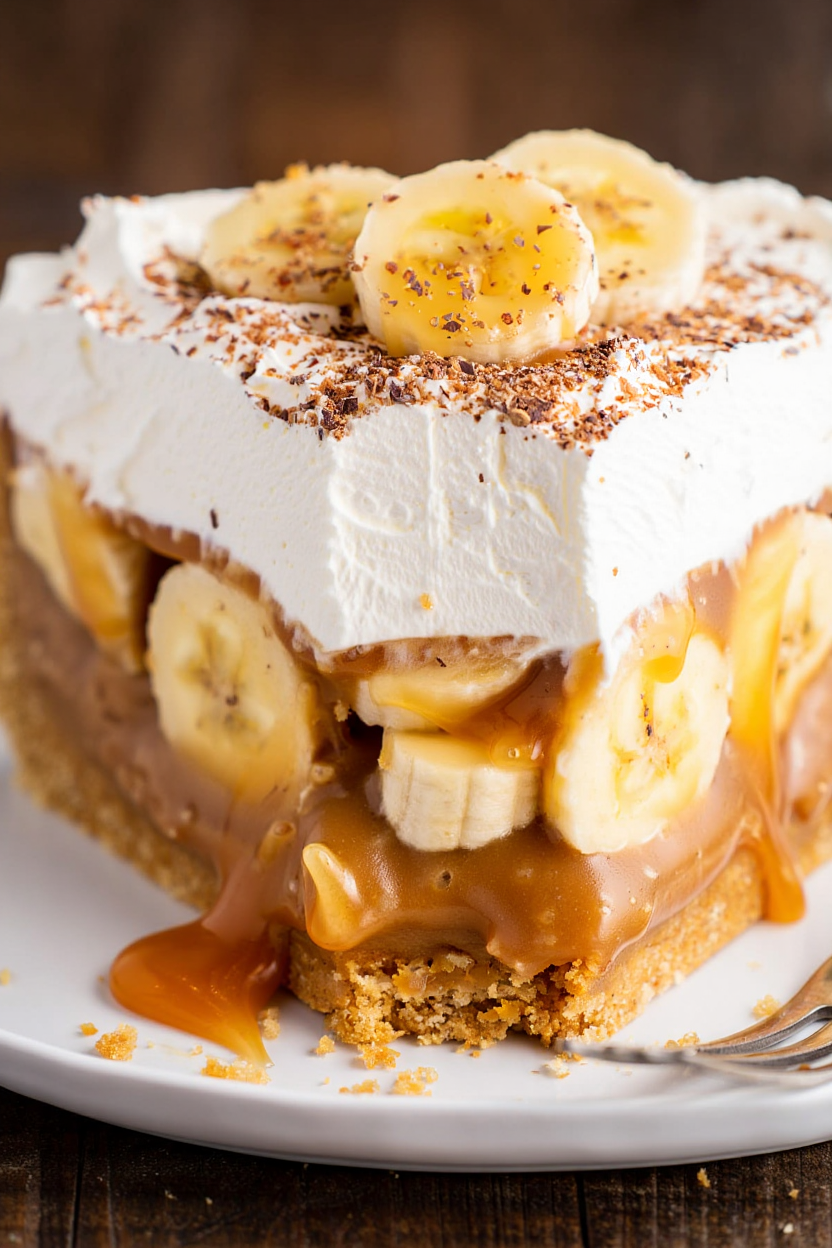
Almost there! Now for the final decorations to make your Banoffee Pie look truly spectacular, just like the one in the image.
- Shave the chocolate: Take your chocolate and use a knife or a chocolate shaver to shave it into small pieces or curls. “Chocolate shavings” are thin pieces of chocolate, often used for decoration.
- Sprinkle chocolate over cream: Sprinkle the chocolate shavings evenly over the whipped cream topping. You can see in the image that the pie is decorated with a generous amount of chocolate shavings, adding a lovely contrast in color and texture.
- Chill before serving: For the best flavor and texture, chill the finished Banoffee Pie in the refrigerator for at least another 30 minutes before serving. This allows all the layers to set together beautifully.
Tips for Banoffee Pie Success
- Use ripe but firm bananas: Overripe bananas can become too mushy. Ripe but firm bananas will hold their shape better and provide a pleasant texture.
- Don’t overcook the toffee: Cook the toffee until it thickens and turns a caramel color, but be careful not to overcook it, as it can become too hard when cooled.
- Chill each layer sufficiently: Chilling the crust and the toffee layer properly is crucial for the pie to hold its shape and have the right texture.
- Whip cream to stiff peaks: Ensure you whip the cream to stiff peaks for a stable and fluffy topping, but avoid over-whipping.
- Assemble close to serving time: Bananas can brown over time, so it’s best to assemble the banana layer and whipped cream topping closer to when you plan to serve the pie. If you need to prepare it in advance, you can brush the banana slices with a little lemon juice to help prevent browning, though this may slightly alter the flavor.
Enjoy Your Homemade Banoffee Pie!
Congratulations! You have just put together a delicious and beautiful homemade banoffee pie. Take a moment to admire your work – it looks just as tempting as the one in the image, doesn’t it? The satisfaction of making this dessert from scratch is truly rewarding.
This Banoffee pie is perfect for sharing with family and friends, for celebrations, or simply as a special treat. Every bite is a delightful combination of textures and flavors, from the crunchy crust to the smooth toffee, soft bananas, and airy whipped cream. It’s a dessert that’s sure to bring smiles and happiness.