Cute & Easy Crochet Basket
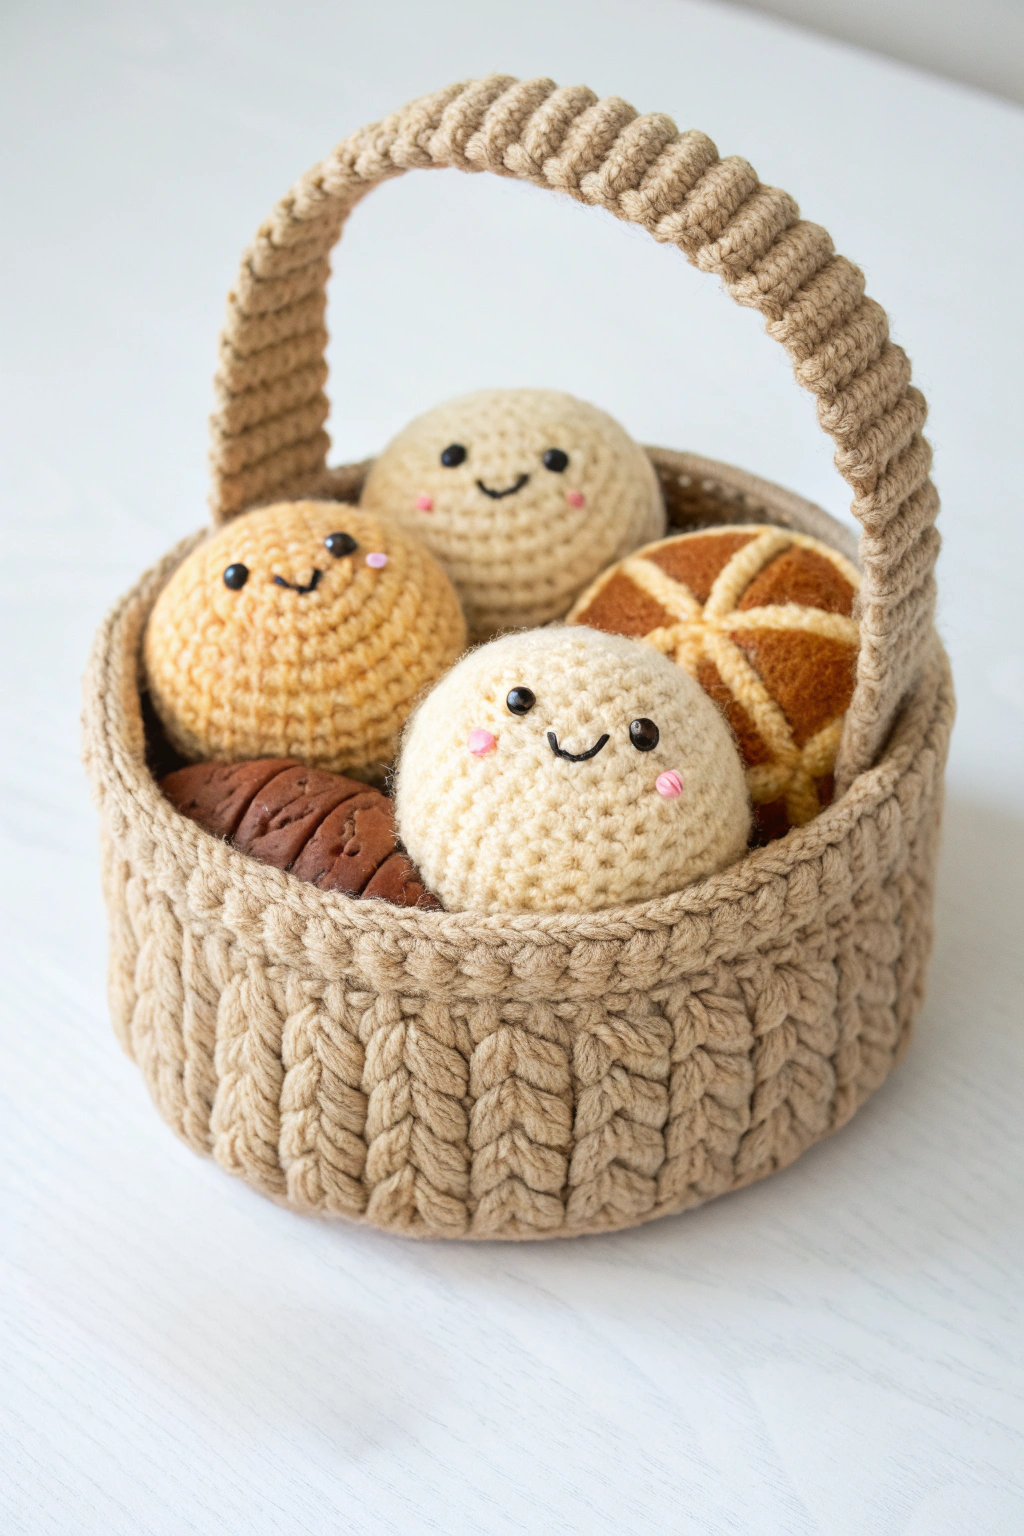
Excited for a super fun crochet adventure? Let’s make this charming little basket! It’s beginner-friendly and perfect for crafting a sweet gift or adding a handmade touch to your home. Picture it overflowing with crocheted goodies just like in the image! Don’t worry if you’re new to crochet – we’ll take it slow and easy. Let’s get hooking and fashion something beautiful!
What You’ll Need to Get Started
Before we begin, gather your supplies. Having everything ready will make the making process smooth and enjoyable.
- Bulky weight yarn in a natural beige color 🧶 (approximately 200 yards for the basket and handle)
- Crochet hook size 5.0 mm (H-8) 🪡
- Scissors ✂️
- Yarn needle for weaving in ends
- Stitch marker (optional, but helpful for beginners) 📍
A Quick Note on Yarn and Hook Size: You’ll notice we used a chunky, textured yarn – that’s key to getting the basket’s nice, firm shape. Using bulky weight yarn is key to achieving a similar result. The 5.0 mm hook is a good starting point, but check your yarn label for recommended hook size and adjust if needed to achieve a tight, even fabric like the one you see in the picture.
Let’s Construct the Basket Base
We’ll start by building the flat base of our basket. This is worked in rounds, meaning we’ll crochet in a spiral without joining rounds. This technique is common in amigurumi and is great for making seamless circles.
Round 1: Start with a magic ring. (If you’re unfamiliar with the magic ring, don’t worry! It’s a fantastic way to start crochet in the round without a hole in the center. You can find many video tutorials online by searching “magic ring crochet”. Alternatively, you can form a starting loop by chaining 2, then working 6 single crochet into the second chain from the hook.) Work 6 single crochet (sc) into the magic ring. Pull the tail of the magic ring tight to close the center. (6 stitches)
Round 2: Work 2 sc in each stitch around. This means you will increase in every stitch. (12 stitches)
Round 3: Sc in the next stitch, 2 sc in the next stitch. Repeat from * to * around. (18 stitches)
Tip for Beginners: This pattern of increasing every other stitch in each round helps to keep your circle flat.
Round 4: Sc in the next 2 stitches, 2 sc in the next stitch. Repeat from * to * around. (24 stitches)
Round 5: Sc in the next 3 stitches, 2 sc in the next stitch. Repeat from * to * around. (30 stitches)
Round 6: Sc in the next 4 stitches, 2 sc in the next stitch. Repeat from * to * around. (36 stitches)
Round 7: Sc in the next 5 stitches, 2 sc in the next stitch. Repeat from * to * around. (42 stitches)
Round 8: Sc in the next 6 stitches, 2 sc in the next stitch. Repeat from * to * around. (48 stitches)
Round 9: Sc in the next 7 stitches, 2 sc in the next stitch. Repeat from * to * around. (54 stitches)
Round 10: Sc in the next 8 stitches, 2 sc in the next stitch. Repeat from * to * around. (60 stitches)
Round 11: Sc in the next 9 stitches, 2 sc in the next stitch. Repeat from * to * around. (66 stitches)
Round 12: Sc in the next 10 stitches, 2 sc in the next stitch. Repeat from * to * around. (72 stitches)
Continue increasing in this manner (increasing the number of single crochet stitches between increases by one in each round) until your base is the desired diameter, approximately 6-7 inches across, or until you reach around Round 16-18, achieving approximately 96-108 stitches. Refer to the image to see the size proportion of the base compared to the sides. Don’t worry about being perfectly exact, handmade charm comes from slight variations!
Important Note for Single Crochet (sc): To single crochet, insert your hook into the stitch, yarn over (wrap the yarn around your hook from back to front), pull up a loop (you will have two loops on your hook), yarn over again, and pull through both loops on your hook. One single crochet stitch is now fashioned.
Developing the Basket Sides with Texture
Now we’ll start working on the sides of the basket. This is where we’ll add that lovely textured look you see in the image. It appears to be a simple stitch pattern that gives a braided or ribbed effect. We will be working in rounds again, but this time we will be working in back loop only single crochet (blsc) for each round to achieve the vertical ribbed texture.
Round 1 (Side Round 1): Work blsc in each stitch around. (Continue with the same stitch count as your last base round – approximately 96-108 stitches).
What is Back Loop Only Single Crochet? Normally, when you crochet into a stitch, you insert your hook under both loops of the ‘V’ shape at the top of the stitch from the previous round. For back loop only single crochet, you insert your hook only under the back loop of that ‘V’, leaving the front loop unworked. This simple change in hook placement produces a ribbed texture.
Rounds 2-20 (Side Rounds 2-20): Repeat Round 1 (blsc in each stitch around) for approximately 18-20 more rounds, or until your basket sides reach the desired height, roughly 4-5 inches tall, like in the image. Refer to the image to see the height of the sides in proportion to the base and handle. You can adjust the number of rounds to make your basket taller or shorter.
Finishing the Top Edge: For the last round of the basket sides, you can simply single crochet in both loops for a slightly neater edge, or continue with back loop single crochet for a consistent ribbed look. Fasten off your yarn, leaving a long tail for weaving in.
Making the Sturdy Basket Handle
The handle is thick and rope-like, which really completes the look of the basket. We’ll assemble a strong handle that is comfortable to hold and adds to the basket’s charm. We will use a technique called I-cord to fashion a sturdy handle. While it might seem a bit different, it’s quite simple once you get the hang of it!
Step 1: Casting On: Chain 3.
Step 2: Row 1: Insert your hook into the second chain from the hook, yarn over, pull up a loop (2 loops on hook), insert your hook into the next chain, yarn over, pull up a loop (3 loops on hook). Do NOT yarn over and pull through all loops like a regular stitch.
Step 3: Working the I-cord: Slide the stitches to the right end of your hook. Yarn over, pull through the first loop on your hook. Yarn over, pull through the next loop on your hook. Yarn over, pull through the last loop on your hook. Repeat from * to * until your I-cord handle reaches approximately 16-18 inches in length, or desired handle length. You can measure against your basket to see what length looks best and is comfortable to hold.
Troubleshooting Tip: If you find it tricky to hold the loops and slide them, take your time and keep the tension even. After a few rows, it will become more natural.
Step 4: Fasten Off: Once your handle is the desired length, fasten off your yarn, leaving a long tail on each end for attaching the handle to the basket.
Attaching the Handle and Final Touches
Now we’ll attach the handle securely to the basket.
Step 1: Positioning the Handle: Hold your handle and position it on the inside of the basket rim, opposite sides from each other. Look at the image to see the handle placement. You want it to be evenly spaced and securely attached.
Step 2: Sewing the Handle: Using your yarn needle and the long tails left on each end of the handle, sew the handle firmly to the inside top edge of the basket. Weave the yarn tail through the stitches of both the handle and the basket rim several times to ensure a strong attachment. Make sure to sew through multiple rounds of the basket side for extra security.
Step 3: Weaving in Ends: Once the handle is securely attached, weave in all remaining yarn ends using your yarn needle, tucking them neatly into the inside of the basket so they are hidden.
You Did It! Your Adorable Basket is Complete!
Congratulations! You have successfully fashioned your own charming crocheted basket! Isn’t it satisfying to make something beautiful with your own hands? This basket is perfect for organizing small items, displaying your crocheted goodies, or simply adding a touch of handmade warmth to your space.
Now that you’ve learned how to make this delightful basket, why not try experimenting with different yarn colors or adding embellishments? The possibilities are endless!