Crochet Sweet Pea Baby Pants
Get ready to grab your hook and make the most adorable and comfy baby pants! These sweet pea pants are not only incredibly cute but also surprisingly simple to fashion, even if you’re just starting your crochet journey. Imagine the joy of gifting (or keeping!) these handmade treasures. Let’s dive into this fun project together!
What You’ll Need to Get Started
Before we begin, gather these materials. It’s always a good idea to have everything ready so you can relax and enjoy the process of making your baby pants!
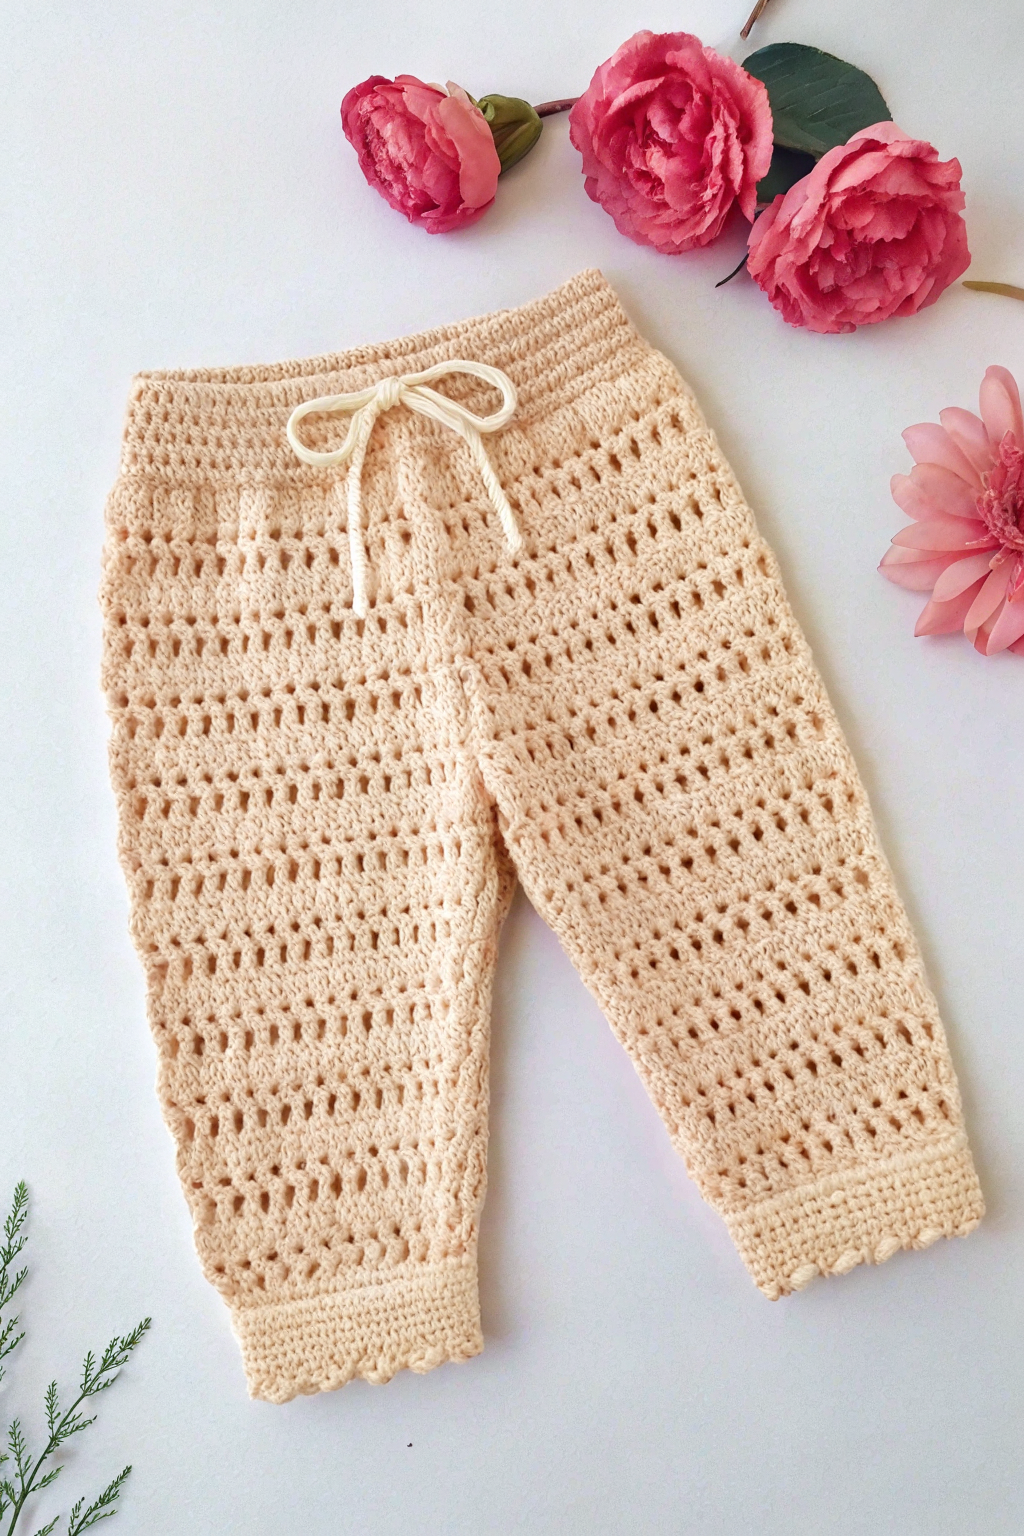
- 🧶 Approximately 200 yards of DK weight yarn in a soft, pastel color (like the peachy tone in the image)
- 🪡 4.0 mm crochet hook (or size to match your yarn)
- ✂️ Scissors
- 📏 Measuring tape
- 📌 Stitch markers (optional, but helpful!)
- Yarn needle for weaving in ends
Let’s Fashion Some Baby Pants! – Step-by-Step Guide
Don’t be intimidated! We’ll take it one step at a time. Refer to the image to see how your work should look at each stage. We’re going to build these pants from the top down, starting with the waistband.
1. Form the Waistband
- Step 1: First, we need to assemble the ribbed waistband. To begin, make a slip knot on your hook. Then, chain 70. This chain will determine the width of the waistband. If you need a smaller or larger waistband, adjust the number of chains accordingly, keeping it an even number for best results.
- Step 2: Now, we’ll work in rows to develop the ribbing. Single Crochet (sc) in the second chain from the hook, and in each chain across. You should have 69 single crochets. (Remember, we skipped the first chain from the hook).
- Step 3: Chain 1 and turn your work. This chain 1 does not count as a stitch. For the ribbing effect, we’ll work single crochet back loop only (sc blo). This means you insert your hook only under the back loop of the stitch from the previous row, instead of under both loops. Sc blo in each stitch across.
- Step 4: Repeat Step 3 until your waistband measures approximately 2 inches in height, or your desired width. You can observe in the image that the waistband has clear horizontal rib lines, which we are achieving with this technique.
- Step 5: Once your waistband is the desired size, bring the two short ends together. Slip stitch the first and last rows together to join the waistband into a ring. This forms the top of the pants.
2. Produce the Pant Body
- Step 6: Now we’ll start working in rounds to fashion the main part of the pants. Chain 3 (this counts as a double crochet – dc). We will now work the openwork pattern. Refer to the image – you can see the lovely airy pattern of the pants.
- Step 7: Double crochet (dc) in the next stitch. Then, chain 2, skip the next 2 stitches. Repeat from * to * all the way around the waistband ring. You will be working into the edge of the rows of the waistband. Try to space your stitches evenly.
- Step 8: When you reach the beginning of the round, slip stitch to the top of the chain 3 to join. You have completed the first round of the openwork pattern.
- Step 9: Chain 3 (counts as a dc). Dc in the next dc. Chain 2, dc in the next dc, dc in the next dc. Repeat from * to * around. Join with a slip stitch to the top of the chain 3.
- Step 10: Repeat Step 9 until the pants body measures approximately 8 inches from the waistband, or your desired length before splitting for the legs. You can see in the image the length of the body section before the legs separate. Feel free to adjust this length depending on the baby’s size.
3. Develop the Legs
- Step 11: Now, we’ll divide for the legs. To do this, we’ll work in rounds for each leg separately. After completing your last round of the body, find the point where you want to divide the legs. This will be roughly in the middle front and middle back.
- Step 12: To start the first leg, work the openwork pattern (chain 3, dc in next dc, chain 2, skip 2, repeat) around approximately half of the stitches. You are essentially working around half of the circumference of the last round. Join with a slip stitch.
- Step 13: Continue working in rounds of the openwork pattern (Step 9) for this leg. Refer to the image to see the length of the legs. Aim for about 6-7 inches, or your desired length.
- Step 14: Once the leg reaches the desired length, we will craft the cuff. Chain 1. Single crochet in each stitch around.
- Step 15: Chain 1 and turn. Work single crochet back loop only (sc blo) in each stitch around, just like we did for the waistband ribbing.
- Step 16: Repeat Step 15 for about 5-6 rounds, or until your cuff is the desired width. Slip stitch to join the last round. Fasten off and weave in your ends securely.
- Step 17: Repeat Steps 12-16 for the second leg, starting at the opposite side of the pant opening. Make sure both legs are the same length.
4. Construct the Drawstring
- Step 18: To make the drawstring, chain approximately 80-90 (or desired length). Fasten off.
- Step 19: Weave the drawstring through the waistband, going in and out of the spaces. Start at the front center, go all the way around, and tie the ends in a bow at the front, as seen in the image. This drawstring is functional and also adds a sweet detail to the pants!
Finishing Touches & Tips for Success
- Weave in all loose ends: Use your yarn needle to securely weave in all yarn ends to give your baby pants a neat and professional finish.
- Blocking (Optional): Gently block your finished pants by lightly dampening them and laying them flat to dry, shaping them as you go. This can help even out stitches and enhance the drape.
- Yarn Choice: Soft, baby-friendly yarn is essential. Cotton or bamboo blends are great choices for breathability and gentleness on baby’s skin.
- Hook Size: The recommended hook size is a starting point. Always check your gauge (the number of stitches and rows per inch) to ensure your finished pants will be the correct size. If your gauge is too tight, use a larger hook; if it’s too loose, use a smaller hook.
- Counting Stitches: Especially when working in rounds with stitch patterns, it’s helpful to count your stitches occasionally to make sure you’re maintaining the correct number.
- Take Breaks: Remember to take breaks and enjoy the process! Crocheting should be relaxing and fun.
Share Your Handmade Joy!
Congratulations! You’ve just fashioned a beautiful pair of crochet baby pants. Aren’t they adorable? Imagine how precious they will look on a little one! We’d love to see your finished projects. Happy hooking!