Cozy Crochet Moccasin Slippers: Easy Step-by-Step Guide
Hello crafting friends! Are you looking for a project that’s both fun and functional? Get ready to cast on and make the coziest moccasin slippers you’ve ever seen! These aren’t just any slippers; they’re handmade with love and perfect for keeping your feet warm and snuggly all year round. If you’ve always wanted to try crocheting but felt a little intimidated, don’t worry! This step-by-step tutorial is designed just for you, even if you’ve never picked up a crochet hook before. We’ll guide you through each stage, making it super easy and enjoyable. So, grab your yarn, and let’s begin fashioning these adorable and comfy slippers together! You’ll be amazed at what you can make with just a little yarn and a hook!
Materials You’ll Need
Before we dive in, let’s gather everything we need. Having your materials ready will make the whole process smoother and more fun!
 Worsted weight yarn in brown (or your favorite color!) – This is a medium thickness yarn, perfect for beginners to handle.
 Crochet hook size H/8 (5.0 mm) – This is a good size hook to use with worsted weight yarn.
 Yarn needle – This is like a sewing needle, but with a bigger eye to thread yarn through, used for weaving in loose ends.
 Stitch markers (optional, but helpful) – These are little clips that help you mark specific stitches, especially useful when working in rounds.
 Two small metal eyelets (optional) – These are little rings that you can insert into fabric to reinforce holes for laces. If you don’t have these, we’ll show you how to make yarn loops instead!
 Eyelet tool (if using eyelets, optional) – This tool helps you attach the eyelets to the slipper.
 Scissors – For cutting the yarn.
Let’s Get Started! Making Your Moccasin Slippers
Now for the exciting part – actually making our moccasin slippers! We’ll break it down into simple steps, explaining everything as we go. Remember, there’s no rush, and the most important thing is to enjoy the process of crafting with your hands.
Forming the Sole
The sole is the bottom part of the slipper, and it’s the first piece we’ll make. We’ll form it in an oval shape, working in rounds. Imagine you’re drawing a spiral that keeps getting wider and wider as you go around. That’s kind of what we’re doing with crochet!
Round 1: To start, we’ll make what’s called a magic ring. Think of it as a special loop that disappears when you pull it tight, leaving a neat center. If magic rings seem a bit tricky right now, don’t worry! You can also start by making a chain of 2 stitches. This is just like forming a little line of yarn loops. Then, work 6 single crochet stitches into the second chain from your hook. A single crochet stitch is a basic stitch that forms a tight, dense fabric. It’s like building a short, solid brick in your crochet project. These 6 single crochet stitches will be the very center of your sole.
Round 2: Now, we’re going to work in rounds, which means we’ll keep crocheting in a spiral, going around and around. In this round, we’ll increase, which means we’ll make two stitches in some of the stitches from the previous round to make the circle bigger. Work 2 single crochet stitches in each stitch around. This means in every stitch from Round 1, you’ll fashion two single crochet stitches. By the end of this round, you’ll have 12 stitches.
Round 3: We’re still increasing to shape our oval sole. Work 1 single crochet stitch in the next stitch, then 2 single crochet stitches in the next stitch. Repeat from * to * around. This pattern of alternating one single crochet and then two single crochet in the next stitch will help develop the oval shape and make it wider. You should have 18 stitches at the end of this round.
Round 4: Continue increasing. Work 1 single crochet stitch in each of the next 2 stitches, then 2 single crochet stitches in the next stitch. Repeat from * to * around. This continues the pattern of increasing, further developing the oval. You’ll have 24 stitches when you finish this round.
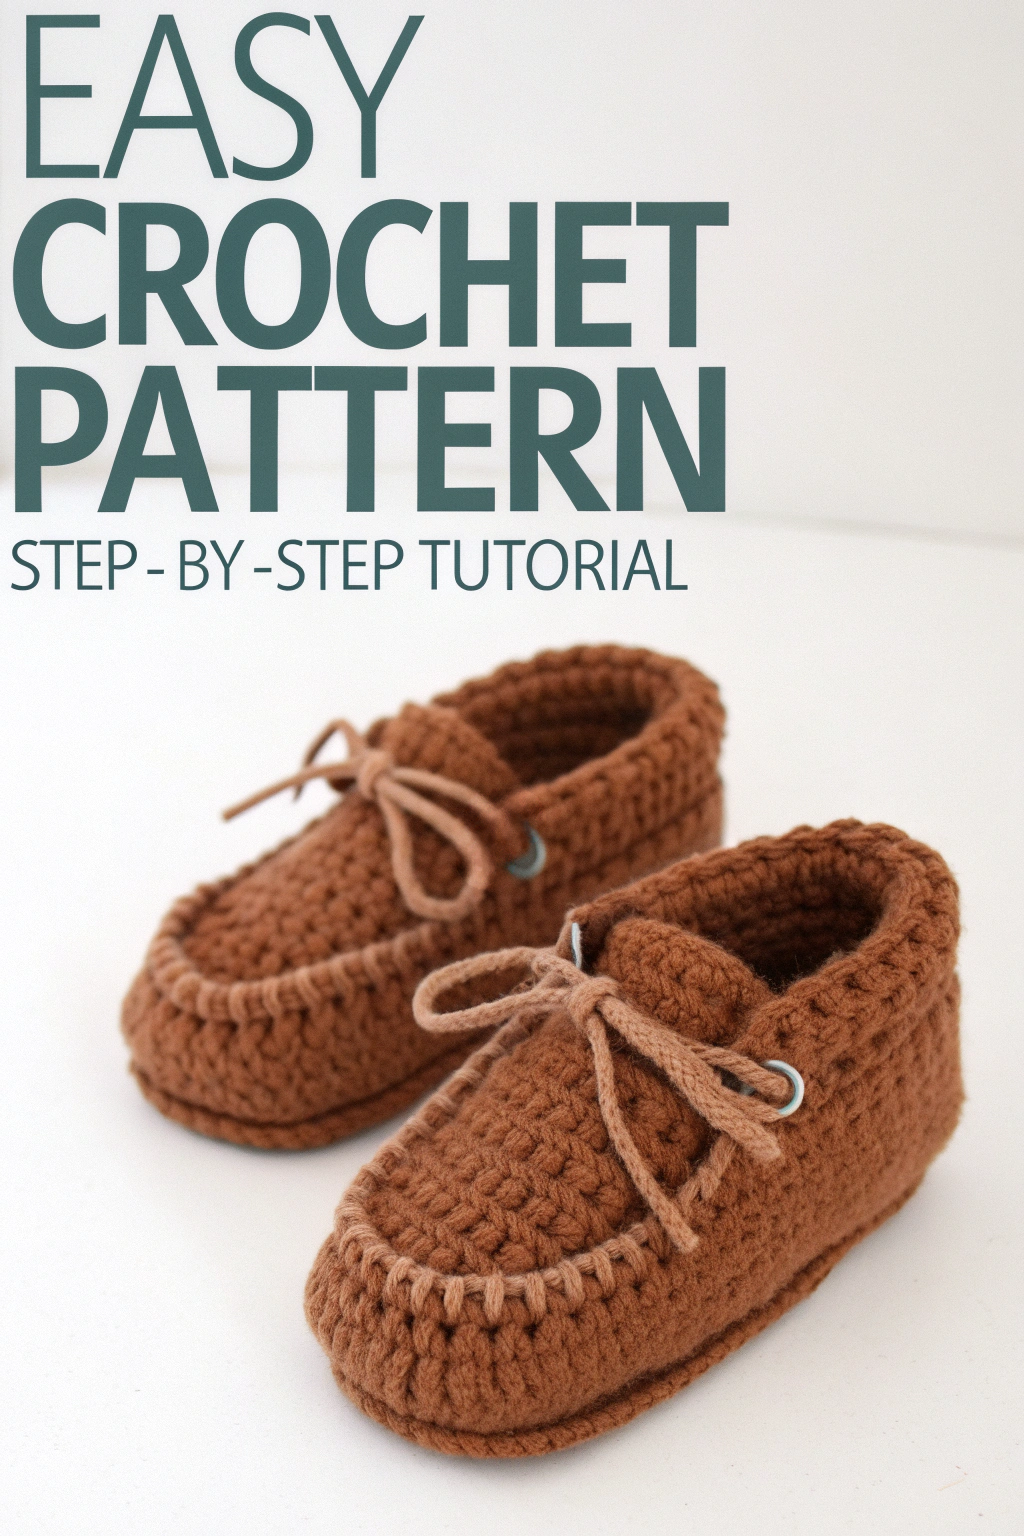
Rounds 5-12: Keep increasing in this way, adding one more single crochet stitch between the increases in each round. For example, in Round 5, you’ll work 1 single crochet in each of the next 3 stitches, then 2 single crochet in the next stitch, and so on. Refer to the image to see the size of the sole in proportion to the whole slipper. Continue until your sole is the desired size for your foot. For a typical adult size, around 12 rounds might be good, but you can adjust based on your foot size. Remember to count your stitches at the end of each round to make sure you’re on track! This is a helpful tip to avoid mistakes and keep your sole shaping correctly.
Round 13: Once your sole is the right size, we’ll make one round without increasing to set the shape. Work 1 single crochet stitch in each stitch around. This round will give a nice, clean edge to the sole. After this round, slip stitch to join and fasten off, leaving a long tail for sewing later. A slip stitch is a very simple stitch used to join rounds or move your yarn without adding height. “Fastening off” just means securing the yarn so your crochet doesn’t unravel. You do this by cutting the yarn and pulling the end through the last loop on your hook, then tightening it.
You’ve just fashioned the sole of your slipper! Take a moment to admire your work. You can see in the image the oval shape of the sole and how it provides the foundation for the rest of the slipper.
Crafting the Upper Part
Now we’ll build the upper part of the slipper, which will come up from the sole and cover your foot. We’ll attach the yarn to the edge of the sole we just made.
Round 1 (Upper): With the right side facing you (the side you want to be on the outside of the slipper), attach your yarn to any stitch on the edge of the sole. To attach the yarn, make a slip knot on your hook, insert your hook into a stitch on the sole, yarn over (wrap the yarn around your hook), and pull through a loop. Now, chain 1. This chain 1 does not count as a stitch, it’s just to bring the yarn up to the right height for the next row. Then, work 1 single crochet stitch in each stitch around the entire edge of the sole. We’re essentially constructing a wall around the sole. When you reach the stitch where you started, slip stitch to join the round.
Rounds 2-10 (Upper): Now we’ll start developing the height of the upper. Chain 2 (this chain 2 does count as a double crochet stitch in this section). Double crochet in each stitch around. A double crochet stitch is a taller stitch than single crochet, and it forms a more open fabric. It’s like building a slightly taller brick in your wall. Keep working in rounds of double crochet, joining each round with a slip stitch and starting each new round with a chain 2. Refer to the image to see how high the upper part of the slipper is. Around 9 rounds of double crochet after the initial single crochet round should be about right, but you can adjust this to your preference for how high you want the slipper to come up your foot.
Shaping the Front (Rounds 11-13): To shape the front of the moccasin, we’ll now work in rows back and forth instead of rounds for a few rows. This will fashion that distinctive moccasin shape you see in the image. Find the center front of your slipper. You can do this by folding it in half. Mark the center front stitch. From this point, count 10 stitches to the left and 10 stitches to the right (or adjust this number depending on the size of your slipper, aiming for about 20 stitches in total for the front). We will work on these 20 stitches for the next few rows.
Row 11: Chain 2 (counts as a double crochet). Double crochet in the next 19 stitches. Turn your work. “Turning your work” is like flipping a page in a book so you can work back in the other direction.
Row 12-13: Chain 2 (counts as a double crochet). Double crochet in each stitch across. Turn your work. Repeat for Row 13. After Row 13, fasten off, leaving a long tail for sewing.
You’ve now fashioned the main upper part of your moccasin! You can see in the image how the front part is shaped slightly differently from the rest of the upper.
Forming the Cuff
The cuff is the ribbed edge at the top of the slipper opening. It adds a nice finished look and helps to keep the slipper snug. We’ll make this using a special stitch called front post double crochet and back post double crochet. These stitches produce a ribbed texture by working around the post of the stitches from the row below, instead of into the top of the stitches.
Round 1 (Cuff): Attach your yarn to the back of the slipper opening, where the heel will be. Chain 2 (counts as a double crochet). Now, we’ll alternate front post double crochet (fpdc) and back post double crochet (bpdc) around the entire opening. For a front post double crochet, you insert your hook from front to back around the post of the next double crochet stitch from the previous round, yarn over, and complete a double crochet as usual. For a back post double crochet, you insert your hook from back to front around the post of the next double crochet stitch from the previous round, yarn over, and complete a double crochet as usual. Alternate fpdc and bpdc around the entire opening, creating a ribbed effect. Slip stitch to join.
Rounds 2-3 (Cuff): Chain 2 (counts as a double crochet). Continue to work in rounds of alternating fpdc and bpdc. Make sure to work each fpdc into a fpdc from the previous round, and each bpdc into a bpdc from the previous round to maintain the rib pattern. Repeat for Rounds 2 and 3, or for as many rounds as you like for your desired cuff height. After the last round, fasten off and weave in all loose ends with your yarn needle. “Weaving in ends” means tucking the yarn tails neatly into the stitches on the inside of your slipper so they don’t unravel or show.
Congratulations! You’ve just crafted the cozy cuff of your moccasin slipper!
Adding the Laces
The laces are the final touch that gives these slippers their moccasin look! We’ll make simple crochet chains for the laces and attach them using eyelets or yarn loops.
Making the Laces: For each slipper, make a crochet chain about 18-24 inches long, or adjust to your preference. To make a chain, make a slip knot, then yarn over and pull through the loop on your hook repeatedly until you reach the desired length. Fasten off and weave in the ends. Make two laces, one for each slipper.
Attaching Eyelets (Optional): If you have eyelets, decide where you want to place them on the sides of your slippers. Refer to the image; they are placed on the sides, near the front shaping. Use the eyelet tool to insert the eyelets according to the tool’s instructions.
Making Yarn Loops (Alternative to Eyelets): If you don’t have eyelets, you can fashion yarn loops instead. Using your yarn and hook, make small chain loops and sew them onto the sides of your slippers where you would place eyelets. Each loop should be big enough to thread the lace through. Sew them securely using your yarn needle and a whip stitch or similar stitch.
Threading the Laces: Once your eyelets or yarn loops are in place, thread the crochet chain lace through them on each slipper, just like you would lace up a shoe. Tie the laces in a bow at the front of each slipper.
You Did It!
You have successfully produced a pair of beautiful, handmade crochet moccasin slippers! Aren’t they wonderfully cozy? Take a moment to appreciate the work you’ve done with your own hands. You’ve taken yarn and a hook and built something functional and beautiful.
Remember, practice makes progress! Don’t worry if your first slipper isn’t absolutely perfect. Each one you make will get better, and you’ll learn something new every time. The joy of crafting is in the process and the satisfaction of having something unique and handmade.
We would absolutely love to see your finished moccasin slippers! Please share photos of your creations online and tag us – we can’t wait to see your cozy footwear! Happy crocheting, and enjoy your warm and comfy handmade slippers!