How to Use Toothpaste to Clean Foggy Headlights
Have you ever found yourself squinting through cloudy headlights, struggling to see the road ahead? You’re not alone. Foggy headlights are a common problem that not only impacts your vehicle’s appearance but also poses a significant safety risk. But here’s a surprising solution that might just brighten your day: toothpaste! That’s right, the same paste you use to keep your pearly whites shining can work wonders on your car’s headlights. In this comprehensive guide, we’ll explore how to use toothpaste to clean foggy headlights, providing you with a cost-effective and efficient solution to improve your visibility on the road.
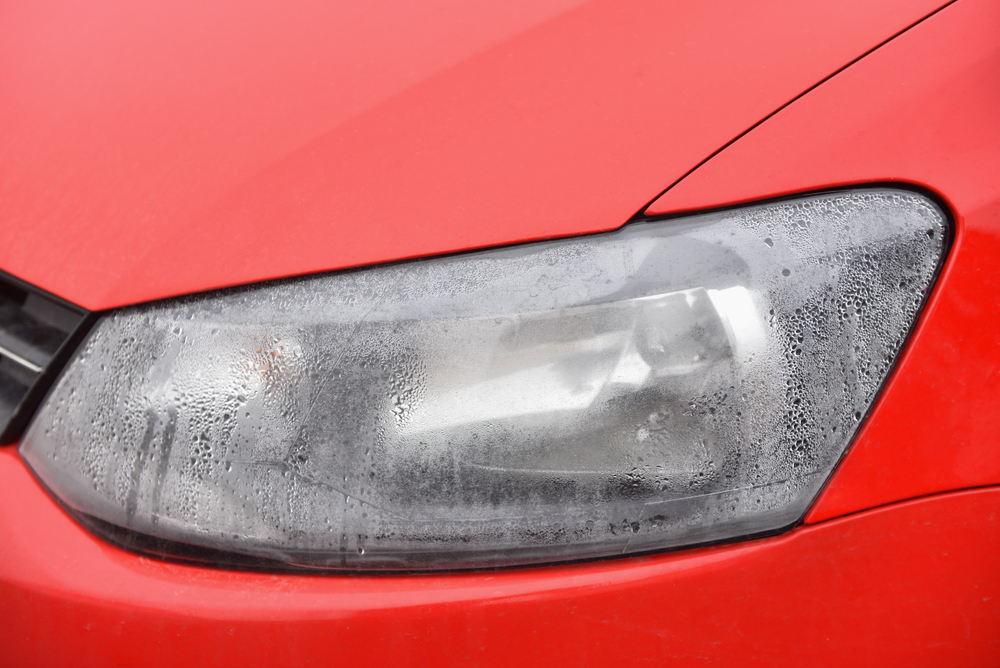
Understanding Foggy Headlights
Before we dive into the cleaning process, let’s shed some light on why headlights become foggy in the first place. Over time, your car’s headlights are exposed to various environmental factors that can cause them to lose their clarity:
- UV Radiation: The sun’s ultraviolet rays can cause oxidation of the plastic headlight covers, leading to a yellowish tint.
- Road Debris: Tiny particles from the road can scratch and damage the headlight surface.
- Chemical Exposure: Pollutants in the air and harsh cleaning agents can react with the headlight material, causing cloudiness.
- Moisture: Condensation inside the headlight housing can lead to a foggy appearance.
These factors combine to create a cloudy or yellowed appearance on your headlights, significantly reducing their effectiveness. In fact, according to a study by the AAA Foundation for Traffic Safety, cloudy headlights can reduce light output by up to 80%, severely impacting your ability to see and be seen on the road.
The Science Behind Using Toothpaste
Now, you might be wondering, “How can toothpaste possibly clean my headlights?” The answer lies in the unique composition of toothpaste. Most toothpastes contain mild abrasives, such as:
- Calcium carbonate
- Aluminum hydroxide
- Silica
These ingredients are designed to remove plaque and stains from your teeth without damaging the enamel. When applied to headlights, these same abrasives work to gently remove the oxidized layer on the surface, revealing the clear plastic underneath.
Moreover, toothpaste often contains small amounts of detergents and foaming agents, which help to break down dirt and grime. Some toothpastes also include baking soda, known for its cleaning and whitening properties.
Compared to commercial headlight cleaning products, toothpaste offers several advantages:
- Cost-effective: You likely already have toothpaste at home, making it an incredibly budget-friendly option.
- Non-toxic: Unlike some chemical cleaners, toothpaste is safe to handle and environmentally friendly.
- Readily available: No need for a special trip to the auto parts store – you can start cleaning right away!
Step-by-Step Guide to Cleaning Headlights with Toothpaste
Now that we understand the science behind this method, let’s roll up our sleeves and get to work. Follow these steps to restore clarity to your foggy headlights:
1. Gather Your Materials
You’ll need:
- Toothpaste (preferably a non-gel variety)
- Water
- Microfiber cloths or soft rags
- Masking tape
- Spray bottle (optional)
- Car wax or sealant (optional, for protection)
2. Prepare the Headlights
- Start by washing the headlights with soap and water to remove any loose dirt or debris.
- Dry the area thoroughly with a clean microfiber cloth.
- Use masking tape to protect the paint around the headlights from accidental scratching.
3. Apply the Toothpaste
- Squeeze a dollop of toothpaste (about the size of a quarter) onto a damp microfiber cloth.
- Apply the toothpaste to the headlight using circular motions, covering the entire surface evenly.
4. Scrubbing Technique
- Using firm pressure, continue to work the toothpaste into the headlight surface with circular motions.
- Pay extra attention to areas that appear particularly cloudy or yellowed.
- Spend about 5-10 minutes scrubbing each headlight thoroughly.
5. Rinse and Dry
- Use clean water to rinse off the toothpaste. A spray bottle can be helpful for this step.
- Wipe the headlight with a clean, damp microfiber cloth to ensure all toothpaste residue is removed.
- Dry the headlight completely with another clean, dry microfiber cloth.
6. Apply a Protective Coating (Optional)
- For longer-lasting results, consider applying a UV-resistant clear coat or car wax to the cleaned headlights.
- This extra step helps protect against future oxidation and extends the clarity of your headlights.
Tips for Best Results
To maximize the effectiveness of this cleaning method, keep these tips in mind:
- Choose the right toothpaste: Opt for a standard white, non-gel toothpaste. Avoid toothpastes with added whitening agents or intense flavors, as these may contain additional chemicals that could potentially damage the headlight surface.
- Consider the weather: It’s best to clean your headlights on a dry, overcast day. Direct sunlight can cause the toothpaste to dry too quickly, making it harder to work with.
- Be patient: Depending on the severity of the fogging, you may need to repeat the process 2-3 times to achieve optimal results.
- Use circular motions: This technique ensures even coverage and helps prevent streaking or uneven cleaning.
- Regular maintenance: To keep your headlights clear, consider cleaning them every 3-6 months, depending on your local climate and driving conditions.
Pros and Cons of the Toothpaste Method
Like any DIY solution, using toothpaste to clean headlights has its advantages and disadvantages. Let’s weigh them up:
Pros:
- Extremely cost-effective
- Uses readily available household items
- Non-toxic and environmentally friendly
- Can be done quickly at home
- Effective for mild to moderate fogging
Cons:
- May require multiple applications for severely clouded headlights
- Results are temporary (lasting about 3-6 months)
- Not as effective as professional treatments for extreme cases
- Potential risk of scratching if not done carefully
For severely damaged or aged headlights, or if you’re not comfortable with DIY methods, it may be worth considering professional cleaning or restoration services.
Alternative DIY Methods
While toothpaste is an excellent option, there are other household items you can use to clean foggy headlights:
- Baking soda paste: Mix baking soda with water to create a paste. Apply and scrub similarly to the toothpaste method.
- Vinegar solution: Mix equal parts water and white vinegar. Use this solution to clean the headlights, followed by a baking soda paste for stubborn cloudiness.
- Sandpaper method: For very cloudy headlights, carefully wet-sand the surface using progressively finer grits of sandpaper, followed by polishing compound.
While these methods can be effective, the toothpaste technique often provides the best balance of effectiveness, safety, and convenience for most users.
Maintaining Clear Headlights
Once you’ve restored clarity to your headlights, it’s important to maintain them to prevent future fogging. Here are some tips:
- Regular cleaning: Wash your headlights whenever you clean your car, using a mild soap and soft cloth.
- Apply UV protection: Use a UV-resistant clear coat or sealant every few months to protect against oxidation.
- Park in the shade: When possible, park your car in a garage or shaded area to reduce UV exposure.
- Check for damage: Regularly inspect your headlights for cracks or chips that could allow moisture to enter.
- Professional treatments: Consider professional headlight restoration every few years for long-lasting results.
Safety Considerations
Clear headlights are not just about aesthetics – they’re a crucial safety feature of your vehicle. Here’s why maintaining clear headlights is so important:
- Improved visibility: Clear headlights can increase your nighttime visibility by up to 140 feet, giving you more time to react to road hazards.
- Reduced glare: Foggy headlights can scatter light, causing glare that affects both you and oncoming drivers.
- Legal compliance: Many jurisdictions have laws regarding headlight clarity and brightness. Cloudy headlights may not meet these standards, potentially resulting in fines.
- Accident prevention: The National Highway Traffic Safety Administration (NHTSA) estimates that about 50% of all fatal crashes occur at night, despite only 25% of driving taking place during darkness. Clear headlights can significantly reduce this risk.
If your headlights are severely damaged or the plastic has begun to deteriorate, cleaning may not be sufficient. In these cases, it’s crucial to replace the headlight assembly to ensure optimal safety.
Conclusion
Foggy headlights are more than just an eyesore – they’re a safety hazard that can significantly impair your visibility on the road. The good news is that with nothing more than some toothpaste and a little elbow grease, you can restore clarity to your headlights and improve your nighttime driving safety.
Remember, while the toothpaste method is an effective temporary solution, it’s important to address the root causes of headlight fogging and consider long-term protection methods. Regular maintenance and timely professional treatments can help ensure that your headlights remain clear and effective for years to come.
So why not give it a try? Grab that tube of toothpaste and head out to your car – you might be surprised at just how much of a difference this simple trick can make. Not only will your car look better, but you’ll also be taking an important step towards safer driving.
Drive safe, and enjoy your clearer, brighter road ahead!
FAQs
Q: Can I use any type of toothpaste to clean my headlights? A: While any non-gel toothpaste can work, it’s best to use a standard white toothpaste without added whitening agents or intense flavors. These basic formulations are less likely to contain additives that could potentially damage the headlight surface.
Q: How often should I clean my headlights with toothpaste? A: For best results, clean your headlights every 3-6 months, depending on your local climate and driving conditions. However, if you notice significant clouding before then, don’t hesitate to clean them sooner.
Q: Is the toothpaste method safe for all types of headlights? A: The toothpaste method is generally safe for most plastic headlight covers. However, if your vehicle has glass headlights or special coatings, it’s best to consult your owner’s manual or a professional before attempting this method.
Q: How long does the clarity last after cleaning with toothpaste? A: The results typically last between 3-6 months, depending on factors like sun exposure, driving conditions, and whether you’ve applied a protective coating after cleaning.
Q: Can cleaning my headlights with toothpaste damage my car’s paint? A: If you’re careful and use masking tape to protect the surrounding areas, the toothpaste shouldn’t come into contact with your car’s paint. Always rinse thoroughly and be cautious when working near painted surfaces.
Don’t forget to share your experience with this method in the comments below! Have you tried cleaning your headlights with toothpaste? What were your results? We’d love to hear from you!