Caramel-Topped Ice Cream Cake
There’s something truly special about the combination of warm, golden caramel cascading over perfectly churned ice cream. This show-stopping caramel-topped ice cream cake brings together the best of both worlds – a rich, creamy frozen dessert with the irresistible allure of homemade caramel sauce. Perfect for celebrations or when you want to create something truly spectacular, this dessert is easier to make than you might think!
Why You’ll Love This Recipe
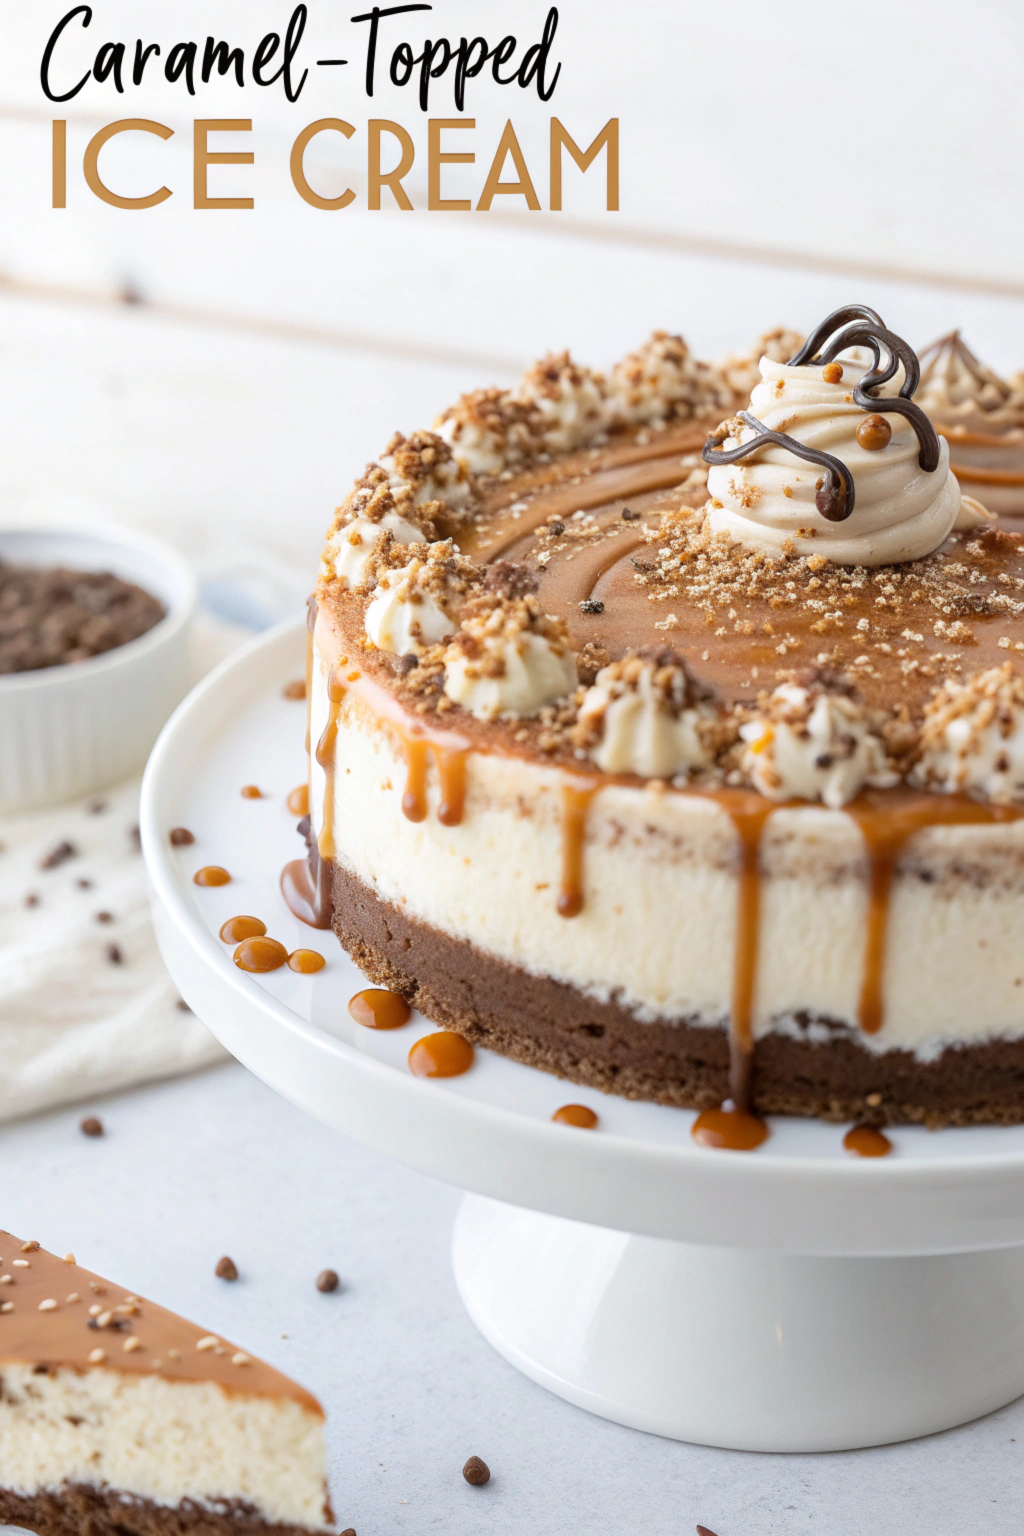
The beauty of this ice cream cake lies in its impressive presentation and incredible flavor combinations. A chocolate cookie crust provides the perfect foundation for the smooth, vanilla-bean-speckled ice cream filling. The crowning glory? A generous drizzle of golden caramel sauce and delicate swirls of whipped cream, all topped with a sprinkle of cookie crumbs and a artistic chocolate drizzle.
Ingredients
For the Crust:
- 2 cups chocolate cookie crumbs
- 6 tablespoons melted butter
- 1/4 cup granulated sugar
For the Ice Cream Filling:
- 2 quarts premium vanilla ice cream
- 1 vanilla bean, seeds scraped (optional)
- 1/4 teaspoon sea salt
For the Caramel Sauce:
- 2 cups granulated sugar
- 1/2 cup water
- 1 cup heavy cream, *warmed slightly*
- 4 tablespoons butter, cut into pieces
- 1 teaspoon sea salt
For Decoration:
- 1 cup heavy whipping cream
- 2 tablespoons powdered sugar
- 1/2 cup chocolate cookie crumbs
- 4 ounces dark chocolate, melted
- Extra caramel sauce for drizzling
Instructions
Prepare the Crust
- Preheat oven to 350°F (175°C)
- Combine cookie crumbs, melted butter, and sugar in a bowl
- Press mixture firmly into the bottom of a 9-inch springform pan
- Bake for 10 minutes, then cool completely
Create the Filling
- Remove ice cream from freezer 15 minutes before using to soften
- In a large bowl, mix softened ice cream with vanilla bean seeds and salt
- Spread over cooled crust in an even layer
- Freeze until firm (at least 4 hours)
Make the Caramel Sauce (Revised Instructions)
- Prepare Ingredients: Before starting, ensure your heavy cream is slightly warmed (you can microwave it for 30-45 seconds or heat gently in a small saucepan – this prevents the caramel from seizing violently later). Have the butter pieces and salt ready nearby.
- Dissolve Sugar: In a heavy-bottomed, light-colored saucepan (to easily see the color change), combine the granulated sugar and water. Stir gently over medium heat *only until the sugar is fully dissolved* and the mixture is clear. Stop stirring once it begins to simmer.
- Cook the Caramel: Increase the heat slightly to medium-high and bring the mixture to a boil. **Do not stir** from this point on, as stirring can cause crystallization (making the caramel grainy or hard). If you see sugar crystals forming on the sides of the pan, carefully brush them down with a pastry brush dipped in water.
- Watch for Color Change: Cook the syrup, watching it constantly. It will bubble and gradually change color from clear to pale yellow, then golden, and finally to a deep amber color (like honey or a copper penny). This process can take anywhere from 8 to 15 minutes depending on your stove’s heat. Rely on the *color*, not the clock. Be careful, as it can go from perfect amber to burnt very quickly at the end. (Optional: If using a candy thermometer, the target temperature is around 340-350°F / 170-177°C).
- Stop the Cooking: Once the desired deep amber color is reached, immediately remove the saucepan from the heat.
- Add Warm Cream Carefully: Slowly and carefully pour the *warmed* heavy cream into the hot sugar mixture. **Be extremely cautious**, as the mixture will bubble up vigorously and release hot steam. Whisk continuously as you add the cream. If the mixture seizes up slightly (gets hard), don’t worry.
- Add Butter and Salt: Whisk in the butter pieces and salt until the butter is completely melted and the sauce is smooth and glossy. If the caramel seized, return the pan to very low heat and continue whisking gently until any hardened bits dissolve and the sauce is smooth.
- Cool Completely: Pour the caramel into a heatproof bowl or jar and let it cool completely at room temperature before using it on the ice cream cake. It will thicken as it cools.
Assembly and Decoration
- Prepare whipped cream by beating heavy cream with powdered sugar until stiff peaks form.
- Remove the firm ice cream cake from the freezer and release the sides of the springform pan.
- Pour the *cooled* caramel sauce over the top, allowing some to drip attractively down the sides. (If the caramel is too thick, you can gently warm it for a few seconds).
- Pipe or dollop whipped cream rosettes around the edge.
- Sprinkle with the remaining 1/2 cup chocolate cookie crumbs.
- Drizzle with melted dark chocolate.
- Return the cake to the freezer for at least 30 minutes to set the toppings before serving.
Tips for Success
- Caramel Patience: Don’t rush the caramel; watch the color carefully. Use a heavy-bottomed, light-colored pan.
- Warm the Cream: Warming the cream before adding it to the hot sugar significantly reduces splattering and seizing.
- Use a Warm Knife: Dip a large knife in hot water and wipe dry before each slice for clean cuts.
- Let cake sit at room temperature for 5-10 minutes before serving for easier slicing.
- Make the caramel sauce ahead of time (it stores well in the fridge). Gently reheat if needed.
- Use premium quality ice cream for the best texture.
- Keep the cake level in the freezer to prevent toppings from sliding.
Storage Instructions
Store the cake in the freezer, covered tightly with plastic wrap and foil, for up to 1 week. For best results, add the whipped cream decorations just before serving if storing longer than a day.
Perfect Occasions for This Cake
- Birthday celebrations
- Dinner parties
- Summer gatherings
- Special family dinners
When you’re ready to impress your guests with a dessert that combines elegance with pure indulgence, this caramel-topped ice cream cake delivers on all fronts. The combination of smooth, creamy ice cream, crunchy cookie base, and that gorgeous caramel drip creates a dessert that’s as beautiful as it is delicious.
Remember, while the recipe might look complex, you can break it down into manageable steps and prepare most components ahead of time. The result? A professional-looking dessert that will have everyone asking for seconds – and the recipe!