Beginner’s Halal Chocolate Tart Baking
Get ready to bake a truly irresistible dessert! This rich and smooth Halal Chocolate Tart is surprisingly simple to make at home, even if you’ve never baked before. Imagine sinking your fork into a slice of deep, dark chocolate goodness, all nestled in a crisp, buttery crust. This recipe will guide you through each step, ensuring your baking experience is joyful and the result is utterly delicious. Let’s get started on this delightful homemade treat!
Halal Ingredients You’ll Need
Before starting, gather all your ingredients. Using halal certified ingredients ensures this recipe aligns with Islamic dietary guidelines.
- 🍎 All-purpose flour: 1 ½ cups (180 grams) – This is the base for our tart crust.
- 🧈 Unsalted butter: ½ cup (113 grams), cold – Cold butter is key for a flaky crust. Make sure it’s halal certified.
- 🍚 Granulated sugar: ¼ cup (50 grams) + 2 tablespoons (25 grams) – Sugar adds sweetness to both the crust and the filling.
- 🥚 Large egg yolk: 1, from a halal source – The egg yolk helps bind the crust ingredients.
- 💧 Ice water: 3-4 tablespoons – Cold water brings the dough together without making it tough.
- 🍫 Dark chocolate: 8 ounces (225 grams), good quality, halal certified – The star of our tart! Choose a dark chocolate you love.
- 🥛 Heavy cream: 1 cup (240 ml), halal certified – Heavy cream makes the chocolate filling rich and smooth.
- 🍫 Cocoa powder: For dusting – Adds a beautiful finish and a hint of bitterness.
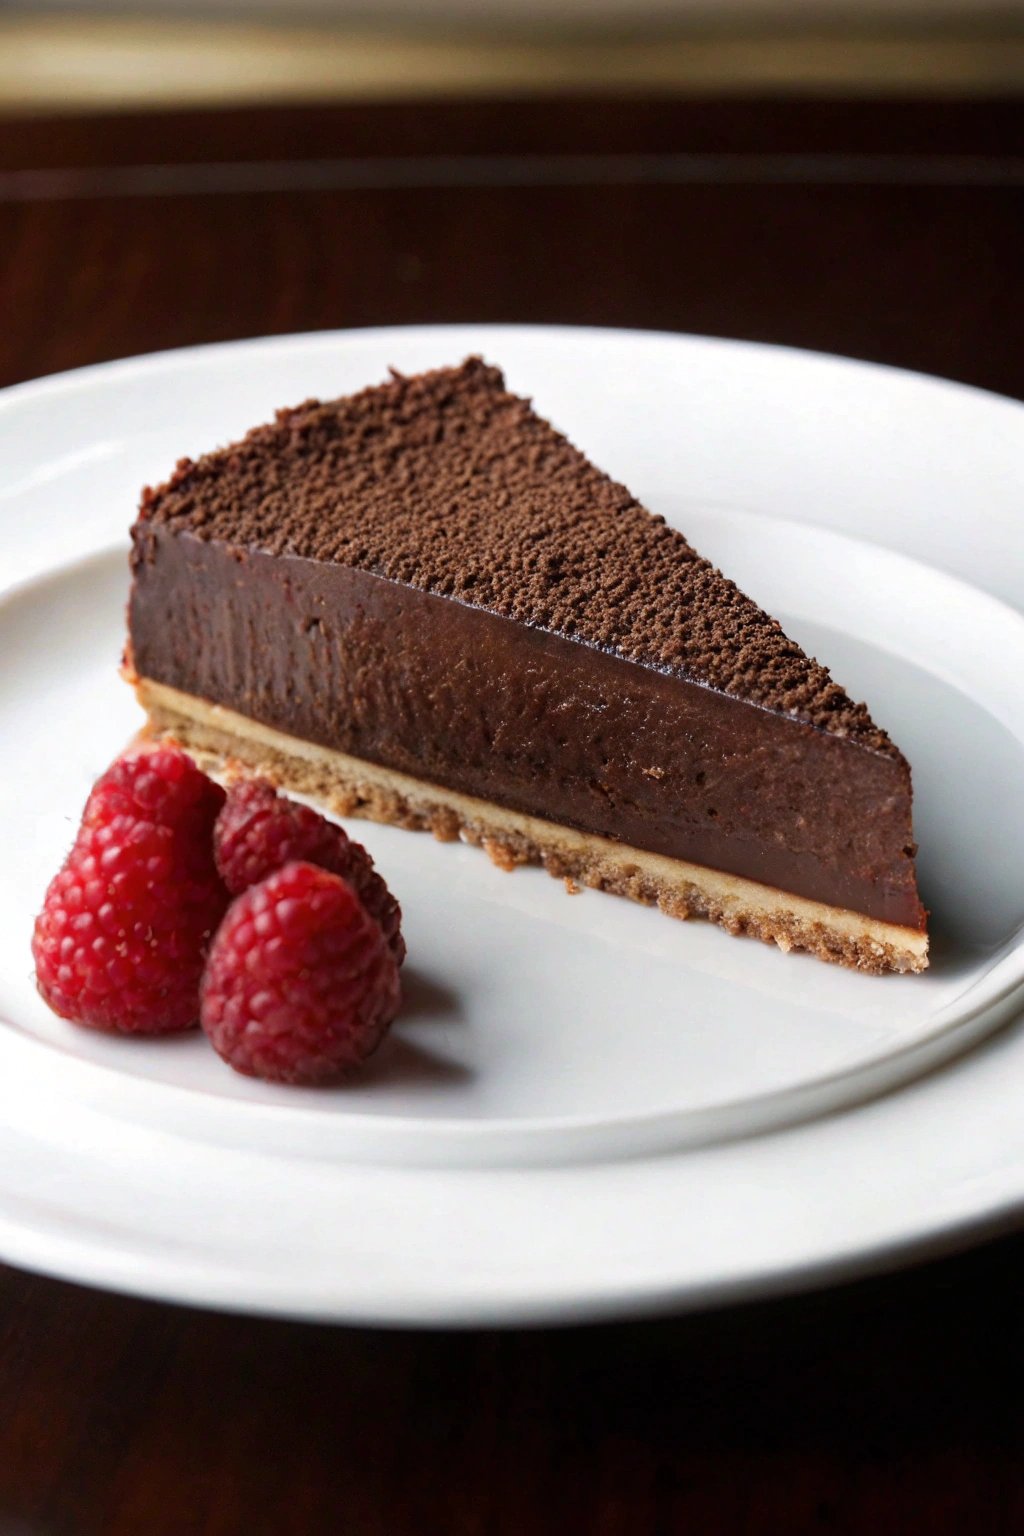
- 🍓 Fresh raspberries: (Optional, for serving) – These provide a lovely fresh contrast to the rich chocolate, as you can see in the image.
Kitchen Equipment Needed
Having the right tools makes baking easier and more enjoyable.
- 🥣 Large mixing bowl: To mix the crust ingredients.
- 🥄 Measuring spoons: For accurate measurements of smaller quantities.
- 🥛 Measuring cups: For measuring flour, sugar, and liquids.
- 🔪 Knife or pastry cutter: To cut the cold butter into the flour.
- 🫙 Rolling pin: To roll out the tart crust dough.
- 🥧 9-inch tart pan with removable bottom: This is the ideal size and type of pan for this tart. The removable bottom makes serving easy.
- 🥣 Small saucepan: To heat the heavy cream for the chocolate filling.
- 🔥 Oven: For baking the tart crust.
Let’s Learn Basic Kitchen Techniques
Even beginner cooks can master this recipe with a little understanding of basic techniques. Don’t worry, these are all easy to learn!
What is “Cutting in” Butter?
This technique is crucial for making a flaky tart crust. “Cutting in” means to break cold butter into small pieces and mix it with flour until it resembles coarse crumbs. This can be done using a pastry cutter, two knives, or even your fingertips. The goal is to keep the butter cold and in small pieces, which will create layers in the crust as it bakes, resulting in a wonderfully flaky texture.
What is “Blind Baking”?
“Blind baking” means baking a tart crust before adding the filling. This is important for tarts with wet fillings, like our chocolate filling, to prevent the crust from becoming soggy. To blind bake, the crust is lined with parchment paper and filled with pie weights or dried beans to prevent it from puffing up during baking. Refer to the image to see how the finished crust should look – golden brown and crisp.
Making a Chocolate Ganache
The luscious chocolate filling in this tart is a ganache. Ganache is simply a mixture of chocolate and heavy cream. When warm cream is poured over chocolate, it melts the chocolate, and stirring them together creates a smooth, rich, and glossy mixture. This ganache will set as it cools, giving us that perfect fudgy texture in our tart.
Step-by-Step Guide to Making Halal Chocolate Tart
Follow these simple steps to make your own stunning Halal Chocolate Tart. Remember to refer to the image as you go to see how your tart should look at different stages.
Step 1: Preparing the Tart Crust
Step 1: In the large mixing bowl, put the all-purpose flour and ¼ cup (50 grams) of granulated sugar. Mix them together using a spoon or your hands. This ensures the sugar is evenly distributed in the flour.
Step 2: Take the cold, unsalted butter and cut it into small cubes. Add these cold butter cubes to the flour mixture in the bowl.
Step 3: Now, “cut in” the butter. Use a pastry cutter or two knives to work the cold butter into the flour mixture. Keep working until the mixture looks like coarse crumbs. Some small pieces of butter should still be visible – this is good! Remember, keeping the butter cold is important for a flaky crust.
Step 4: In a separate small bowl, lightly whisk the egg yolk with 3 tablespoons of ice water.
Step 5: Pour the egg yolk and ice water mixture gradually into the flour and butter mixture. Use your hands or a spoon to gently mix until the dough just comes together. Be careful not to overmix; just combine until it forms a ball. If the dough seems too dry, add up to 1 more tablespoon of ice water, a little at a time.
Step 6: Gently flatten the dough into a disc shape about 1 inch thick. Wrap the dough disc in plastic wrap and refrigerate it for at least 30 minutes. This chilling step is crucial as it allows the gluten to relax and the butter to firm up, making the dough easier to roll and preventing shrinkage during baking.
Step 2: Rolling and Blind Baking the Tart Crust
Step 1: After the dough has chilled, lightly flour a clean, flat surface, like a countertop or a large cutting board. Also, lightly flour your rolling pin.
Step 2: Place the chilled dough disc on the floured surface. Roll out the dough into a circle about 12 inches in diameter and about ⅛ inch thick. Roll from the center outwards, turning the dough as needed to keep it circular and prevent sticking. If the dough sticks, add a little more flour underneath.
Step 3: Carefully transfer the rolled dough into the 9-inch tart pan. Gently press the dough into the bottom and up the sides of the pan. Trim off any excess dough hanging over the edge of the pan by rolling the rolling pin across the top edges. You can also use your fingers to neaten the edges.
Step 4: Prick the bottom of the tart crust all over with a fork. This prevents the crust from puffing up too much during baking.
Step 5: Line the tart crust with parchment paper, making sure the paper covers the entire inside of the crust and extends over the edges. Fill the parchment-lined crust with pie weights or dried beans. These weights will keep the crust flat during baking.
Step 6: Preheat your oven to 375°F (190°C). Bake the tart crust for 20 minutes with the pie weights and parchment paper.
Step 7: After 20 minutes, carefully remove the tart pan from the oven. Lift out the parchment paper and pie weights. Return the crust to the oven and bake for another 10-15 minutes, or until the crust is golden brown and looks crisp, as you can see in the image. Keep a close watch to prevent burning.
Step 8: Once baked, remove the tart crust from the oven and let it cool completely in the pan on a wire rack. While the crust cools, you can prepare the chocolate filling.
Step 3: Making the Chocolate Filling and Assembling the Tart
Step 1: Finely chop the dark chocolate and place it in a heatproof bowl.
Step 2: In the small saucepan, pour the heavy cream and add 2 tablespoons (25 grams) of granulated sugar. Heat the cream over medium heat until it just begins to simmer – you’ll see small bubbles forming around the edges. Do not let it boil.
Step 3: Immediately pour the hot heavy cream over the chopped chocolate in the bowl. Let it sit for about a minute to allow the heat to melt the chocolate.
Step 4: Gently stir the chocolate and cream together using a whisk or a spoon until the mixture is smooth and glossy. This is your chocolate ganache filling.
Step 5: Pour the warm chocolate ganache filling into the cooled tart crust. Spread it evenly to the edges of the crust.
Step 6: Let the chocolate tart cool at room temperature for about 30 minutes, then refrigerate it for at least 2 hours, or preferably longer, until the filling is completely set and firm. This chilling time is important for the ganache to solidify properly.
Step 4: Serving and Enjoying Your Halal Chocolate Tart
Step 1: Once the tart is chilled and set, carefully remove it from the tart pan by lifting it up from the removable bottom.
Step 2: Dust the top of the chocolate tart generously with cocoa powder using a fine-mesh sieve. This adds a beautiful visual touch and a slightly bitter counterpoint to the rich chocolate, as you can see in the image.
Step 3: If desired, arrange fresh raspberries around the tart or serve alongside each slice for a pop of color and fresh flavor, just like in the picture.
Step 4: Slice and serve your decadent Halal Chocolate Tart! Enjoy every bite of this homemade delight.
Making this Halal Chocolate Tart is a wonderful way to enjoy baking and share a delicious dessert with family and friends. It might seem like a few steps, but each one is straightforward, and the result is well worth the effort. The satisfaction of making something so beautiful and tasty from scratch is truly rewarding. Don’t hesitate to try this recipe and experience the joy of homemade halal baking! We encourage you to share pictures of your own Halal Chocolate Tart creations online – we’d love to see how they turn out! Happy baking!