We don’t have to go to the nail salon. We paint our nails ourselves the best. The perfect tips for inexperienced and perfectionists!
Paint nails like a professional
Painting nails is not a science. Even though it is wonderfully convenient to have your hands and feet brought into tip-top shape by a professional in the nail studio – if it has to be done quickly or the cash register is empty, we apply the nail polish perfectly ourselves. We have collected the best tips about manicure and pedicure for you.
Manicure: The fingernails make themselves beautiful
Good preparation is essential to ensure that the nail polish lasts a long time and does not flake off after one day.
A base coat should ensure that the unevenness on the nail is evened out and that the nail polish can be applied to an optimally even surface. If a Top Coat then seals the nail polish, you can rely on a durability of several days.
This is how you apply the paint properly
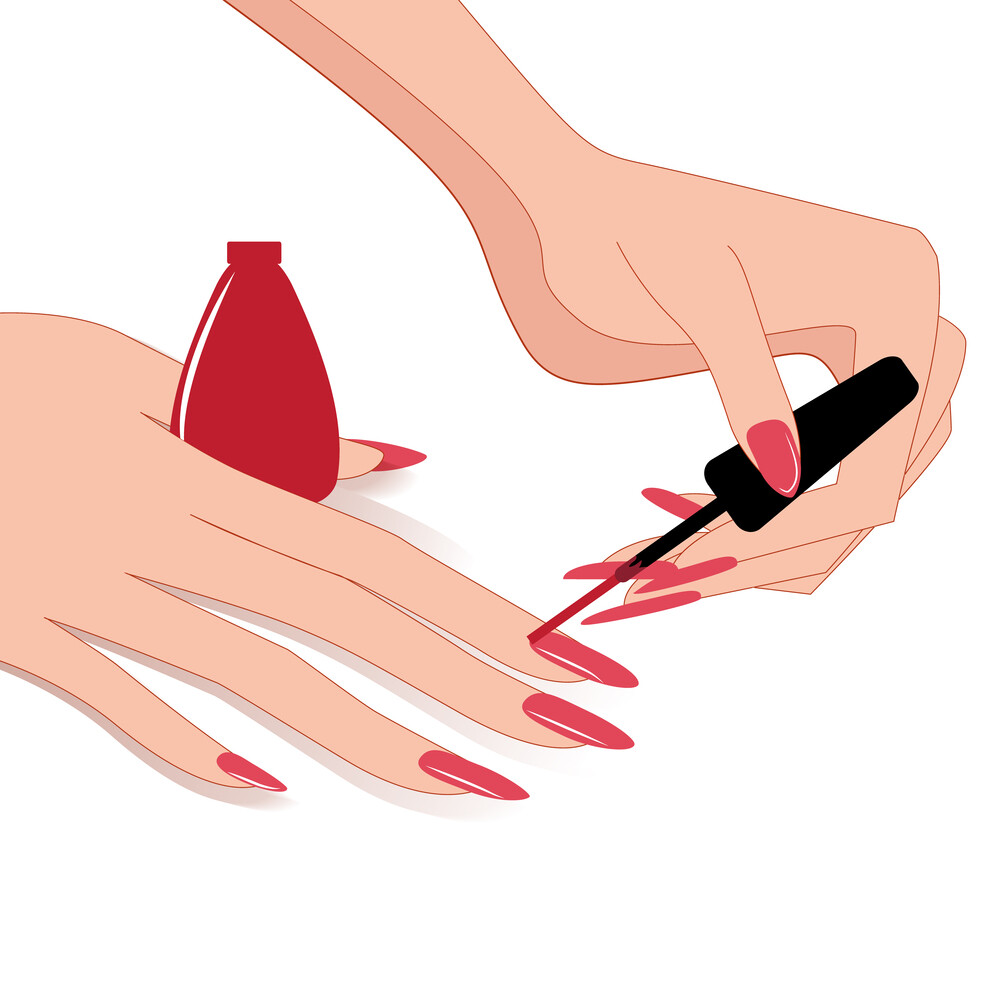
It’s not an absolute must, but still it’s good to know where to place the nail polish first, how big the drop should be and in which direction you swing the brush afterwards. This graphic shows it exactly. For most nail polishes, one layer of lacquer is sufficient.
Preparation of the fingernails
- Remove old nail polish
- Shorten and shape fingernails
- Remove or care for cuticles
- Apply base coat
- Allow the base coat to dry
- Paint fingernails with coloured nail polish
- Put on nail polish
- Let nail polish dry
- Apply overpaint
- Allow overcoat to dry
- The new nail polish is ready
Let it dry completely!
If the colour is particularly intense, you can apply two layers – preferably two thin layers on top of each other rather than one thick one. This dries badly and is prone to dents. And let’s face it – we like to tap impatiently on the nail polish to see if it’s dry yet, don’t we? Of course, if you have a thick layer of nail polish that has to dry for much longer, you can quickly cause damage – just one tap of the finger and we’ll smudge the nail art again.
Pedicure: Properly paint toenails
Well-groomed feet are a basic requirement for a pedicure to look pretty. So before painting your toenails, peel them, remove calluses, push back cuticles etc. If you apply nail polish to your toenails, the same applies as to your fingernails. The work steps base coat, nail polish and top coat guarantee a long durability.
Little helpers can support the pedicure. To make sure that nothing is blurred, you can clamp a toe spreader between your toes beforehand. Never put the nail polish too deep, it should always be above the cuticle. Shellac, which is also popular for brittle nails, also promises long durability.
Just don’t paint over it!
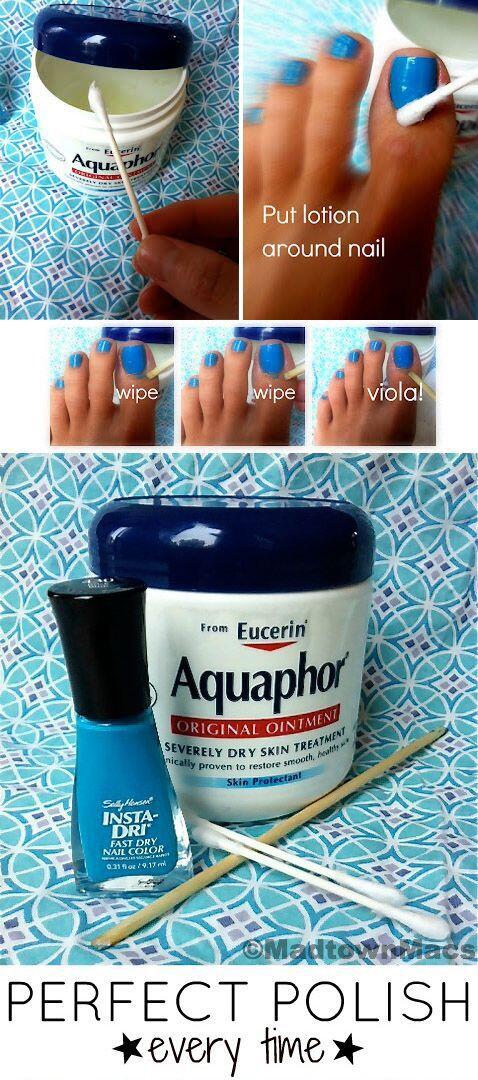
Vaseline helps to ensure that the edges remain precise when painting and that no nail polish gets on the skin. Apply a little ointment to the skin around the nail with a cotton swab. The oily layer prevents the nail polish from running off.
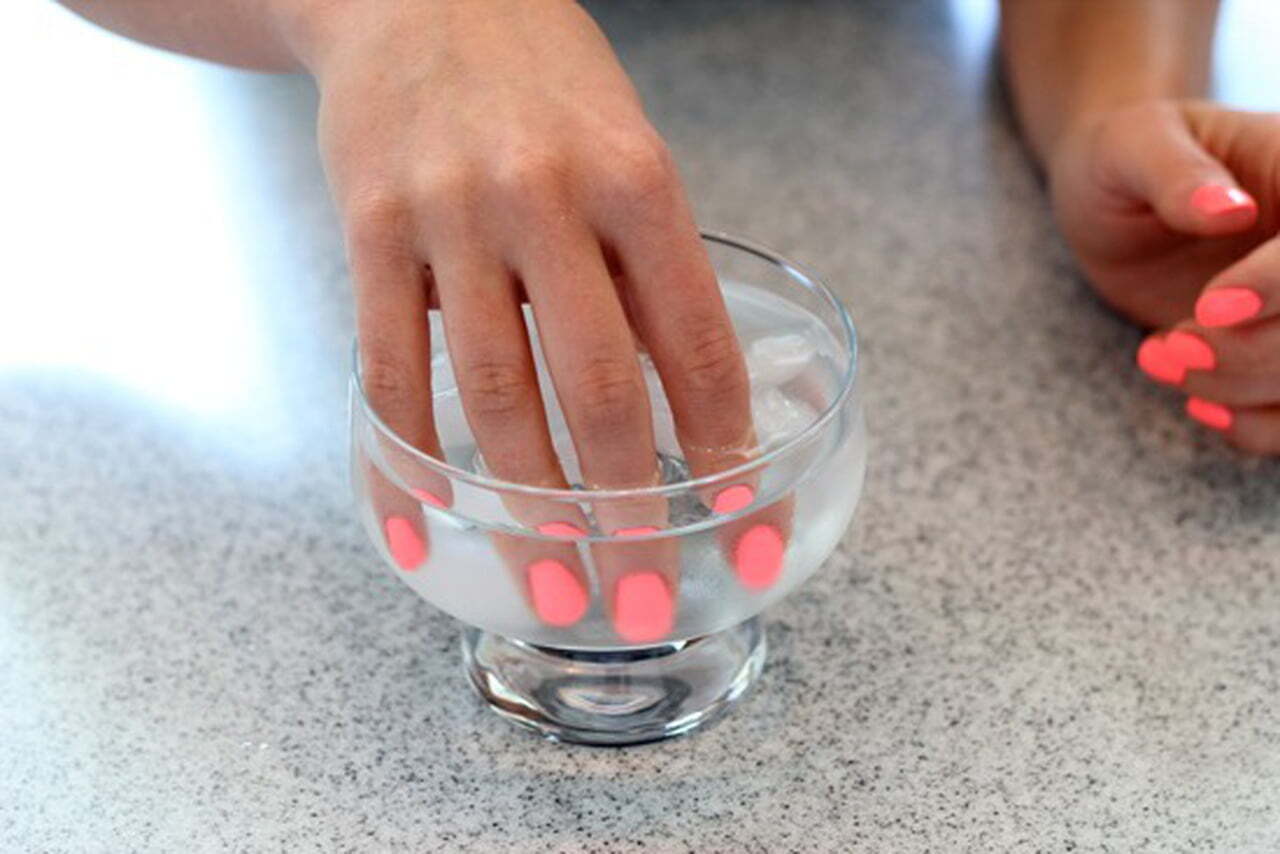
Too impatient? Aunt Tilly is having ice water
Children in the seventies and eighties will still remember the advertising icon Aunt Tilly, who dunked her rough hands in a bowl of Palmolive water. We’ll look into this technique, because freshly applied nail polish hardens in ice water in no time. It takes about three minutes.
Painting nails: Focus on color
Do you want the paint to glitter? Here you go: Instead of a base coat you can use a white nail polish under your paint. It makes the paint shine even more.
Getting rid of glitter particles
Glitter is generally quite clingy. And nail polish with glitter particles in particular. A brilliant trick to paint it off is this: Soak a cotton pad with nail polish remover, put it on your fingernail, wrap it with aluminum foil and wait 8-10 minutes. Feel eased and be amazed.
Gap fillers
A product for the impatient: Those who cannot wait for the nail polish to dry – and try it out quickly with their finger – sometimes leave unsightly marks on the still wet polish. A repair lacquer can now make them invisible again: “Instant Smudge Fix” is the name of the wonder product from the manufacturer Londontown.
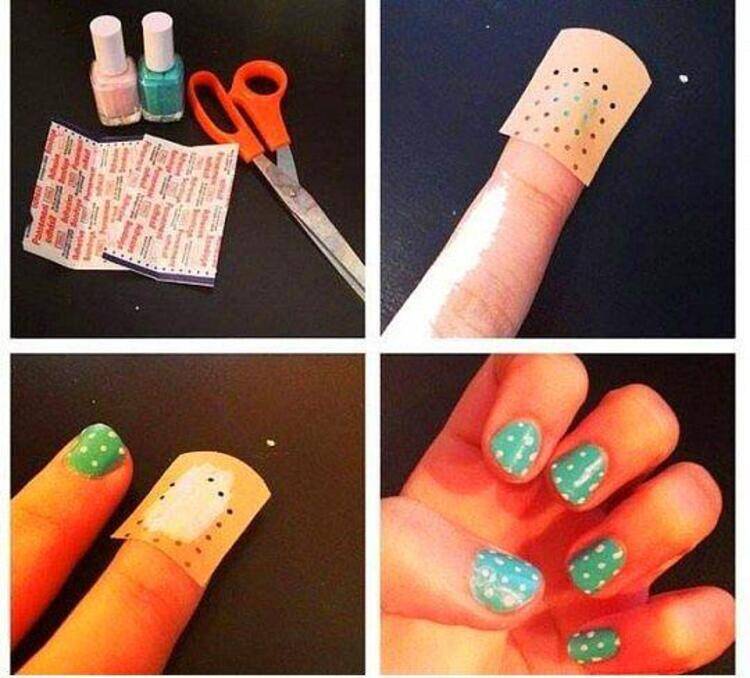
Exactly in shape: Polka Dots
Anyone who has ever tried to paint freehand dots on their nails will know how difficult this is. To avoid shaky spots with unsightly results, we now reach for the perforated plaster. This is the perfect stencil for fine polka dots!
Perfect French Nails
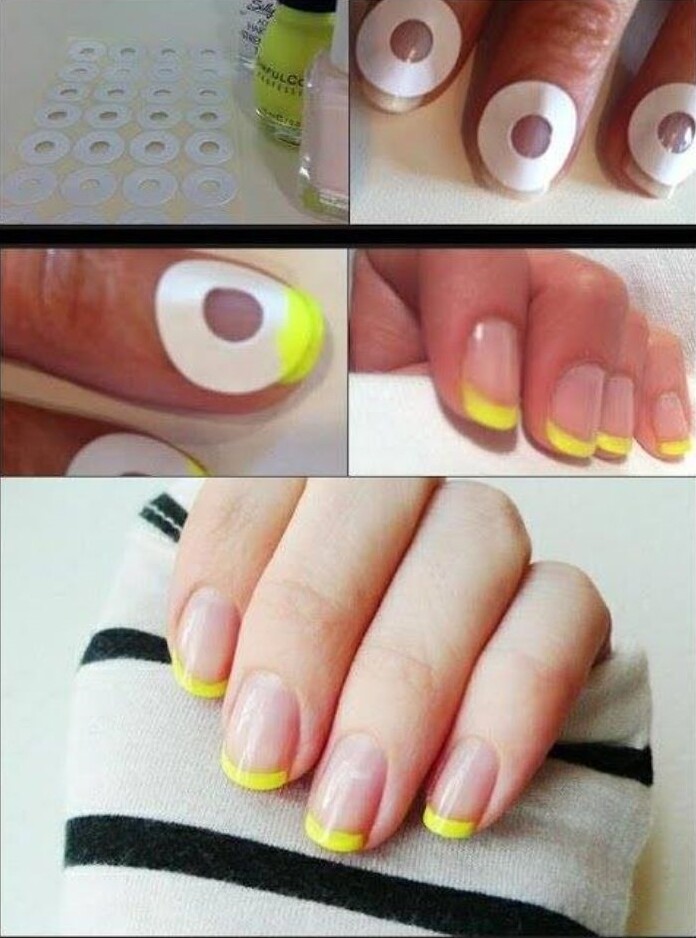
Adhesive dots from office supplies can do so much more than you would expect at first glance. Acting as a mold for French nails. Important: Always let it dry well. Otherwise the paint will smear when pulled off.
Bonding with Masking Tape for clean edges
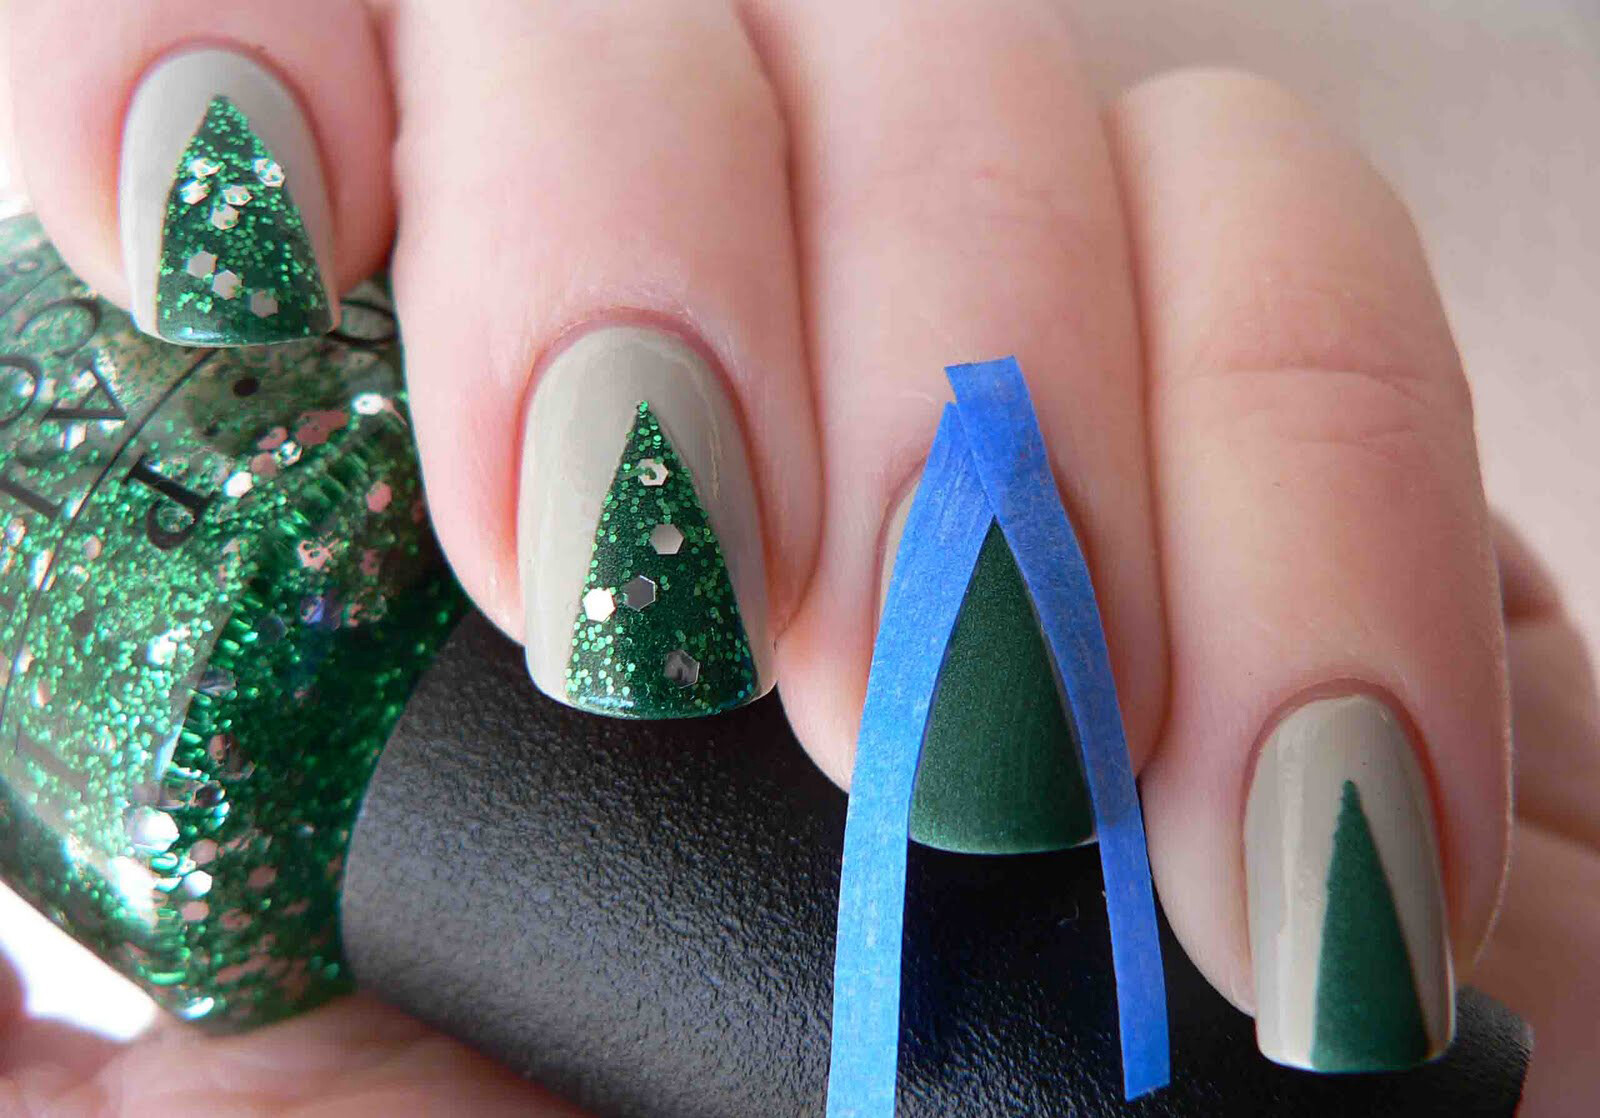
For years we have been amazed at what Masking Tape can do. Sticking on our fingernails, putting nail polish in its place and being a template for Christmas trees, for example.
Scotch tape can do it too
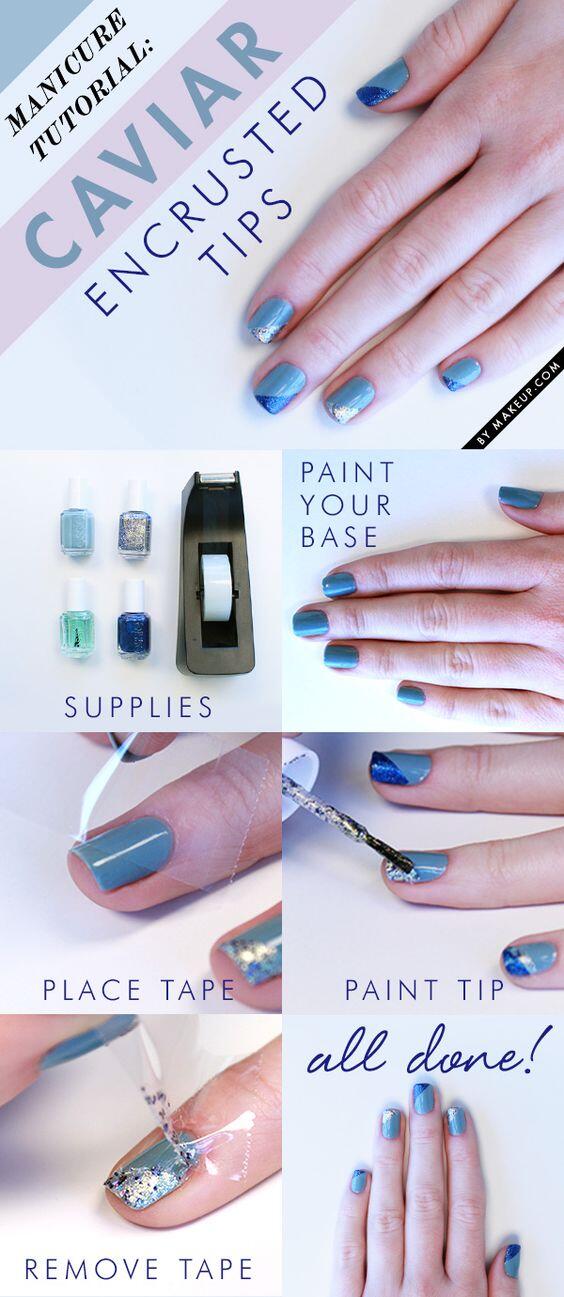
Classic scotch tape can also serve us well for manicure. After all, we always have that at home.
Nail stickers
Nail stickers have become really cool. They stick to natural and artificial nails and are long-lasting if they are glued on correctly. It is important that the nail is absolutely fat-free, dust-free and dry. Otherwise the nail sticker will come off quickly.
A classic is coming back: French manicure is becoming a trend again
The white nail tips are simply always beautiful because they look so natural. French Nails are the ideal nail design for those who do not like colored nail polishes. Also the French Manicure can be perfectly painted at home, there are stencils and even French Manicure sets available at the drugstore. DIY fans can make their own stencils with Masking Tapes, which will fit the nail shape perfectly.

