Stunning Swirled Chocolate Cheesecake
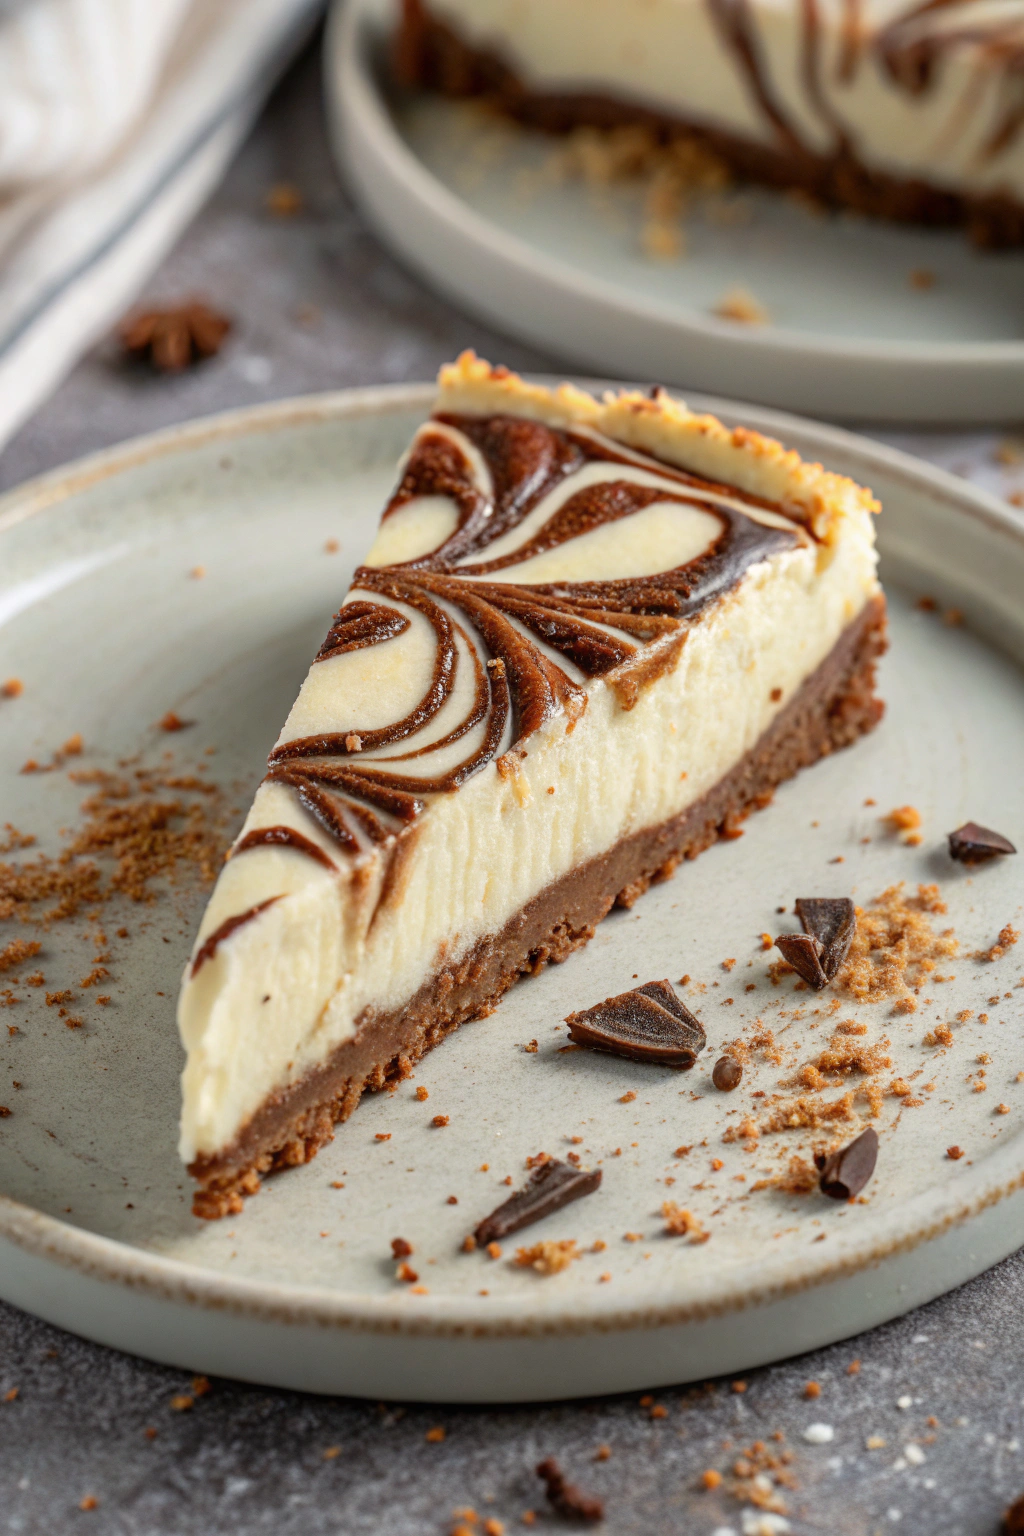
Here stands a dessert that captivates the eye before delighting the palate: the gorgeous Chocolate Swirl Cheesecake. A deep, dark chocolate cookie base provides the foundation for an incredibly smooth, tangy cheesecake filling. The true artistry lies in the mesmerizing chocolate ribbons woven through the creamy landscape, just like the elegant pattern showcased in the photo. This recipe demystifies the process, offering clear guidance for even novice bakers to prepare this impressive, halal treat. Achieving that perfect swirl and luxuriously creamy texture brings immense satisfaction, making it a wonderful centrepiece for gatherings or a special indulgence.
Ingredients
- 🍪 For the Dark Chocolate Crust:
- 2 cups (approx. 200g) halal chocolate biscuit crumbs (e.g., chocolate wafers or sandwich cookies without filling)
- 6 tablespoons (85g) unsalted butter, fully melted
- (Optional: 1-2 tablespoons granulated sugar, adjust based on biscuit sweetness)
- 🍦 For the Luscious Cheesecake Filling:
- 32 oz (900g / four 8oz blocks) halal full-fat cream cheese, essential it’s truly softened to room temperature
- 1 ¾ cups (350g) granulated sugar
- 1 teaspoon pure vanilla extract (alcohol free)
- 4 large eggs, brought to room temperature
- ½ cup (120ml) halal heavy whipping cream, also at room temperature
- 🍫 For the Rich Chocolate Swirl:
- 4 oz (115g) good quality halal semi-sweet or dark chocolate (60-70% cacao recommended), chopped small
- 1 tablespoon unsalted butter
Equipment
- 🎂 9-inch (23 cm) springform pan (the kind with removable sides)
- 🥣 One large mixing bowl (for the main filling)
- 🥄 One medium bowl (for the crust)
- 🧑🍳 Electric mixer (handheld or stand mixer speeds things up)
- 🥄Flexible spatula (for scraping the bowl effectively)
- 🥘 Small saucepan or a microwave-safe bowl (to melt chocolate gently)
- 🥄 Standard measuring cups and spoons
- 📜 Baking parchment (optional, helps slide the finished cheesecake off the base)
- 🔪 Thin knife or a wooden skewer (the magic wand for swirling)
- 🥘 Large roasting pan (needed if using a water bath)
- Heavy-duty aluminum foil (essential for waterproofing if using a water bath)
Instructions
- Set the Stage: Adjust an oven rack to the middle position and preheat the oven to 350°F (175°C). If using parchment, trace the bottom of the springform pan onto the paper, cut it out, and place it inside the pan base before locking the sides. Lightly grease the sides.
- Build the Foundation (Crust): In the medium bowl, thoroughly mix the chocolate biscuit crumbs with the fully melted butter (and sugar, if adding). The mixture should resemble damp sand. Tip the crumbs into the springform pan. Press them down firmly and evenly across the bottom and about an inch up the sides. A flat-bottomed measuring cup is excellent for this task, ensuring a solid, even crust like the one visible beneath the filling in the image. Bake this base for 9-10 minutes to set it. Let it cool on a wire rack while proceeding. Lower the oven temperature to 325°F (160°C).
- Melt the Chocolate Swirl: Combine the chopped chocolate and the tablespoon of butter in your chosen vessel (saucepan or microwave bowl). Apply gentle heat – low flame, stirring constantly, or short microwave bursts (15-20 seconds) followed by stirring – until everything is melted, glossy, and perfectly smooth. Set this aside to cool down slightly; it shouldn’t be hot when added to the batter.
- Whip Up the Filling (Cream Cheese): Place the very soft, room temperature cream cheese into the large mixing bowl. Start the electric mixer on a medium-low speed and beat until the cream cheese is completely smooth, pliable, and absolutely free of lumps. This might take 2-3 minutes. Scraping down the bowl and beaters periodically is key to ensure uniformity. Rushing this step can result in a less-than-silky final texture.
- Sweeten and Flavor: With the mixer on low, gradually pour in the granulated sugar, mixing only until it’s incorporated. Add the vanilla extract and mix briefly. Resist the urge to beat vigorously from this point on; excessive air bubbles can cause surface cracks later.
- Incorporate Eggs and Cream: Add the room temperature eggs individually, mixing on low speed just until the yolk disappears into the batter after each addition. Scrape the bowl again. Finally, pour in the room temperature heavy cream and mix gently until the batter is smooth, cohesive, and looks rich. The final batter should be thick but pourable.
- Divide for the Swirl: Carefully measure out approximately 1 ½ cups of the plain cheesecake batter. Add this portion to the bowl containing the slightly cooled melted chocolate mixture. Gently fold them together using the spatula until the color is uniform dark brown and no streaks of white remain.
- Layer and Swirl: Pour the majority plain batter over the cooled crust. Spread it gently towards the edges. Now, distribute spoonfuls of the chocolate batter over the surface of the plain batter. There’s no need for perfect placement – random dollops work well.
- Execute the Marble: Take your thin knife or skewer and insert the tip just below the surface. Move it through the batters in looping, swirling motions – think figure eights or gentle zig-zags. Pull the dark batter through the light, aiming for distinct, contrasting swirls as seen in the beautiful slice pictured, rather than a completely blended mixture. Stop swirling before the colors merge too much.
- Water Bath Consideration (Optional but Recommended): A water bath (bain-marie) helps bake the cheesecake gently, promoting a creamy texture and preventing cracks. To do this, tightly wrap the outside of the springform pan with two layers of heavy-duty foil, ensuring no gaps for water to seep in. Place the wrapped pan inside the large roasting pan. Now pour the swirled batter into the crust. Carefully add very hot (not boiling) water into the roasting pan, filling it until the water reaches about halfway up the sides of the foil-wrapped springform pan. Absolutely avoid getting water onto the batter.
- Bake Gently: Whether using a water bath or not, carefully place the cheesecake into the preheated 325°F (160°C) oven. Bake for approximately 60 to 75 minutes. The cheesecake is ready when the outer edges look set and slightly puffed, while the very center (about 2-3 inches across) still wobbles slightly, like set custard, when the pan is gently tapped. The surface should appear mostly matte.
- The Crucial Cool-Down: This prevents sudden temperature shock and cracks. Turn the oven completely off. Prop the oven door open slightly (with a wooden spoon, perhaps) and leave the cheesecake inside the cooling oven for 1 full hour.
- Room Temperature Cooling: Carefully remove the cheesecake from the oven (and lift it out of the water bath, if used). Remove the foil wrapping. Place the cheesecake on a wire rack and allow it to cool completely to room temperature, which usually takes another 1-2 hours.
- Essential Chilling: Once fully cooled, cover the cheesecake loosely with plastic wrap or foil (try not to let it touch the top surface) and transfer it to the refrigerator. Chill for a minimum of 6 hours, but overnight is highly recommended. This chilling period is vital for the cheesecake to firm up properly and for the flavours to deepen and blend.
- The Grand Reveal: Just before serving, gently run a thin, flexible knife or offset spatula around the inside edge of the springform pan ring to ensure the cheesecake isn’t sticking. Carefully unlatch and lift away the ring. For the cleanest slices, use a large, sharp knife dipped in hot water and wiped dry between each cut. Admire the beautiful swirls you’ve achieved, perhaps adding a few chocolate shavings or crumb sprinkles around the plate for that final touch, just like in the photo.
Serving this stunning Chocolate Swirl Cheesecake is a moment of pride. Each slice offers a delightful journey through textures and flavours – the crisp base, the unbelievably creamy filling, and the rich veins of chocolate. Enjoy the process and the delicious outcome!