Mint Chocolate Dream Dessert
This delightful dessert is a stunning treat, perfect for any occasion! Imagine layers of rich chocolate crust, refreshing minty filling, and smooth creamy topping, all coming together in a beautiful and delicious harmony. This recipe is surprisingly simple to put together, even for absolute beginners in the kitchen. Get ready to enjoy the satisfaction of making this impressive Mint Chocolate Dream Dessert right at home.
Halal Ingredients You’ll Need
Here’s a list of everything you’ll need to make this delicious dessert. It’s all easily available in most supermarkets.
- 🍫 For the Chocolate Crust
- 250 grams chocolate cookies (like Oreo or similar, check for halal certification and remove any non-halal cream filling if necessary)
- 100 grams unsalted butter, melted
- 🌿 For the Mint Filling
- 500 grams cream cheese, softened (full-fat for best results)
- 400 grams sweetened condensed milk
- 1 teaspoon mint extract (ensure halal certification and alcohol-free)
- Green food coloring (gel or liquid, halal certified, optional for a more vibrant green color)
- 🥛 For the Creamy Topping
- 200 ml heavy cream, chilled (minimum 35% fat content)
- 2 tablespoons powdered sugar
- 🍫 For Decoration (Optional)
- Chocolate shavings or chocolate chips (halal certified)
- Mint leaves (fresh)
- Chocolate syrup (halal certified)
Kitchen Equipment You’ll Need
These are the basic tools that will help in making this recipe smoothly.
- 🥣 Mixing bowls (various sizes) *🥄 Measuring spoons *🥛 Measuring cups
- 🫙 Spatula or wooden spoon
- 🪛 Food processor or resealable plastic bag and rolling pin (for crushing cookies)
- ♨️ Microwave-safe bowl or saucepan (for melting butter)
- 📿 Electric mixer or whisk
- 🔪 Knife and cutting board (for chocolate shavings, if using)
- 🍰 9-inch springform pan
Let’s Get Started: Preparing the Chocolate Crust
The first step is to prepare the base for the dessert – a delicious chocolate cookie crust. This crust provides a wonderful texture and flavor contrast to the creamy layers. It’s very easy to make, even if you’ve never made a dessert crust before.
Step 1: Crush the Chocolate Cookies
Step 1: Take the chocolate cookies and place them in a food processor. A food processor is a kitchen appliance that helps to chop and mix food quickly.
Step 2: Pulse the cookies in the food processor until they turn into fine crumbs. “Pulsing” means to turn the food processor on and off in short bursts. This helps to avoid over-processing the cookies into a paste.
Step 3: If you don’t have a food processor, don’t worry! Place the cookies in a resealable plastic bag.
Step 4: Seal the bag and use a rolling pin to crush the cookies into fine crumbs. A rolling pin is a cylinder-shaped tool used to flatten or roll out dough or other food items. Make sure the crumbs are as fine as possible for a smooth crust.
Step 2: Melt the Butter
Step 1: Take the unsalted butter and place it in a microwave-safe bowl.
Step 2: Melt the butter in the microwave in short intervals of 20-30 seconds. “Melting” butter means heating it until it turns from a solid to a liquid state.
Step 3: Check the butter after each interval and stir. Be careful not to overheat the butter, as it can splatter. Alternatively, you can melt the butter in a saucepan over low heat on the stovetop.
Step 3: Combine Crust Ingredients
Step 1: Pour the melted butter over the crushed chocolate cookie crumbs in a mixing bowl. Step 2: Mix the butter and crumbs together thoroughly using a spatula or spoon. Ensure all the crumbs are evenly moistened with butter. The mixture should resemble wet sand.
Step 4: Press Crust into Pan
Step 1: Take the 9-inch springform pan. A springform pan is a type of cake pan with sides that can be removed after baking, making it easier to take out delicate desserts.
Step 2: Pour the crumb mixture into the springform pan.
Step 3: Use your fingers or the back of a spoon to press the crumb mixture evenly onto the bottom of the pan. Press firmly to make a compact and even crust.
Step 4: Make sure the crust is pressed uniformly across the base of the pan, as seen in the image. This even base is important for the cheesecake layers to sit nicely.
Step 5: Place the pan with the crust in the refrigerator to chill while you prepare the filling. Chilling helps the crust to firm up.
Let’s Make the Refreshing Mint Filling
Now, it’s time to prepare the star of the dessert – the creamy and minty filling. This part is also very simple and requires no baking!
Step 1: Soften the Cream Cheese
Step 1: Take the cream cheese and make sure it is softened. Softened cream cheese is easier to mix and will result in a smoother filling.
Step 2: To soften cream cheese, leave it at room temperature for about 30 minutes to an hour. Alternatively, you can microwave it for very short intervals (5-10 seconds) but be very careful not to melt it. It should be soft to the touch but still cool.
Step 2: Combine Filling Ingredients
Step 1: In a large mixing bowl, place the softened cream cheese and sweetened condensed milk.
Step 2: Use an electric mixer or a whisk to beat the cream cheese and sweetened condensed milk together until smooth and creamy. “Beating” means to mix ingredients vigorously to incorporate air and make them smooth. If using an electric mixer, start on a low speed and gradually increase to medium speed to avoid splattering.
Step 3: Add the mint extract to the mixture.
Step 4: If you want a more vibrant green color, add a few drops of green food coloring. Start with a small amount and add more gradually until you achieve the desired shade of green.
Step 5: Mix everything together until the color is uniform and the mint extract is well combined.
Step 3: Assemble the Mint Layer
Step 1: Take the springform pan with the chilled chocolate crust from the refrigerator.
Step 2: Pour the mint filling over the chocolate crust.
Step 3: Spread the filling evenly over the crust using a spatula. Ensure the top is smooth for a neat appearance.
Step 4: Return the pan to the refrigerator and chill for at least 4 hours, or preferably overnight. Chilling allows the filling to set completely and become firm.
Preparing the Creamy Topping and Decoration
The final touches are the creamy topping and decorations, which elevate this dessert to another level of deliciousness and visual appeal.
Step 1: Whip the Heavy Cream
Step 1: Take the chilled heavy cream and pour it into a clean mixing bowl. It is important that the heavy cream and the bowl are chilled for the cream to whip properly.
Step 2: Use an electric mixer or a whisk to whip the heavy cream. “Whipping” cream means beating it vigorously to incorporate air and increase its volume, making it light and fluffy.
Step 3: Start on a low speed and gradually increase to medium-high speed.
Step 4: Whip until soft peaks form. Soft peaks mean that when you lift the whisk or mixer out of the cream, the peak of the cream will gently fold over on itself. Be careful not to overwhip, or the cream may become grainy.
Step 5: Add the powdered sugar to the whipped cream. Step 6: Gently fold in the powdered sugar using a spatula. “Folding” is a gentle mixing technique where you use a spatula to cut down through the mixture, across the bottom of the bowl, and up and over, turning the bowl slightly each time. This helps to incorporate ingredients without deflating the whipped cream.
Step 2: Assemble the Creamy Topping Layer
Step 1: Take the springform pan with the chilled mint layer from the refrigerator.
Step 2: Spread the whipped cream evenly over the mint filling.
Step 3: You can use a spatula to create swirls or patterns on the top for a decorative effect, if desired.
Step 3: Decorate the Dessert (Optional)
Step 1: Now comes the fun part – decorating! Get creative and make the dessert look as beautiful as it tastes.
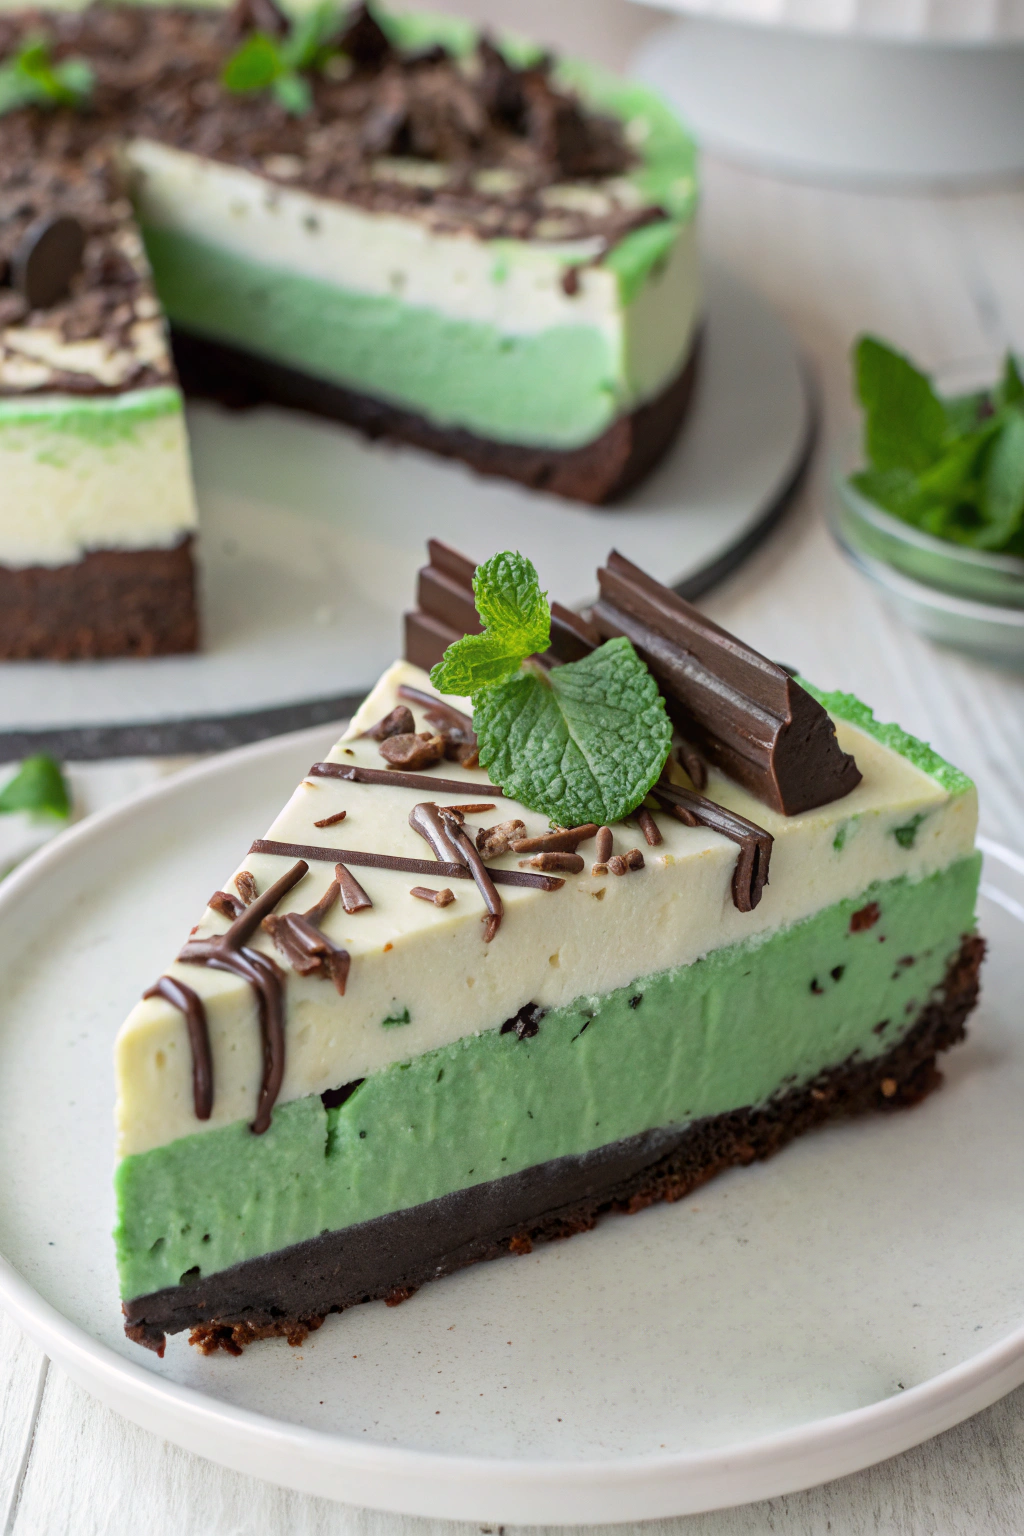
Step 2: Refer to the image for inspiration. The dessert in the image is decorated with chocolate shavings, chocolate syrup drizzles, and fresh mint leaves.
Step 3: To make chocolate shavings, you can use a vegetable peeler or a knife to shave chocolate from a chocolate bar. Sprinkle the chocolate shavings over the whipped cream topping.
Step 4: Drizzle chocolate syrup over the top in a decorative pattern. Step 5: Garnish with fresh mint leaves for a final touch of freshness and visual appeal.
Serving and Enjoying Your Mint Chocolate Dream Dessert
Step 1: Carefully remove the springform pan sides to release the Mint Chocolate Dream Dessert.
Step 2: Slice into wedges and serve chilled.
Step 3: Observe in the image the beautiful layers and textures of the dessert slice. Each layer contributes to the overall taste and visual appeal.
Step 4: This dessert is perfect for serving at gatherings, parties, or simply as a special treat for your family.
Making this Mint Chocolate Dream Dessert is a rewarding experience. Don’t be discouraged if it doesn’t look perfect the first time. Each time you make it, you’ll become more comfortable and confident in the kitchen. Share your amazing desserts with family and friends, and let them taste the delightful result of your effort!