Beautifully Layered Raspberry Mousse Dessert
Get ready to put together a dessert that’s as beautiful to look at as it is delicious to eat! This Beautifully Layered Raspberry Mousse Dessert is designed to be visually stunning yet surprisingly approachable for beginner bakers. The delicate layers of raspberry flavor and creamy mousse, topped with a smooth glaze, create an elegant treat perfect for any special occasion. And the best part? This recipe uses halal ingredients, so everyone can share in the homemade joy. Let’s start putting together this eye-catching and tasty layered dessert!
Halal Ingredients You’ll Need
- 🥣 200g Digestive Biscuits (halal certified)
- 🧈 100g Unsalted Butter, melted (halal certified)
- 🌸 400g Fresh or Frozen Raspberries (for varied pink hues, a mix of ripe and slightly less ripe can be interesting)
- 🍬 100g Granulated Sugar
- 🍋 2 tablespoons Lemon Juice
- 💧 2 tablespoons Gelatin Powder (halal certified)
- 💦 6 tablespoons Cold Water
- 🥛 500ml Heavy Cream, chilled (halal certified)
- ⚪ 100g White Chocolate (halal certified)
- 💗 Pink Food Coloring (halal certified, optional, for a more vibrant and uniform pink layer if desired)
Kitchen Equipment Required
- 🍪 Baking Pan (approximately 9×13 inches, or similar rectangular shape)
- 🥣 Mixing Bowls (various sizes)
- 🥄 Measuring Spoons
- ⚖️ Kitchen Scale or Measuring Cups
- 🥣 Small Saucepan
- 🥄 Spatula or Wooden Spoon
- 🥢 Whisk
- 🎛️ Electric Mixer or Hand Whisk
- 🔪 Knife
- 📄 Parchment Paper (optional, for lining the pan and easier removal)
- 🔥 Refrigerator
Let’s Learn Basic Kitchen Techniques for Layered Desserts
Before starting to put together this Beautifully Layered Raspberry Mousse Dessert, understanding a few basic techniques will be helpful, especially for achieving those lovely layers. Don’t worry, they are all easy to master!
First, melting butter. This is simply heating butter until it becomes liquid. Microwave or low heat on the stovetop works best. Stir occasionally if using a saucepan to prevent burning. Melted butter binds the biscuit base ingredients.
Next, dissolving gelatin. Gelatin is key for firm mousse layers. “Blooming” it in cold water first is essential. Sprinkle gelatin powder over cold water, let it sit, then gently heat until dissolved into a clear liquid. This ensures the mousse sets properly and creates distinct layers.
Finally, whipping cream. Whipping cream is heavy cream beaten until thick and fluffy. This makes the mousse light and airy. Stop whipping at soft peaks to avoid overwhipping.
Putting Together the Beautifully Layered Raspberry Mousse Dessert – Step-by-Step
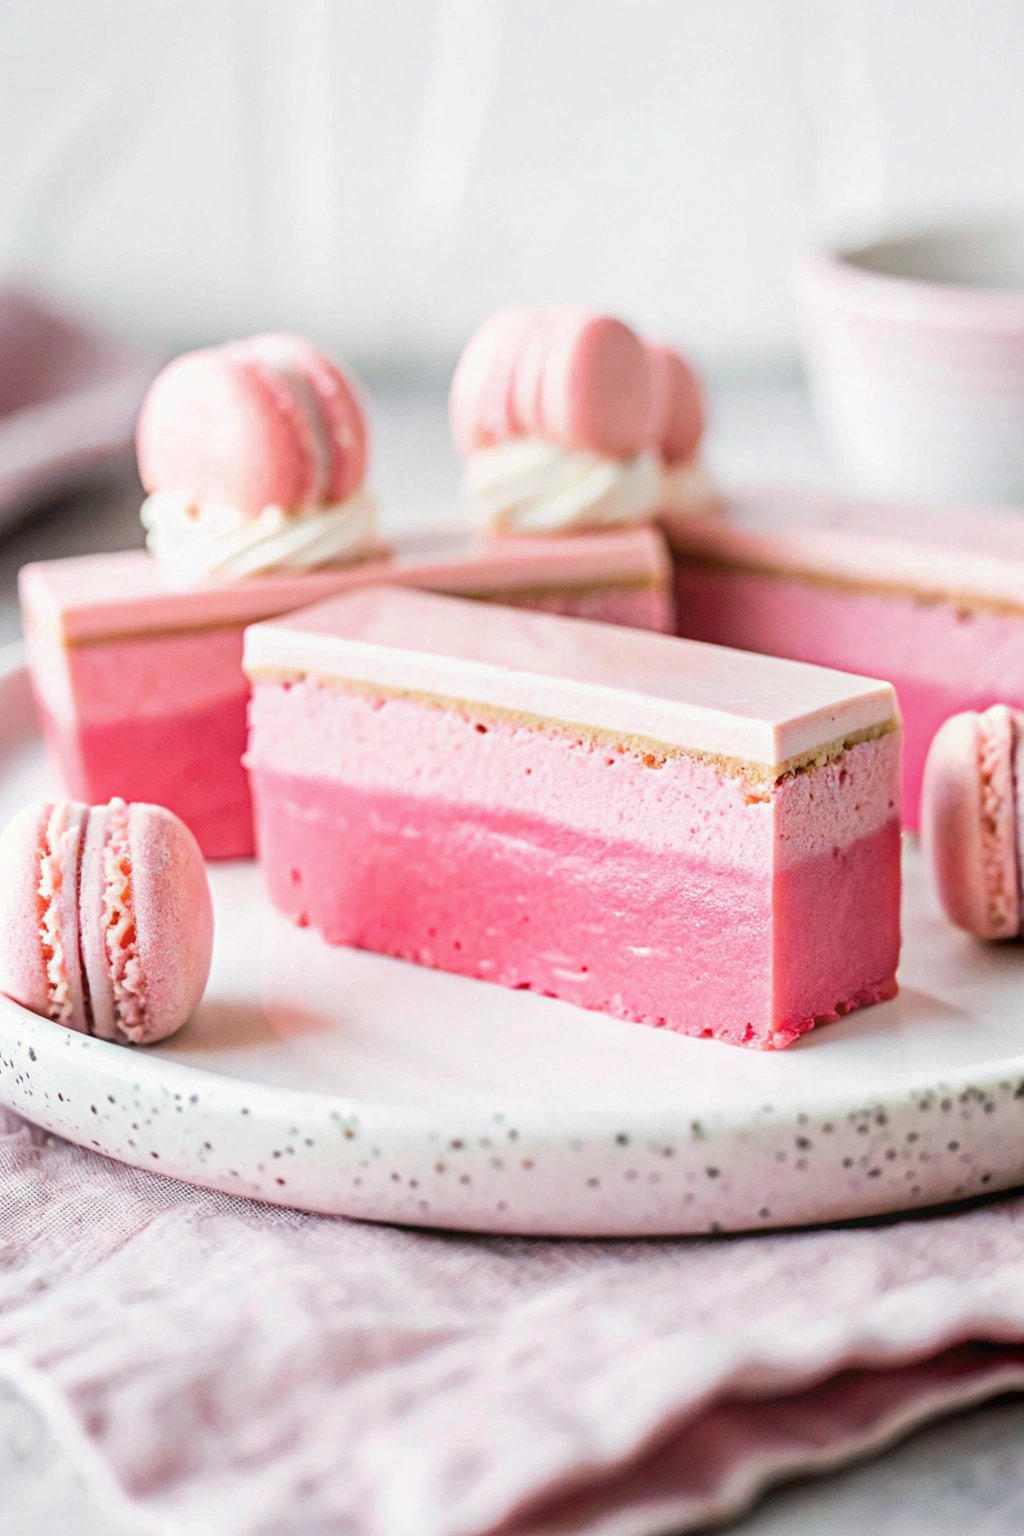
This recipe is broken down to make achieving beautiful layers straightforward. Refer to the image to guide you. Notice the distinct layers and the lovely pink hue variation in the mousse – we’ll aim for a similar visually appealing result.
Step 1: Preparing the Delicate Biscuit Base Layer
- Prepare the biscuit base layer first. Crush digestive biscuits into fine crumbs using a zip-lock bag and rolling pin, or a food processor. Fine crumbs create a smooth, delicate base.
- In a mixing bowl, combine crushed biscuit crumbs with melted butter. Mix until crumbs are evenly moistened. This forms the foundational layer of the dessert.
- Press the biscuit mixture evenly into the bottom of your baking pan, creating a thin, even layer. A thinner base, like in the image, allows the mousse layers to be more prominent. Use fingers or a spoon back to compact it.
- Refrigerate the baking pan with the biscuit base layer to chill and firm up. Chilling helps define the layers and prevents the base from mixing with the mousse.
Step 2: Crafting the Raspberry Mousse Layer with Varied Pink Tones
- Now, prepare the raspberry mousse layer, aiming for a visually appealing pink layer, potentially with subtle color variations like in the image. If using frozen raspberries, thaw slightly. Combine raspberries, sugar, and lemon juice in a saucepan. For varied pink tones, consider using a mix of riper (deeper color) and slightly less ripe (lighter color) raspberries.
- Cook raspberry mixture over medium heat, stirring until raspberries soften and sugar dissolves, about 5-7 minutes.
- Remove from heat and let cool slightly. Blend raspberry mixture until smooth using a blender or immersion blender. For a very smooth mousse and to remove seeds, strain the puree through a fine-mesh sieve.
- In a small bowl, sprinkle gelatin powder over cold water. Let it “bloom” for 5 minutes.
- Heat bloomed gelatin gently in a saucepan or microwave until dissolved and clear. Avoid boiling.
- In a large mixing bowl, pour warm, dissolved gelatin into raspberry puree. Stir well. For a more uniform and vibrant pink, add a few drops of pink food coloring here (optional). Let the raspberry-gelatin mixture cool slightly, but not set.
- In a separate bowl, whip chilled heavy cream to soft peaks.
- Gently fold whipped cream into the raspberry-gelatin mixture in additions. Fold carefully to maintain airiness and create a light, textured mousse layer.
Step 3: Assembling and Chilling for Defined Layers
- Remove the baking pan with the chilled biscuit base layer from the refrigerator.
- Pour raspberry mousse mixture evenly over the biscuit base layer. Spread smoothly to create an even pink layer. Notice in the image how thick and prominent this mousse layer is – aim for a generous layer.
- Refrigerate the baking pan for at least 4-6 hours, or preferably overnight, until the mousse is fully set and firm. Proper chilling is crucial for well-defined layers and a firm mousse.
Step 4: Preparing the Smooth White Chocolate Glaze Top Layer
- Once the mousse is set, prepare the white chocolate glaze layer. Break white chocolate into pieces and place in a heatproof bowl.
- Melt white chocolate over simmering water (bowl not touching water) or in the microwave in short intervals, stirring until smooth.
- Let melted white chocolate glaze cool slightly to thicken slightly but remain pourable.
Step 5: Glazing and Elegant Decoration
- Remove chilled mousse dessert from the refrigerator.
- Pour slightly cooled white chocolate glaze evenly over the raspberry mousse layer. Spread smoothly and let it drip elegantly down the sides. This creates the final smooth white layer, contrasting beautifully with the pink mousse.
- For decoration, use halal macarons as seen in the image for an elegant touch. Place macarons on the glaze while slightly soft.
- Return the glazed dessert to the refrigerator for about 30 minutes to allow the glaze layer to set completely.
- Once set, the Beautifully Layered Raspberry Mousse Dessert is ready to serve. For clean, professional-looking slices like in the image, use a warm, clean knife, dipping and wiping it between slices. Rectangular slices, as in the image, showcase the layers beautifully.
Enjoy Your Exquisitely Layered Homemade Halal Raspberry Mousse Dessert!
Congratulations! You’ve put together a Beautifully Layered Raspberry Mousse Dessert that’s both stunning and delicious. While the image might showcase a professionally styled dessert, your homemade version, following these steps, will be equally delightful and visually appealing. The slight variations in homemade desserts are part of their unique charm. Share pictures of your layered creation – celebrate your baking success! Enjoy every delicious layer of your homemade masterpiece!