DIY Crochet Baby Booties – So Cozy!
Ready to fashion something utterly adorable with your own hands? Let’s embark on a fun crochet adventure and make these charming baby booties! If you’ve always wanted to try crocheting, or you’re looking for a sweet and simple project, you’ve come to the right place. Grab your yarn and hook, and let’s get started on making these tiny treasures. You’ll be amazed at how quickly you can develop these little shoes, and the joy of gifting (or keeping!) something so precious that you built yourself is truly heartwarming.
Materials You’ll Need
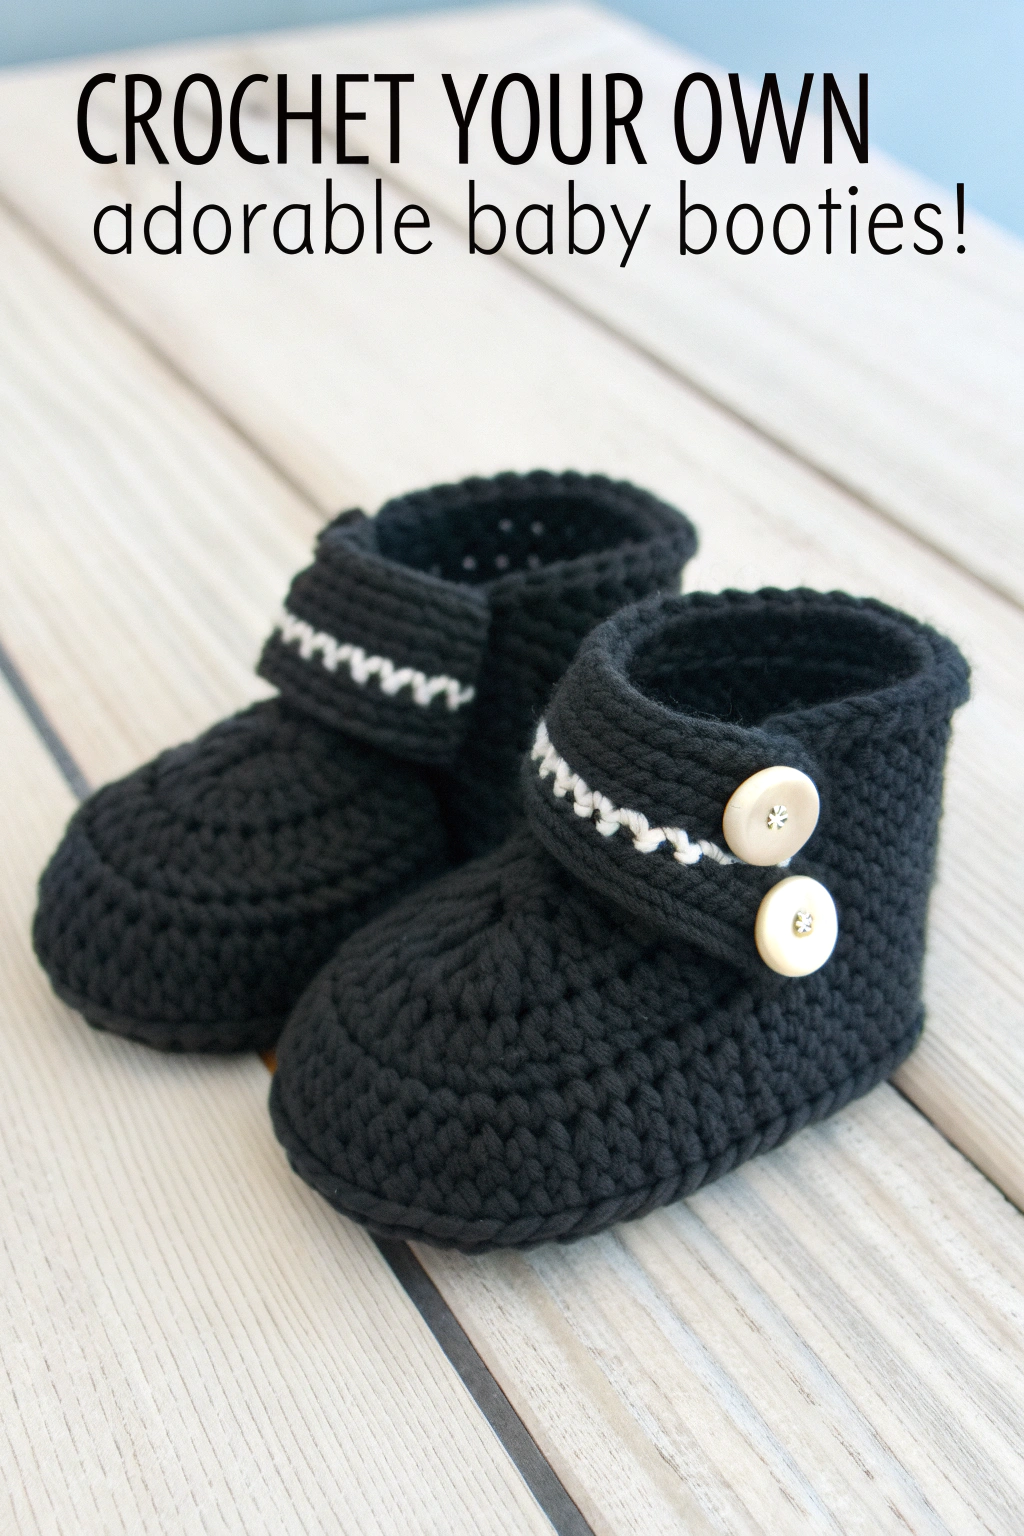
Before we dive in, let’s gather everything we need. For this project, we are going to craft booties that look just like the ones in the image – classic black with sweet white accents.
- 🧶 Yarn: Worsted weight yarn in black. You won’t need a lot, just a small amount will do for these tiny shoes!
- 🧶 Yarn: A small amount of white yarn in the same weight as the black, for the decorative details.
- 🪡 Crochet Hook: A 4.0mm crochet hook (or size G/6). This is a common size that works well with worsted weight yarn. If you’re unsure, check the yarn label – it often suggests a hook size.
- ✂️ Scissors: To snip your yarn.
- 📍 Yarn Needle: Also sometimes called a tapestry needle, this is a blunt needle with a large eye, perfect for weaving in yarn ends and sewing on buttons.
- Buttons: Two small buttons. In the image, they are light-colored and round, about 1/2 inch in diameter. Choose buttons you like!
Let’s Get Started: Fashioning Your Baby Booties
We’re going to construct these booties step-by-step. Don’t worry if you’re completely new to crochet – we’ll explain everything in simple terms. Remember to refer to the image to see how the finished bootie should look as we go.
Forming the Sole
First, we’ll make the bottom part of the bootie, the sole. This is the flat part that the baby’s foot will rest on.
Round 1: Start by making a slip knot. A slip knot is the very first loop on your hook to start crocheting. To make one, form a loop with your yarn, then insert your hook into the loop, catch the yarn, and pull through to form a knot on your hook. Now, chain 10. To chain, you wrap the yarn around your hook (this is called “yarn over” or YO) and pull it through the loop on your hook. Do this ten times. This chain is the foundation for our sole.
Round 2: Now we are going to work around the chain we just fashioned. We’ll be using single crochet stitches for the sole. Single crochet (sc) is a basic stitch. To make a single crochet, insert your hook into the second chain from your hook (skip the first chain). Yarn over, pull up a loop (you’ll have two loops on your hook). Yarn over again, and pull through both loops on your hook. That’s one single crochet! Make 2 single crochet stitches in that first chain you just worked into. Then, single crochet in each of the next 7 chains. In the very last chain, make 4 single crochet stitches. Now we need to work on the other side of the chain. Single crochet in each of the next 7 chains. Finally, in the very last chain (which is also where you started with the first 2 single crochets), make 2 more single crochet stitches. Join to the first single crochet of this round with a slip stitch. A slip stitch (sl st) is used to join rounds. To make a slip stitch, insert your hook into the stitch you want to join to, yarn over, and pull through both loops on your hook in one go. You have now completed the first round of the sole!
Round 3: Chain 1 (this doesn’t count as a stitch). Now, we’re going to build on the previous round. Make 2 single crochet stitches in the first stitch. Then, make 1 single crochet in each of the next 9 stitches. Make 2 single crochet stitches in each of the next 4 stitches. Make 1 single crochet in each of the next 9 stitches. Make 2 single crochet stitches in each of the last 2 stitches. Join with a slip stitch to the first single crochet of this round.
Round 4: Chain 1. Make 2 single crochet stitches in the first stitch. Then, make 1 single crochet in each of the next 11 stitches. Make 2 single crochet stitches in each of the next 4 stitches. Make 1 single crochet in each of the next 11 stitches. Make 2 single crochet stitches in each of the last 2 stitches. Join with a slip stitch to the first single crochet of this round. Fasten off and weave in the end. “Fasten off” means to finish your crochet and secure the yarn. To do this, cut your yarn, yarn over, and pull the yarn tail completely through the loop on your hook. Pull it tight to secure. “Weave in the end” means to use your yarn needle to thread the yarn tail back and forth through the stitches on the back of your work to hide it and keep it secure.
You should now have a small, oval-shaped sole. Refer to the image to see the shape – it’s the base of our bootie!
Constructing the Upper
Now we’ll start building up the sides of the bootie, forming the upper part that will enclose the foot. We’ll continue using single crochet.
Round 5: Join black yarn with a slip stitch anywhere on the sole edge. Chain 1. Now, we’re going to work in the “back loops only.” Look at the top of your stitches from the previous round. You’ll see a “V” shape. The back loop is the loop of the “V” that’s furthest away from you. For this round, insert your hook only into the back loop of each stitch around. Single crochet in each stitch around in the back loops only. Join with a slip stitch to the first single crochet. Working in the back loops only gives a nice defined edge where the sole meets the upper part of the bootie.
Round 6-12: Chain 1. Single crochet in each stitch around (this time, go through both loops of the stitch as normal, not just the back loop). Join with a slip stitch to the first single crochet. Repeat rounds 6-12, for a total of 7 rounds of single crochet for the upper part. This will form the height of the bootie.
Adding the Cuff and Decorative Stitching
Now we’re going to fashion the cuff, the folded-over top edge of the bootie, and add the cute white decorative stitching.
Round 13: Chain 1. Single crochet in each stitch around. Join with a slip stitch to the first single crochet.
Round 14: Chain 1. Single crochet in each stitch around. Join with a slip stitch to the first single crochet. Fasten off black yarn and weave in ends.
Now, we’ll add the white decorative stitching. This is the wavy white line you see at the top of the cuff and on the strap in the image. We are going to produce a simple “reverse single crochet” or “crab stitch” edging with white yarn. This stitch works backward, giving a textured, decorative edge.
Edging Round (White Yarn): Join white yarn with a slip stitch anywhere on the top edge of the cuff. Chain 1. Now, instead of working forward (to the right if you are right-handed), we are going to work backward (to the left). Insert your hook into the stitch to the right of the stitch you just joined in (the stitch before the one you just worked in, going backwards around the cuff). Single crochet in that stitch, working backward. Continue to single crochet in each stitch backwards around the entire cuff edge. It might feel a little awkward at first, but you’ll get the hang of it! When you reach the beginning, join with a slip stitch to the first reverse single crochet. Fasten off white yarn and weave in ends.
Fold down the cuff. You can see in the image how the cuff is folded over, making a neat, double layer at the top.
Making and Attaching the Strap
Next, we’ll construct the strap that goes across the front of the bootie and fastens with buttons.
Strap: With black yarn, chain 15.
Row 1: Single crochet in the second chain from the hook and in each chain across. Chain 1 and turn.
Row 2-4: Single crochet in each stitch across. Chain 1 and turn. After Row 4, fasten off black yarn.
Now, add the white decorative edging to the strap, just like we did for the cuff.
Edging Round (White Yarn): Join white yarn with a slip stitch anywhere along one long edge of the strap. Chain 1. Work reverse single crochet stitches along all four edges of the strap, just like you did for the cuff. Join with a slip stitch to the first reverse single crochet. Fasten off white yarn and weave in ends.
Position the strap on the bootie. Refer to the image. The strap goes across the front of the bootie, starting on one side of the cuff and attaching to the other. Use your yarn needle and black yarn to sew one end of the strap securely to the side of the bootie cuff. Make sure it’s positioned so that when you fold the strap across, it will comfortably close the bootie.
Adding the Buttons
Finally, we’ll assemble the buttons. Place the buttons on the other side of the bootie cuff, opposite to where you sewed the strap. Position them so they line up with the end of the strap when it’s folded over. See in the image how the buttons are placed. Use your yarn needle and black yarn to sew the buttons securely in place.
Repeat all steps to make a second bootie for the pair!
Step Back and Admire Your Booties!
Congratulations! You’ve just fashioned your very own pair of adorable crochet baby booties! Look at the image and compare your booties – you’ll see you’ve made something truly wonderful. Wasn’t it satisfying to craft these with your own hands?
Don’t be discouraged if your first attempt isn’t perfect. Like any skill, crocheting gets easier with practice. The joy of making something special and handmade is truly rewarding.
We’d absolutely love to see your finished baby booties! Please share photos of your adorable creations – it brightens our day to see what you make! Happy crocheting!