Knit a Cozy Bear Hat for Your Little Cub!
Hello fellow crafters! Are you ready to embark on a wonderfully warm and fuzzy project? Get ready to fashion the most adorable bear hat you can imagine! This project is perfect for beginner knitters who are eager to learn new skills while producing something truly heartwarming. Imagine the joy of making a snuggly hat with your own hands, a special piece filled with love and handmade charm. Let’s dive in and build this beautiful bear hat together!
Materials You’ll Need
Before we begin, let’s gather all the supplies you will need to construct your very own bear hat. Having everything ready will make the whole process smooth and enjoyable!
- 🧶 Worsted weight yarn in brown (or your preferred bear color!) – This is a medium-thickness yarn, easy to work with for beginners.
- 🪡 Circular knitting needles, size US 8 (5mm), 16-inch length – Circular needles are great for hats because you knit in rounds, like a spiral, which avoids seams!
- 🥢 Double-pointed needles (DPNs), size US 8 (5mm) – These are used for shaping the top of the hat when the circle gets smaller. Don’t worry, we’ll explain this clearly!
- ✂️ Scissors – For snipping yarn ends.
- 📍 Stitch marker – This little ring helps you keep track of the beginning of your round, like a bookmark in your knitting!
- 🧶 Tapestry needle – A large, blunt needle used to weave in yarn ends and sew pieces together.
Let’s Get Started: Knitting Your Bear Hat
Now for the fun part! We’ll go step-by-step to fashion this charming bear hat. Remember, knitting is all about patience and practice, so don’t worry if it takes a little while to get the hang of things. We’re here to guide you every step of the way!
Getting Ready: Casting On
To begin, we need to get yarn onto our needles. This is called “casting on,” and it’s like making the first row of stitches.
- Make a slip knot: Form a loop with your yarn, then bring the yarn end over and through the loop. Pull gently to tighten – this is your slip knot, and it goes on your needle.
- Cast on 80 stitches: Using the long-tail cast-on method (there are many helpful videos online if you’re unsure, just search “long tail cast on”), place 80 stitches onto your circular needle. Imagine you’re forming a chain of loops on your needle. These loops are your stitches, the foundation of your knitted fabric.
Knitting the Hat Body
Now we’ll start building the main part of the hat, working in rounds. Think of knitting in rounds like spiraling upwards to form a tube.
- Join in the round: Carefully slide all your stitches onto the needles. Make sure they are not twisted. Bring the two needle tips together. Knit the first stitch of your cast-on row together with the last stitch. This joins your flat row into a circle, and now you’ll be knitting in rounds. Place a stitch marker at the beginning of the round – this marks where each round starts and ends.
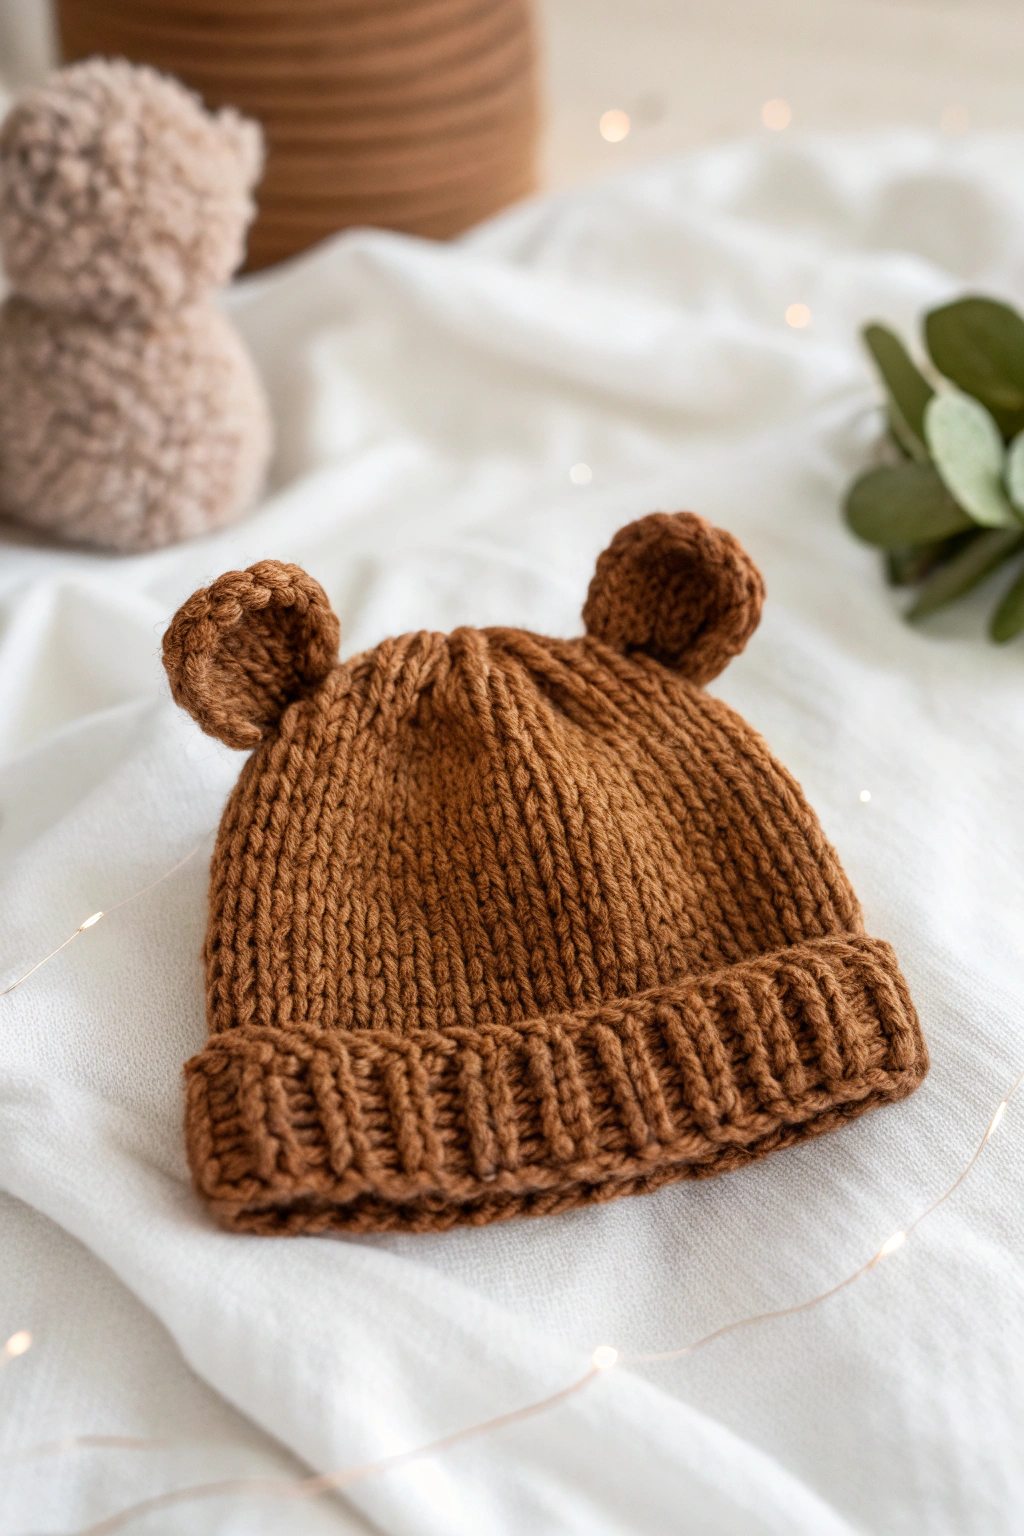
- Knit every round: For the main part of the hat, we’ll use the knit stitch. To knit, insert your right needle into the front of the first stitch on the left needle, wrap the yarn around the right needle tip, pull the loop through the stitch, and slide the old stitch off the left needle. Repeat this knit stitch for every stitch in the round. Refer to the image; you can see the main part of the hat is formed using this simple knit stitch, which gives a smooth, vertical lined texture called stockinette stitch in knitting terms.
- Continue knitting: Keep knitting in rounds, always knitting every stitch, until your hat measures about 6 inches from the cast-on edge. This will form the main body of the hat, the part that covers the head.
Forming the Brim
Next, we will fashion the ribbed brim at the bottom edge of the hat. The brim is that stretchy, folded-up part that helps the hat fit snugly. It’s made using ribbing, which is a combination of knit and purl stitches.
- Purl stitch explained: Before we start ribbing, let’s learn the purl stitch. It’s the opposite of the knit stitch. To purl, bring the yarn to the front of your work, insert your right needle from back to front into the first stitch on the left needle, wrap the yarn around the right needle tip, pull the loop through to the front, and slide the old stitch off. Purl stitches look like little bumps, and they create a horizontal line texture.
- Knit 1, Purl 1 ribbing: For the brim, we will alternate knit and purl stitches. In each round, knit one stitch, then purl the next stitch. Repeat from * to * all the way around the round. This is called “K1, P1 ribbing.” This combination of knit and purl stitches makes the fabric stretchy and ribbed, perfect for a snug brim. Observe in the image how the brim has vertical lines (from the knit stitches) alternating with horizontal lines (from the purl stitches).
- Continue ribbing: Keep working in K1, P1 ribbing for about 2 inches. This will form a nice, deep brim for your bear hat.
Shaping the Hat Top and Closing
Now we need to shape the top of the hat to close it up. We’ll do this by decreasing stitches, making the circle of knitting gradually smaller. This is where those double-pointed needles come in handy!
- Switch to double-pointed needles: As you decrease stitches, the number of stitches gets smaller, and it becomes harder to work with circular needles. Divide your stitches evenly onto your double-pointed needles (DPNs). Usually, you use four or five DPNs to hold the stitches, and the fifth (or sixth) needle to knit with. Imagine you are knitting with a set of knitting “pencils” arranged in a circle.
- Decrease round 1: Knit 2 together (K2tog) all around: To decrease, we’ll use “knit two together” (K2tog). This means knitting two stitches as if they were one, effectively reducing one stitch. For this round, knit every two stitches together. So, knit the first and second stitch together, then the third and fourth stitch together, and so on, all the way around. This will halve the number of stitches in this round.
- Decrease round 2: Knit all stitches: Knit every stitch in this round. This round gives a break from decreasing and sets up the next decrease round.
- Decrease round 3: K2tog all around: Repeat the K2tog decrease again, knitting every two stitches together all around the round. Again, you’ll halve the number of stitches.
- Decrease round 4: Knit all stitches: Knit every stitch in this round.
- Decrease round 5: K2tog all around: Repeat the K2tog decrease one more time.
- Cut the yarn: Cut your yarn, leaving a tail about 6 inches long.
- Draw yarn through remaining stitches: Thread your tapestry needle with the yarn tail. Slip each of the remaining stitches off the needles and onto the tapestry needle. Once all stitches are on the tapestry needle, gently pull the yarn to tighten and close the top of the hat.
- Secure the top: Weave the yarn tail through the closed top a few times to secure it tightly and prevent it from unraveling. Weave the end to the inside of the hat.
Fashioning the Bear Ears
No bear hat is complete without adorable ears! We will now fashion two cute, rounded ears and attach them to the hat.
- Cast on 12 stitches: Using your double-pointed needles and brown yarn, cast on 12 stitches for each ear. You’ll make two ears, so repeat this process twice.
- Knit in rounds: Join in the round and knit every round for about 1.5 inches. Imagine knitting a small tube for each ear.
- Decrease rounds for ears: Now we’ll shape the top of the ear to make it rounded.
- Round 1: K2tog all around: Knit two together all around the round. You’ll now have half the stitches.
- Round 2: Knit all stitches.
- Round 3: K2tog all around: Knit two together all around again. You’ll have very few stitches left.
- Cut yarn and draw through: Cut the yarn, leaving a tail. Thread the tapestry needle, draw the yarn through the remaining stitches, and pull tight to close the top of the ear. Secure and weave in the yarn tail, just like you did for the hat top.
- Repeat for the second ear: Make another ear following steps 1-4.
Assembling the Bear Ears
Now for the final touch: attaching the ears to the hat!
- Position the ears: Refer to the image to see where the ears are placed on the hat. They are positioned symmetrically on the top of the hat, towards the sides. Experiment with placement to find what looks best to you before sewing.
- Sew the ears to the hat: Using your tapestry needle and yarn tail from the ears, sew each ear securely to the hat. Use small, neat stitches to attach them firmly. Weave in the remaining yarn ends inside the hat to hide them.
Finishing Touches
Congratulations, you’ve just built your own knitted bear hat! Just a few final steps to make it perfect.
- Weave in all yarn ends: Make sure all yarn ends are securely woven into the inside of the hat and ears. This keeps your work neat and prevents ends from coming loose.
- Give it a gentle shape: You can gently shape the hat and ears with your hands to make them look just right.
And there you have it – a wonderfully warm and utterly adorable bear hat, fashioned by your own hands! Imagine the smiles this hat will bring. Making something with your own hands is such a rewarding experience, and you’ve just developed a beautiful and practical item.
Don’t be shy – share your finished bear hat! We’d absolutely love to see your creations. Post a picture of your hat and spread the joy of handmade crafts! Happy knitting!