Delightful Homemade Cherry Jelly Cake
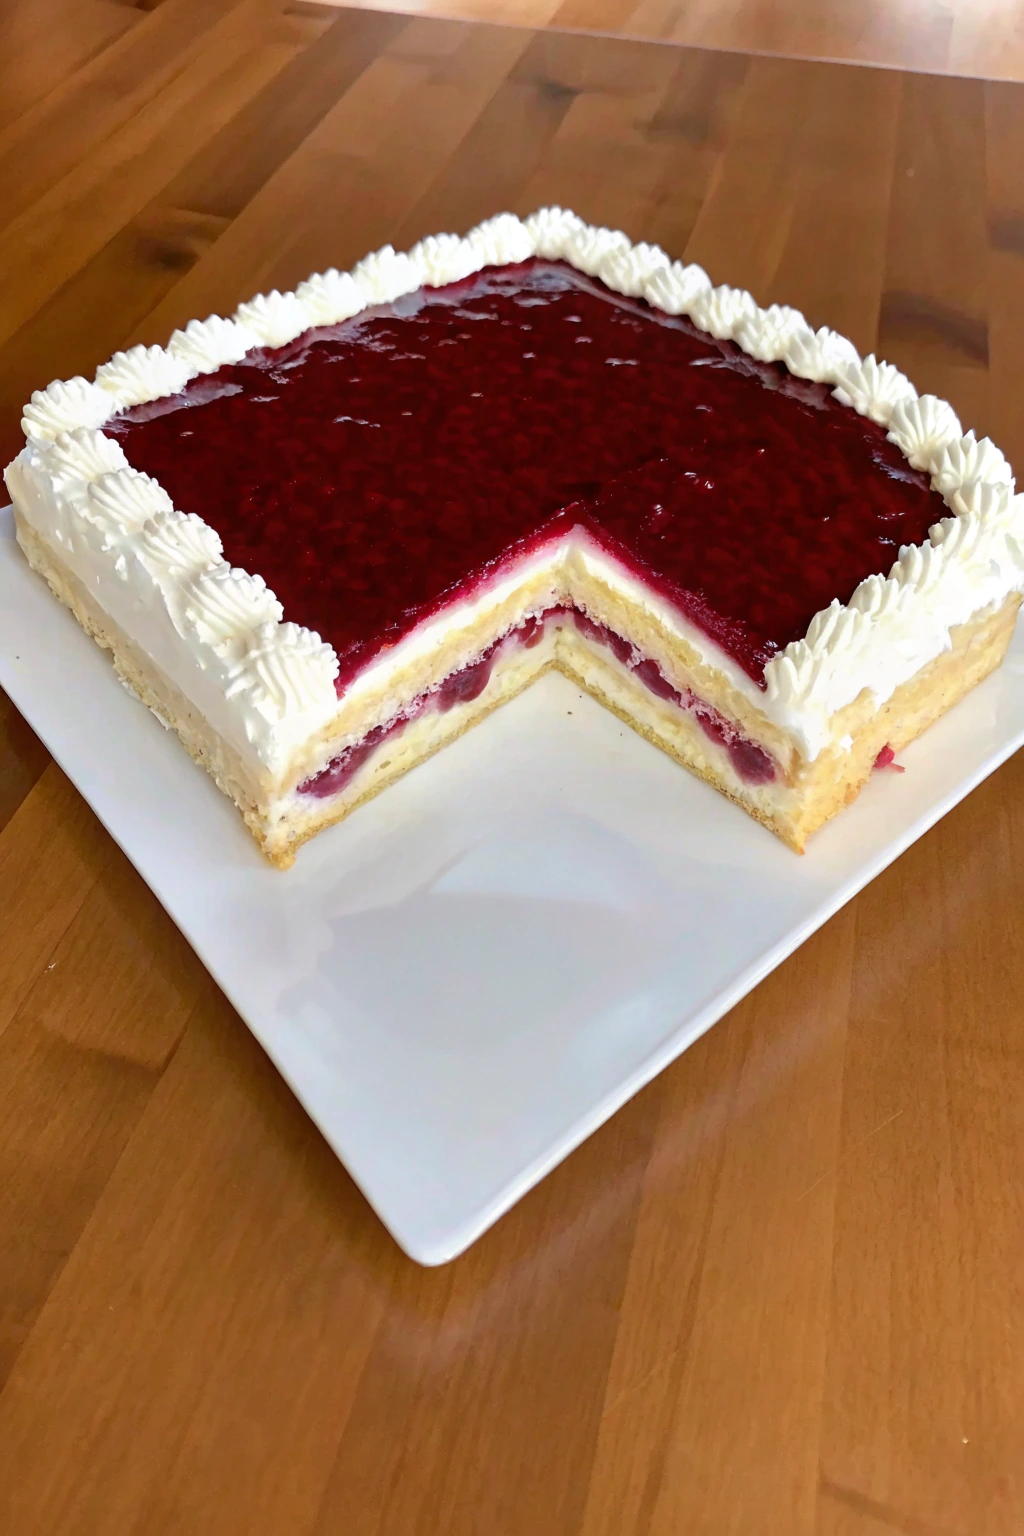
Get ready to bake a truly delightful treat! This Cherry Jelly Cake is not only beautiful to look at, as you can see in the image, but also wonderfully delicious and surprisingly easy to make at home. It’s the perfect dessert for any occasion, and this recipe is designed especially for beginner bakers who want to create amazing halal food. Imagine the joy of serving a homemade cake that everyone will adore! Let’s get started on this exciting baking adventure together.
Halal Ingredients You’ll Need:
Before starting, gather all the necessary ingredients. Having everything measured and ready will make the baking process much smoother and more enjoyable. Here’s what is needed to create this Cherry Jelly Cake:
- 🍪 For the Crust:
- 250 grams all-purpose flour (This is the main ingredient for the crust, making it sturdy.)
- 125 grams cold butter, cut into small cubes (Butter gives the crust its rich flavor and crumbly texture. Make sure it’s cold for a good crust!)
- 75 grams granulated sugar (Sugar adds sweetness to the crust.)
- 1 large egg (Egg helps to bind the crust ingredients together.)
- A pinch of salt (Salt enhances the flavors in the crust.)
- 🍒 For the Cherry Filling:
- 500 grams fresh or frozen cherries, pitted (Cherries provide the fruity flavor and lovely texture inside the cake. If using frozen cherries, thaw them first.)
- 2 tablespoons granulated sugar (Sugar adds sweetness to the cherries.)
- 1 tablespoon cornstarch (Cornstarch is used to slightly thicken the cherry juices as they bake.)
- 🥛 For the Creamy Layer:
- 500 grams cream cheese, softened (Cream cheese creates a smooth and tangy creamy layer. It’s important for it to be softened so it mixes easily.)
- 100 grams granulated sugar (Sugar sweetens the creamy layer.)
- 1 teaspoon alcohol free vanilla extract (Vanilla extract adds a lovely aroma and flavor to the cream.)
- 🍓 For the Jelly Topping:
- 500 ml cherry juice or red fruit juice (This juice forms the base of the jelly topping, giving it a beautiful red color and cherry flavor.)
- 50 grams granulated sugar (Sugar sweetens the jelly topping.)
- 2 tablespoons halal gelatin powder (Gelatin is what makes the jelly set firm. Make sure it’s halal gelatin.)
- 6 tablespoons cold water (Cold water is needed to bloom or soften the gelatin.)
- 🍦 For Decoration (Optional):
- 250 ml heavy cream (Heavy cream is whipped to make the decorative swirls seen on the cake in the image.)
- 2 tablespoons powdered sugar (Powdered sugar sweetens the whipped cream.)
- 1/2 teaspoon alcohol free vanilla extract (Vanilla extract adds flavor to the whipped cream.)
Important Note: Always ensure all ingredients, especially gelatin and any flavor extracts, are certified halal if you require a strictly halal recipe.
Kitchen Equipment You’ll Need:
Having the right tools makes baking much easier and more enjoyable. Here’s a list of equipment needed for this recipe. Don’t worry if you don’t have everything fancy – basic kitchen tools will work perfectly!
- 🥣 Mixing Bowls: You will need a few different sizes for mixing ingredients separately.
- 🥄 Measuring Spoons and Cups: Accurate measurements are important in baking.
- ⚖️ Kitchen Scale (Optional but Recommended): For precise measurements, especially for flour and butter.
- 🔪 Knife and Cutting Board: For cutting butter and possibly cherries if they are not already pitted.
- 🥚 Whisk or Fork: For mixing eggs and dry ingredients.
- 🖐️ Your Clean Hands: Sometimes, using your hands is the best way to bring the crust dough together!
- ⬜ Square Baking Pan (approximately 9×9 inches): This is the pan to bake the cake in. A square pan similar to the one in the image works best.
- 📜 Parchment Paper (Optional): To line the baking pan for easy removal of the cake.
- 🔥 Oven: To bake the crust and set the cake.
- 🥄 Spatula or Spoon: For spreading fillings and smoothing surfaces.
- Saucepan: For making the jelly topping.
- ⏱️ Timer: To keep track of baking and chilling times.
- 🔄 Cooling Rack: To cool the baked crust completely.
- 🧁 Piping Bag and Tip (Optional): For decorating with whipped cream like in the image. If you don’t have these, you can simply spread whipped cream using a spoon or knife.
Let’s Learn Basic Kitchen Techniques:
For this Cherry Jelly Cake, there are a few very simple techniques to understand. Don’t be intimidated! These are easy to learn, and once you know them, you’ll use them in many recipes.
- Softening Cream Cheese: “Softened” cream cheese means taking it out of the refrigerator ahead of time so it becomes easier to mix. It should be soft enough that you can easily stir it with a spoon, but not melted. Usually, about 30 minutes to an hour at room temperature is enough, depending on how warm your kitchen is. If you gently press it with your finger, it should give easily.
- Pitting Cherries: “Pitting” cherries means removing the hard seed or “pit” from the center of the cherry. You can buy a cherry pitter tool, or you can simply cut the cherry in half and remove the pit with your fingers or the tip of a knife. Be careful as cherry juice can stain!
- Blooming Gelatin: “Blooming” gelatin means softening gelatin powder in cold water before using it. This helps the gelatin dissolve smoothly and prevents lumps in your jelly. You sprinkle the gelatin powder over cold water and let it sit for about 5-10 minutes. It will become thick and jelly-like.
Step-by-step Instructions: Making the Cherry Jelly Cake
Now for the exciting part – making the Cherry Jelly Cake! Follow these simple steps, and you’ll be enjoying a delicious homemade cake in no time. Remember to refer to the image as you go to see how the cake should look at different stages.
Step 1: Making the Crust
- Combine Dry Ingredients: In a mixing bowl, put the flour, sugar, and salt. Use a whisk or a fork to mix them together. This is to evenly distribute the salt and sugar in the flour.
- Add Cold Butter: Add the cold, cubed butter to the flour mixture.
- Mix Butter into Flour: Use your fingertips to rub the butter into the flour mixture. Keep rubbing and pressing until the mixture looks like breadcrumbs. You want small pieces of butter still visible, but mostly combined with the flour. This process is important for creating a flaky crust.
- Add Egg and Combine: Make a well in the center of the flour and butter mixture. Crack the egg into the well. Use a fork to gently mix the egg into the flour mixture. At first, it will look crumbly.
- Bring Dough Together: Use your hands to gently bring the dough together into a ball. Do not overmix or knead the dough. Just gently press it together until it forms a ball. If it’s too dry, add a tiny bit of cold water, one teaspoon at a time, until it comes together.
- Press into Baking Pan: Press the dough evenly into the bottom of your square baking pan. You can use your fingers or the back of a spoon to spread it out. Try to make it as even as possible so the crust bakes uniformly. You can see in the image that the crust is a thin, even layer.
- Prick the Crust: Use a fork to prick holes all over the crust. This prevents the crust from puffing up too much while baking.
- Bake the Crust: Preheat your oven to 180°C (350°F). Bake the crust for 15-20 minutes, or until it is lightly golden brown around the edges. Keep an eye on it – ovens can vary!
- Cool the Crust: Once baked, take the crust out of the oven and let it cool completely in the pan on a cooling rack. It needs to be completely cool before adding the next layers.
Step 2: Preparing the Cherry Filling
- Combine Cherries and Sugar: In a saucepan, put the pitted cherries and sugar.
- Cook Cherries: Cook over medium heat, stirring occasionally. As the cherries heat up, they will release their juices.
- Simmer and Thicken: Bring the cherry mixture to a simmer (small bubbles will start to appear). In a small bowl, mix the cornstarch with a tablespoon of cold water to make a slurry (a smooth mixture). Pour the cornstarch slurry into the simmering cherries. Stir continuously.
- Cook Until Thickened: Cook for another 1-2 minutes, stirring constantly, until the cherry mixture thickens slightly. It should look a bit glossy and jam-like.
- Cool Cherry Filling: Remove the saucepan from the heat and let the cherry filling cool slightly. It should be warm, but not hot, when you spread it on the crust.
Step 3: Making the Creamy Layer
- Beat Softened Cream Cheese and Sugar: In a mixing bowl, put the softened cream cheese and sugar. Use a mixer (hand mixer or stand mixer) or a whisk to beat them together until smooth and creamy. If you are using a whisk, make sure the cream cheese is very soft to avoid lumps.
- Add Vanilla Extract: Add the vanilla extract to the cream cheese mixture and mix until just combined. Do not overmix.
Step 4: Preparing the Jelly Topping
- Bloom Gelatin: In a small bowl, sprinkle the gelatin powder over the cold water. Let it sit for 5-10 minutes to bloom. You will see it become thick and jelly-like.
- Heat Juice and Sugar: In a saucepan, combine the cherry juice (or red fruit juice) and sugar. Heat over medium heat, stirring until the sugar is dissolved and the juice is just starting to simmer. Do not boil.
- Dissolve Gelatin: Remove the saucepan from the heat. Add the bloomed gelatin to the hot juice mixture. Stir continuously until the gelatin is completely dissolved and the mixture is clear. Make sure there are no granules of gelatin left.
- Cool Jelly Mixture Slightly: Let the jelly mixture cool slightly at room temperature. It should be lukewarm, not hot, before pouring over the cake. If it’s too hot, it might melt the creamy layer.
Step 5: Assembling and Chilling the Cake
- Spread Cherry Filling: Once the crust is completely cool, spread the slightly cooled cherry filling evenly over the baked crust.
- Spread Creamy Layer: Gently spread the cream cheese mixture evenly over the cherry filling. Use a spatula to smooth the top.
- Pour Jelly Topping: Carefully and slowly pour the slightly cooled jelly mixture over the cream cheese layer. Pour it evenly to cover the entire surface. Refer to the image to see how the jelly forms a smooth, glossy top.
- Chill the Cake: Cover the cake with plastic wrap and refrigerate for at least 4-6 hours, or preferably overnight, to allow the jelly to set completely and the cake to firm up. Chilling is crucial for the cake to hold its shape and for the flavors to meld together.
Step 6: Decorating with Whipped Cream (Optional)
- Make Whipped Cream: Once the cake is fully chilled and the jelly is set, you can decorate it with whipped cream if desired, like in the image. In a chilled bowl, combine the heavy cream, powdered sugar, and vanilla extract.
- Whip Cream: Use a mixer (hand mixer or stand mixer) to whip the cream until stiff peaks form. This means when you lift the beaters, the whipped cream holds its shape and stands up in peaks. Be careful not to overwhip, or it will become grainy.
- Decorate the Cake: You can use a piping bag fitted with a decorative tip to pipe swirls of whipped cream around the edge of the cake, just like in the image. If you don’t have a piping bag, you can simply spoon dollops of whipped cream around the edge or spread it over the whole cake.
- Serve and Enjoy! Carefully cut the Cherry Jelly Cake into squares and serve. Enjoy the wonderful flavors and textures of your homemade halal dessert!
Enjoy Your Homemade Halal Cherry Jelly Cake!
Congratulations! You have successfully baked a beautiful and delicious Cherry Jelly Cake. Making food from scratch is a truly rewarding experience. This recipe is a wonderful way to enjoy homemade halal baking, and it’s perfect for sharing with family and friends. The bright colors and fruity flavors make it a delightful treat for any gathering.
Don’t be discouraged if your first attempt isn’t perfect – baking is a skill that improves with practice. Each time you bake, you’ll learn something new and become more confident in the kitchen. Feel free to get creative with decorations or try different fruit combinations in the future!
We hope you love this Cherry Jelly Cake recipe as much as we do. If you try making it, please share your creations! It’s always inspiring to see how homemade treats bring joy to others. Happy baking and Bismillah.