Chocolate Spider Cookies: A Whimsical Cookie Creation
There’s something magical about transforming simple ingredients into a treat that makes people smile. These charming chocolate spider cookies do exactly that, combining the beloved comfort of peanut butter cookies with artistic chocolate decorations to create something truly special. What I love most about these cookies is how they manage to be both adorably cute and absolutely delicious – proving that playing with your food can lead to the most delightful results!
Why You’ll Love These Cookies
- Perfect blend of peanut butter and chocolate flavors
- Fun to make with helpers in the kitchen
- Beautiful presentation for special occasions
- Make-ahead friendly
- No special equipment needed beyond basic piping tools
Ingredients
For the Cookie Base:
- 2 cups all-purpose flour
- 1 cup creamy peanut butter
- 1 cup unsalted butter, softened to room temperature
- 1 cup granulated sugar
- 1 large egg
- 1 teaspoon pure alcohol free vanilla extract
- 1/2 teaspoon salt
- 1/2 teaspoon baking soda
For the Decoration:
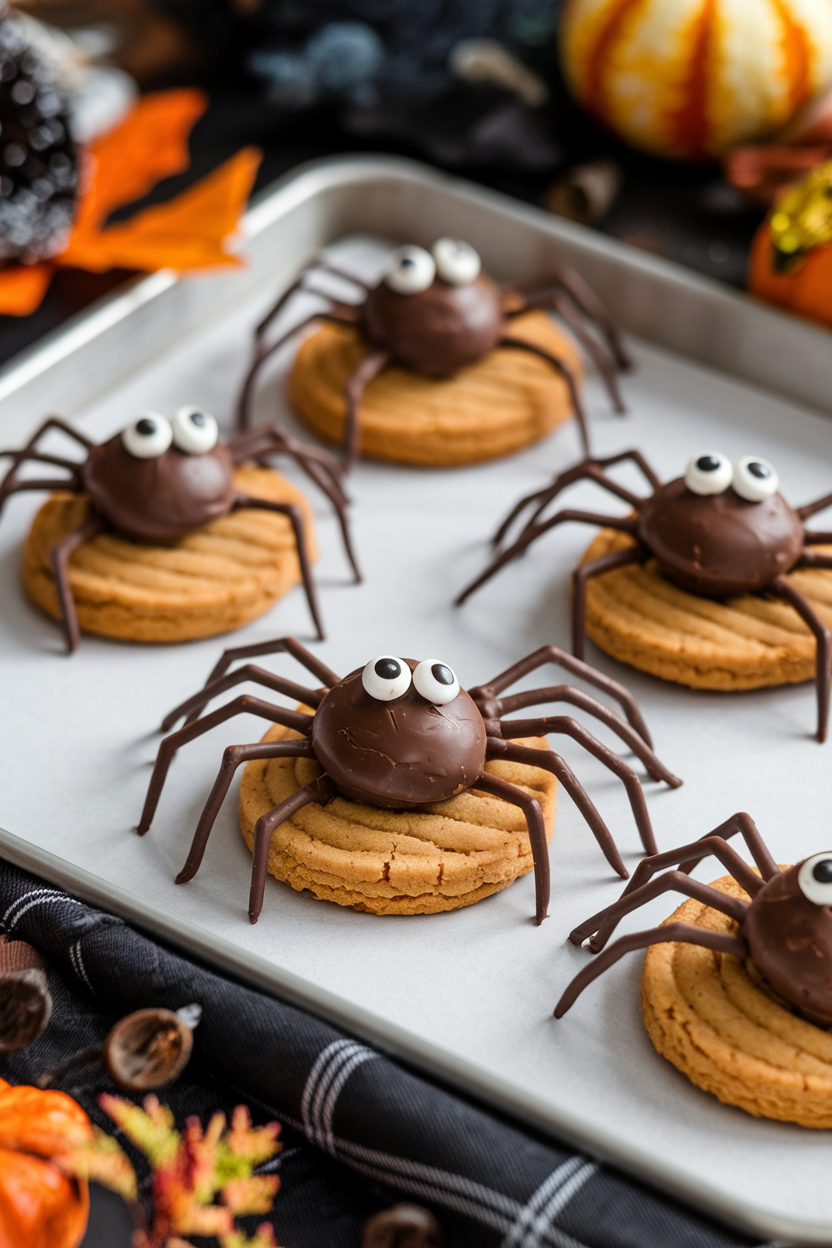
- 24 chocolate truffles (about 1 inch in diameter)
- 16 oz dark chocolate melting wafers (recommended for best contrast)
- 48 candy eyes
- Piping bag fitted with a #2 or #3 round tip, or zip-top bag
- Parchment paper for practice piping
Instructions
Making the Cookie Base:
- In a large bowl, cream together the softened butter, peanut butter, and sugar using an electric mixer on medium speed until the mixture becomes light and fluffy (about 3-4 minutes).
- Add the egg and alcohol free vanilla extract, beating until well combined and smooth.
- In a separate bowl, whisk together the flour, salt, and baking soda.
- Gradually add the dry ingredients to the wet ingredients, mixing on low speed until just combined. Don’t overmix!
- Cover the dough and refrigerate for 30 minutes. This helps prevent spreading during baking.
- Preheat your oven to 350°F (175°C) and line baking sheets with parchment paper.
- Roll the chilled dough into 1.5-inch balls and place them 2 inches apart on the prepared baking sheets.
- Using the back of a spoon, gently press down on each cookie ball, creating a smooth surface with a slight swirled indent. This creates the perfect platform for your spider decoration while matching the artistic swirl pattern shown in our photos.
- Bake for 12-15 minutes, or until the edges are lightly golden brown while the center remains slightly lighter.
- Allow cookies to cool on the baking sheet for 5 minutes before transferring to a wire rack to cool completely.
Creating the Spider Design:
- Once cookies are completely cool, prepare your workspace with the chocolate truffles, melting wafers, and candy eyes.
- Melt the dark chocolate wafers according to package instructions, being careful not to overheat.
- Transfer melted chocolate to a piping bag fitted with a #2 or #3 round tip (or prepare a zip-top bag with a very small corner snipped off).
- Before starting on the cookies, practice piping spider legs on parchment paper to get comfortable with the pressure needed for thin, consistent lines.
- Place one chocolate truffle in the center of each cooled cookie, securing it with a small dot of melted chocolate.
- To pipe the legs, apply even, gentle pressure while pulling outward from the truffle body. Create four legs on one side, then rotate the cookie to complete the remaining four. Each leg should be thin and elegant, with a slight curve for a natural appearance. The legs should be quite fine and delicate, so less is more when it comes to chocolate flow.
- While the legs are still slightly wet, attach two candy eyes to the front of each truffle using tiny dots of melted chocolate.
- Allow the chocolate to set completely before moving or stacking the cookies.
Pro Tips for Success
- Temperature Matters: Keep your room cool while working with chocolate. Warm hands or a hot kitchen can make the chocolate difficult to work with. If needed, take breaks and return the chocolate to the refrigerator briefly.
- Perfect Piping: Practice piping several spider legs on parchment paper before working on your cookies. Focus on maintaining consistent pressure for even leg thickness and practice creating gentle curves. You can scrape this chocolate back into your piping bag once it sets.
- Make-Ahead Magic: The peanut butter cookies can be baked up to 2 days in advance and stored in an airtight container. Decorate them the day you plan to serve for the freshest appearance.
- Chocolate Consistency: If your melted chocolate becomes too thick, add a tiny amount of neutral oil (like coconut oil) and stir well. This helps achieve the perfect piping consistency.
- Chocolate Selection: Dark chocolate creates better contrast against the golden cookie base and gives a more sophisticated look. Choose high-quality melting wafers specifically designed for candy making – they’ll give you the smoothest flow for those delicate legs.
- Cookie Base Perfection: The smooth, swirled top of each cookie provides the ideal canvas for your spider design. Using a spoon’s back to create this pattern gives you control over the final texture – aim for gentle swirls rather than deep indentations.
Serving and Storage
These charming cookies make a stunning presentation when arranged on a pure white serving platter or cake stand. The contrast really makes the design pop! They’re perfect for:
- Dessert tables at parties
- Cookie exchanges
- After-school treats
- Gift boxes for friends and neighbors
Store the finished cookies in an airtight container at room temperature, placing pieces of parchment paper between layers to protect the decorations. They’ll stay fresh for 3-4 days, though they rarely last that long!
For the best texture and flavor, serve these cookies at room temperature. They pair beautifully with:
- Cold milk
- Hot chocolate
- Coffee or tea
- Vanilla ice cream for an extra-special dessert
Recipe Notes
- Makes: 24 decorated cookies
- Prep Time: 45 minutes
- Chill Time: 30 minutes
- Bake Time: 12-15 minutes
- Decoration Time: 30-40 minutes
- Total Time: About 2 hours
Remember, the key to these cookies is patience during the decoration process. Take your time with the details – the end result is worth every minute spent creating these delightful treats!