How to Clean and Disinfect Sponges in Seconds
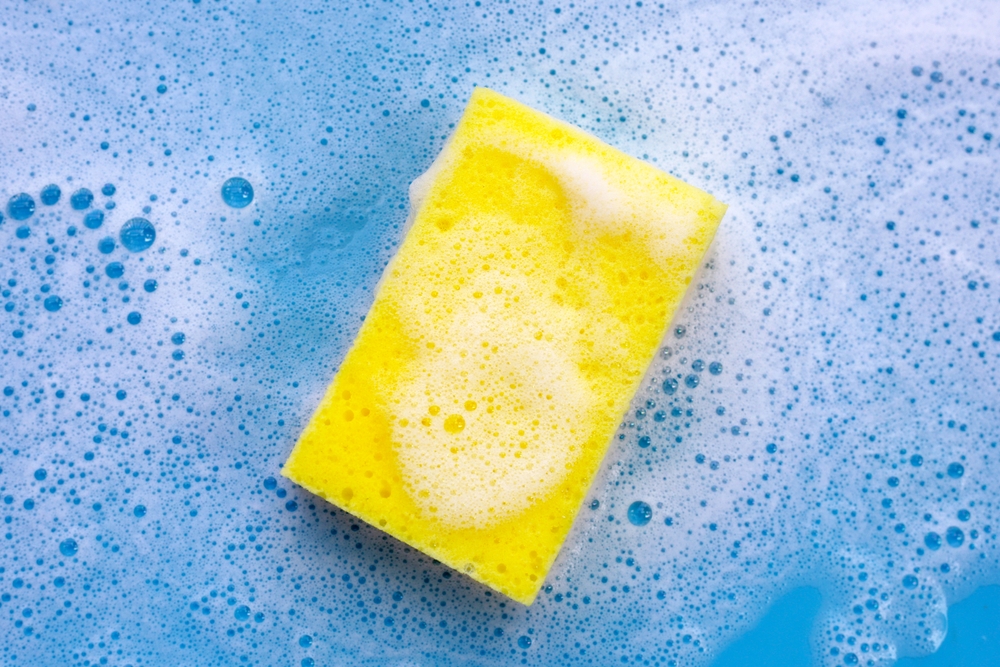
In the bustling heart of every kitchen lies an unsung hero: the humble sponge. Day in and day out, it tackles greasy pans, food-encrusted dishes, and countless messes. But have you ever stopped to consider what lurks within those porous crevices? Join us on a journey into the world of sponge hygiene, where we’ll uncover the secrets to keeping your kitchen’s most hardworking tool fresh, clean, and germ-free in mere seconds.
The Hidden Dangers of Dirty Sponges
Before we dive into the nitty-gritty of sponge cleaning, let’s address the elephant in the room: just how dirty can a sponge get? Brace yourself, because the answer might surprise you.
A Microscopic Metropolis
Your average kitchen sponge is a veritable metropolis for microorganisms. Studies have shown that a single cubic centimeter of a used kitchen sponge can house up to 54 billion bacteria. To put that into perspective, that’s about seven times the entire human population crammed into a space smaller than a sugar cube!
Some of the most common bacteria found in sponges include:
- Escherichia coli (E. coli)
- Salmonella
- Staphylococcus
- Campylobacter
These aren’t just harmless houseguests; they’re potential troublemakers that can lead to foodborne illnesses if given the chance to spread.
Health Risks: More Than Just a Stomach Ache
The risks associated with contaminated sponges go beyond a simple case of upset stomach. Potential health issues include:
- Gastroenteritis: Characterized by nausea, vomiting, and diarrhea
- Food poisoning: Which can lead to severe dehydration and, in extreme cases, hospitalization
- Skin infections: If bacteria come into contact with cuts or open wounds
- Respiratory issues: In rare cases, when harmful bacteria become airborne
The Cleaning Conundrum
Given these risks, you might be wondering how often you should clean or replace your sponges. The general consensus among experts is:
- Clean your sponges daily if you use them frequently
- Replace sponges every 1-2 weeks, depending on use and wear
- Dispose of sponges immediately if they develop an odd smell or visible mold
But fear not! We’re about to explore quick and easy methods to keep your sponges in tip-top shape, extending their life and keeping your kitchen safer in the process.
Quick and Easy Methods to Clean and Disinfect Sponges
Now that we’ve scared you with the potential dangers of dirty sponges, let’s arm you with the knowledge to combat these microscopic menaces. Here are four foolproof methods to clean and disinfect your sponges in seconds.
1. The Microwave Method: Zap Those Germs Away
Time required: 1-2 minutes
Effectiveness: Eliminates up to 99.9% of bacteria
Step-by-step instructions:
- Thoroughly wet the sponge with water. Ensure it’s soaked, not just damp.
- Place the wet sponge in a microwave-safe dish.
- Microwave on high for 1 minute (for standard sponges) or 2 minutes (for larger sponges).
- Let the sponge cool in the microwave for several minutes before removing.
Safety precautions:
- Never microwave a dry sponge – it could catch fire!
- Use tongs or oven mitts to remove the hot sponge from the microwave.
- Ensure your sponge doesn’t contain any metal scrubbing components.
2. The Dishwasher Method: Piggyback on Your Dishes
Time required: Duration of a dishwasher cycle
Effectiveness: Eliminates up to 99.9% of bacteria
Proper placement and settings:
- Place the sponge in the top rack of your dishwasher.
- Secure it in the silverware basket or between dishes to prevent it from falling.
- Run the dishwasher on the hottest water setting (usually the “sanitize” cycle).
- Use the heated dry setting if available.
Advantages and limitations:
Pros:
- Convenient if you’re already running a load of dishes
- Requires no additional energy use
Cons:
- Takes longer than other methods
- May not be as thorough if the sponge is shielded by dishes
3. The Bleach Solution Method: Chemical Warfare on Germs
Time required: 5 minutes
Effectiveness: Eliminates up to 99.9% of bacteria
Correct bleach-to-water ratio:
Mix 3/4 cup of bleach with 1 gallon of water, or for a smaller batch:
- 1 tablespoon of bleach per cup of water
Soaking time and rinse procedure:
- Submerge the sponge fully in the bleach solution.
- Let it soak for 5 minutes.
- Rinse thoroughly under running water until all bleach odor is gone.
- Squeeze out excess water and allow to air dry.
4. The Vinegar Soak Method: Nature’s Disinfectant
Time required: 5-10 minutes
Effectiveness: Eliminates up to 99.6% of bacteria
Benefits of using vinegar:
- Natural and eco-friendly
- No harsh chemical smells
- Easily available and inexpensive
Process and duration:
- Fill a bowl with equal parts water and white vinegar.
- Submerge the sponge in the solution.
- Let it soak for 5-10 minutes.
- Rinse thoroughly under running water.
- Squeeze out excess water and allow to air dry.
Comparing Sponge Cleaning Methods
Now that we’ve explored four effective methods for cleaning and disinfecting sponges, let’s compare them to help you choose the best option for your needs.
| Method | Effectiveness | Time Required | Cost | Environmental Impact |
|---|---|---|---|---|
| Microwave | 99.9% | 1-2 minutes | Low | Low |
| Dishwasher | 99.9% | 1-2 hours | Low | Medium |
| Bleach Solution | 99.9% | 5 minutes | Low | Medium |
| Vinegar Soak | 99.6% | 5-10 minutes | Very Low | Very Low |
Key Takeaways:
- Microwave method is the quickest and highly effective.
- Dishwasher method is convenient but time-consuming.
- Bleach solution is fast and effective but uses chemicals.
- Vinegar soak is the most eco-friendly option with slightly lower effectiveness.
Tips for Maintaining Clean Sponges
Cleaning your sponges is crucial, but maintaining them between cleanings is equally important. Here are some tips to keep your sponges in prime condition:
- Proper storage and drying techniques:
- Squeeze out excess water after each use.
- Store sponges in a dry, well-ventilated area.
- Use a sponge holder that allows air circulation.
- Alternating between multiple sponges:
- Use different sponges for various tasks (e.g., one for dishes, one for countertops).
- Rotate sponges daily to allow each one to dry completely between uses.
- When to replace sponges entirely:
- Replace after 1-2 weeks of regular use.
- Discard immediately if you notice:
- Persistent odors
- Visible mold or mildew
- Disintegration or falling apart
Alternative Cleaning Tools
While sponges are versatile and popular, there are other options worth considering:
- Silicone scrubbers:
- Pros: Durable, easy to clean, resist bacteria growth
- Cons: May not be as effective on tough stains
- Dish brushes:
- Pros: Long-lasting, can reach into tight spaces
- Cons: May scratch delicate surfaces
- Microfiber cloths:
- Pros: Reusable, effective on various surfaces
- Cons: Require frequent washing, may not be as effective on tough grime
Consider incorporating a mix of these tools alongside your sponges for a more hygienic and effective cleaning routine.
Frequently Asked Questions
Q: Can I use these cleaning methods on all types of sponges? A: Most methods work for standard cellulose or synthetic sponges. However, avoid microwaving sponges with metal components, and check manufacturer instructions for specialty sponges.
Q: How do I know if my sponge is too old to clean? A: If your sponge has persistent odors, visible mold, or is falling apart, it’s time to replace it. Generally, sponges should be replaced every 1-2 weeks with regular use.
Q: Are there any natural disinfectants I can use besides vinegar? A: Yes! You can try:
- Hydrogen peroxide (3% solution)
- Tea tree oil (add a few drops to water)
- Lemon juice (soak in a 50/50 mixture with water)
Q: Can I clean sponges in cold water? A: While cold water is better than no cleaning at all, hot water is much more effective at killing bacteria. For best results, use hot water or one of the methods described above.
Conclusion
Maintaining clean sponges is a small but crucial step in ensuring a hygienic kitchen environment. By implementing these quick and effective cleaning methods, you can significantly reduce the risk of bacterial growth and cross-contamination in your home.
Remember:
- Clean your sponges daily if used frequently.
- Choose a cleaning method that fits your lifestyle and preferences.
- Replace sponges regularly, and immediately if they show signs of wear or odor.
- Consider alternating between different cleaning tools for optimal hygiene.