Beginner’s Guide to Composting – Start Your Own Eco-Friendly System
Composting is the natural process of recycling organic matter like food scraps and yard waste into a nutrient-rich fertilizer for your garden. Making your own compost at home is an easy, eco-friendly way to reduce your carbon footprint while substantially improving your soil health.
This beginner’s guide covers the details of composting basics, what to compost, various composting systems, how to start and maintain a compost pile or bin, and finally how to harvest and use your finished compost. Let’s start at the beginning and explore the wonderful world of compost!
What is Composting and How Does it Work?
Compost is the dark, crumbly, earthy-smelling material produced by the natural decomposition of organic matter over time. Composting is the purposeful gathering of compostable organic waste like food scraps, leaves, grass clippings, and other plant materials into a designated composting area and allowing this material to slowly and naturally break down.
Compost relies on a process called aerobic decomposition. This means the decomposition process requires oxygen in order for the beneficial microorganisms like bacteria, fungi, and invertebrates to break down the organic matter. By providing the right ingredients and conditions, you can create the perfect environment for nature to decompose this material into healthy, nutrient-rich compost for your garden.
The Science Behind Composting
The magic behind composting lies in the activities of the various microorganisms responsible for the decomposition. Bacteria, fungi, insects, worms, and other invertebrates all play a role in breaking down organic matter and are naturally present in the environment.
When given the right mixture of carbon-rich “brown” materials like dead leaves and nitrogen-rich “green” materials such as food waste, along with adequate moisture and oxygen, these organisms thrive and accelerate the decomposition process. Turning and mixing the compost pile regularly allows more oxygen to reach the microorganisms and facilitates faster breakdown.
Hot vs Cold Composting
There are two general approaches to composting:
Hot composting involves building a large compost pile, at least 3 feet x 3 feet x 3 feet in dimensions. The large amount of organic matter and air spaces between the particles create an environment where microbes can thrive. The high microbiotic activity generates heat, raising the internal temperature of the pile up to 140°F-160°F (60°C-71°C). At these hot temperatures, compost can break down very rapidly. Turning the pile periodically maintains air flow and allows the heat to spread evenly.
Cold composting involves smaller piles that do not heat up significantly. The decomposition occurs more slowly at normal air temperatures. Cold composting requires less maintenance but can take 6-12 months to produce finished compost depending on conditions. Cold composting works well with vermicomposting bins where earthworms are the main decomposers.
Benefits of Composting
Composting offers numerous benefits for your garden as well as for the environment:
- Reduces waste sent to landfills – Organic waste like kitchen scraps and yard trimmings make up around 30% of household garbage. Composting this material avoids methane production in landfills and incineration.
- Provides an excellent organic fertilizer – Finished compost contains a concentration of macronutrients like nitrogen, phosphorus and potassium in plant-available forms as well as many essential micronutrients. The organic matter also improves soil’s physical and biological properties.
- Improves soil structure – Adding compost to soil increases moisture retention, porosity, and drainage of clay soils. It also reduces compaction, aerates sandy soils, and attracts beneficial soil organisms.
- Supports healthy plant growth – The nutrients, microorganisms, and organic compounds in compost serve as food for plants. This boosts yields, disease resistance, and overall plant vigor.
- Good for the environment – Composting reduces waste, avoids methane and greenhouse gases from landfills, and eliminates the need for chemical fertilizers.
What Can Be Composted?
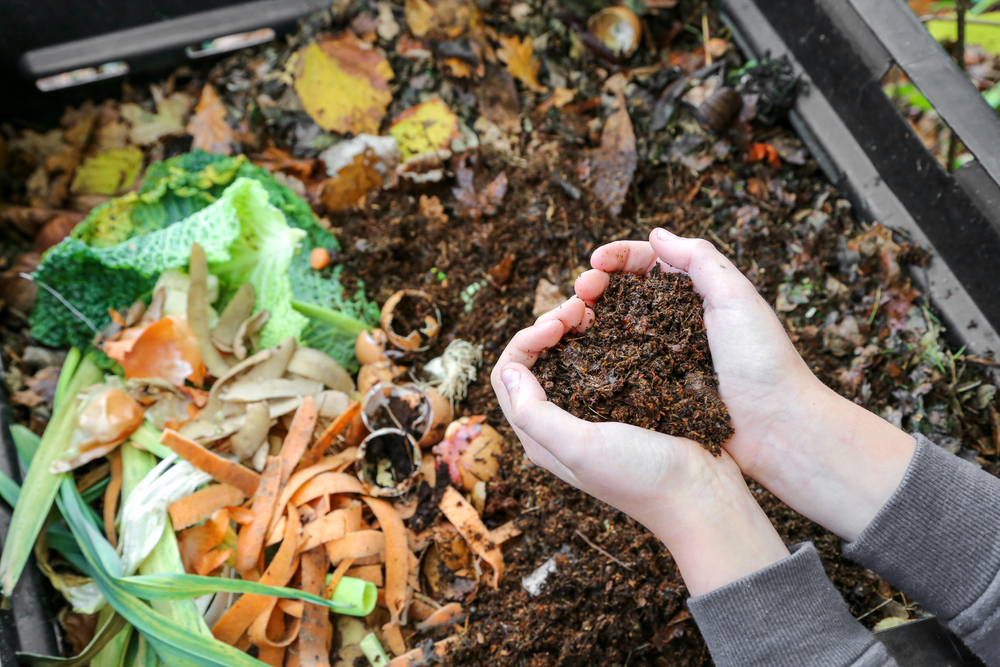
Many organic materials from your home, garden, and even the grocery store can be added to your compost pile or bin. However, not everything belongs in a compost system. Getting the right mix of ingredients is important for quick, odor-free decomposition. Here are the do’s and don’ts of compost materials.
Suitable “Greens” – Nitrogen-Rich Materials
- Fruits and vegetable scraps – Avoid fatty, oily, or cooked food
- Fresh grass clippings, green leaves and plant trimmings – Best in thin layers
- Coffee grounds and tea bags
- Plant-based kitchen waste like stale bread, grains, beans, pasta
- Crushed eggshells
- Fresh manure from grass-eating animals like horses, cows, rabbits (not dogs or cats)
Suitable “Browns” – Carbon-Rich Materials
- Dried brown leaves and twigs
- Chopped brush/prunings
- Wood chips, sawdust, straw
- Shredded paper, cardboard, newspaper
- Cotton, wool, hair
- Used potting soil or dried spent plants from indoor pots
- Sawdust from untreated wood (not pressure-treated)
Ideally, your compost pile should contain a carbon to nitrogen ratio between 25-30 parts carbon for every 1 part nitrogen by volume. Too much carbon and the decomposition slows down. Too much nitrogen causes unpleasant odors from ammonia gas. Finding the right balance of materials is key.
Don’t Compost These
Some items should never go into your compost:
- Meat, fish, bones or dairy products – These can attract rodents and cause odors.
- Oils, grease, butter and lard – These break down too slowly.
- Pet feces or cat/dog litter – May contain parasites and pathogens harmful to humans.
- Invasive weeds – Weed seeds can survive and spread through compost.
- Diseased plant materials – Pathogens can persist and infect future crops.
- Charcoal ash or coal cinder – May contain toxic compounds.
- Sawdust from pressure-treated wood – Contains toxic preservatives.
Choosing a Composting System
There are several types of composting setups to choose from, depending on your space and needs. Here are some of the most common composting systems:
Outdoor Compost Pile
This is the most basic option, involving collecting compostable materials into a heap directly on the ground or on a makeshift wire bin. A minimum pile size of 3′ x 3′ x 3′ is recommended for hot composting. Turning the pile periodically provides the aeration needed by the aerobic decomposing organisms. Requires at least 5-6 feet of outdoor space. Very easy to add materials as you generate them.
Pros: Space-efficient, simple to establish, easy to add materials, low/no cost to start.
Cons: Some odor possible, potential for rodents, turning labor required.
Compost Tumbler Bin
An enclosed rotating drum bin, usually plastic or metal, mounted on a stand. Periodically turning or rolling the unit makes aeration easy. Composting happens faster due to easier mixing. Requires less space since the drum holds and confines the compost. Accessible design makes adding materials easy. Prevents vermin. Range of size options available.
Pros: Fast composting, easy turning, rodent resistant, contained design takes up less space.
Cons: Relatively expensive, frequent manual turning required for best results, size limits materials added.
Enclosed Compost Bin
A contained system consisting of modular stacking units, bins, or drums with solid sides and a lidded top. Designed to hold, insulate, and conceal the compost while allowing air flow. Units have doors or openings to add materials and access compost. Bins made of plastic, recycled plastic or wood are available. Most units require occasional stirring or turning. Keeps in odors and prevents rodent access. Takes 1-2 square feet of yard space.
Pros: Aesthetic appearance, blocks odors, rodent resistant, insulated retention of heat and moisture.
Cons: Turning requires disassembly, restricted capacity limits amount of materials.
Vermicomposting Worm Bin
Indoor or outdoor composting that uses red wiggler worms to break down food waste. An enclosed bin contains layered organic materials, bedding, and worms. The worms break down waste into high-quality compost and liquid fertilizer called vermicompost leachate or “worm tea”. Requires careful maintenance of temperature, moisture and bedding for worm health. Slower than traditional compost.
Pros: Can compost year-round, suitable for indoor use, makes superior compost and fertilizer.
Cons: Worm maintenance requirements, slower breakdown of materials, limited volume capacity.
Setting Up Your Compost Pile or Bin
Once you’ve selected the ideal composting method and location for your outdoor space or needs, it’s time to start piling on materials. Here are some tips for establishing a successful new compost pile or bin:
- Choose a level, dry area, in partial sunlight if possible. Near a water source and garden area is ideal for convenience.
- Gather materials to build a wire or wood bin if not using a commercial composter. Plans are available online for making your own attractive compost bin.
- Start by layering 4-6 inches of coarse wood chips, sticks, or twigs directly on the ground or bin bottom to promote aeration from underneath the pile.
- Mix in paper shreds or dried leaves to allow airflow between the added food and garden waste. Alternate thin 3-4 inch layers of “greens” and “browns”.
- Overlap, mix, and scatter the ingredients as they are added. Varied particle sizes create air pockets for better oxygen circulation.
- Dampen each layer lightly with water as you build the pile to achieve the moisture content of a wrung-out sponge. Too much moisture promotes anaerobic conditions.
- Cover the top of the bin or pile with a tarp to retain heat and moisture if desired. Do not completely seal – allow for some airflow.
- Start the decomposition immediately by mixing in garden soil or finished compost which provides active microbes.
- Give your new compost a “bio-starter inoculant” by adding either home-made compost tea or purchased active compost inoculant.
Maintaining and Troubleshooting Your Compost
With proper maintenance and monitoring, you’ll have usable finished compost in as little as 2-4 months. Here are some tips for keeping your compost actively decomposing:
- Check the moisture weekly by grabbing a handful of compost. It should feel damp but not dripping wet. Slow decomposition is the main problem when compost gets too dry.
- Monitor the internal temperature of the pile, especially if aiming for hot active composting. Temperatures above 160°F (71°C) are ideal.
- Turning and mixing the compost weekly or bi-weekly is key to preventing dead zones and evenly distributing moisture and nutrients. Always mix materials from the exterior into the center and vice versa.
- Use a pitchfork, rake, or compost tumbler to aerate the pile. In cold weather months, less frequent turning is needed.
- Adjust the moisture by adding water or dry brown materials like sawdust or shredded paper if too wet.
- Add high-nitrogen greens if the decomposition slows. Mix in more browns like leaves if odors arise.
- Break up any large undecomposed items like thick tree branches before returning to the compost pile.
- Eliminate odors by adjusting moisture, increasing aeration, or covering the pile. Limit food waste additions if smell is excessive.
With frequent monitoring and adjustments, your compost pile will break down continuously into dark, crumbly, sweet-smelling humus!
What To Do With Finished Compost
You know your compost is ready to use when it has taken on a fresh earthy smell, dark crumbly texture, and you can no longer recognize the original materials. Mature compost is typically ready in 2-4 months depending on the system and conditions.
- Harvest finished compost from the bottom and sides of the pile or bin, leaving any undecomposed chunks in the center to continue breaking down.
- Screen the compost through a wire mesh screen or sieve to remove any woody bits or debris that haven’t fully broken down yet. Return these to the compost pile.
- Only harvest your beautifully decomposed, dark brown compost! Unfinished green material can compete with plants for nitrogen resources.
- Store fully cured compost in buckets or burlap bags out of the sun and rain. Apply as needed in the garden.
- Blend compost into potting soil as 25-50% of the total for houseplants and container plants to provide superior nutrition.
- Mix 1-3 inches of compost into garden beds before planting seeds or transplants. Compost boosts nutrients and beneficial microbial activity in the soil.
- Use compost as a side dressing fertilizer around established plants, applying a 1-2 inch thick layer around the base of each plant out to the dripline.
- Amend lawn soil by top dressing with a 1/4-1/2 inch layer of compost. Use a lawn dethatcher to work it gently down into the roots.
- When planting trees, shrubs, and perennials, blend 20-30% compost into backfill soil amendments to establish thriving new plants.
Composting is a wonderfully eco-friendly and soil nourishing activity for gardeners and non-gardeners alike. Now that you know the comprehensive details behind successful backyard composting, you are ready to begin reaping the “fruits” of your organic waste labors! Start a compost system at home and put your food scraps and yard waste to good use. Remember to share some pictures of your composting setup and any other tips in the comments below!