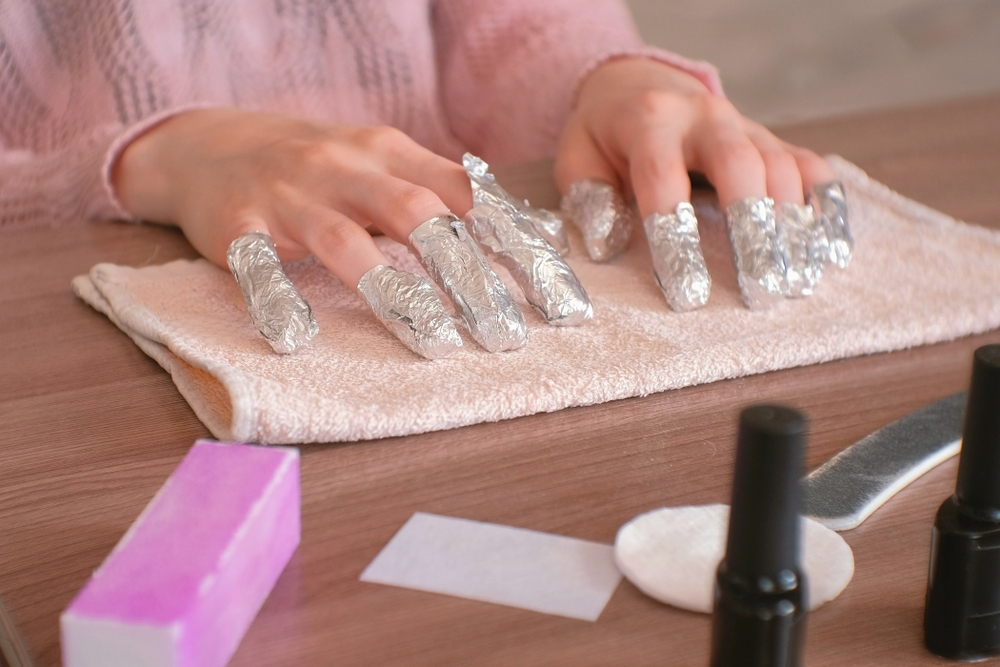
Tired of artificial fingernails? We explain which methods you can use to remove shellac, acrylic and gel nails and when it’s better to wait for an appointment at the nail salon.
Artificial fingernails already made a comeback some time ago thanks to Pinterest, Instagram etc.. And rightly so, because regardless of whether it’s shellac, acrylic or gel nails – any method of artificially brightening up fingernails can achieve great results. Today, artificial fingernails can also look quite natural.
Nevertheless, the following applies: Only those who pay a visit to their nail studio at regular intervals can enjoy a well-groomed look. Full-blown polish and overly long nails can quickly look cheap.
In times of Corona, it is unfortunately very difficult for most people to have their nails spruced up regularly in a nail salon. Therefore, if you want to remove your gel nails for the time being, you can find out here step-by-step how this works best.
DIY method 1: Remove gel nails with foil
For this you will need:
- a coarse-grained nail file
- cuticle oil (you can get it here at Amazon)*
- nail polish remover with acetone
- cotton balls (no pads)
- cling film or aluminum foil
- Cuticle stick
Step 1: Remove gloss layer
First, you need to remove the top shiny layer of your nails. Use the coarse-grained nail file and carefully file down the shine. Important: Make sure you only file down the first glossy layer, the color remains on the nails. Also make sure that no fine dust gets stuck under your cuticles.
Step 2: Protect cuticles
Once the shiny layer is gone, you should treat your sensitive cuticles with nail oil or cream to protect them from the nail polish remover. This prevents the acetone from drying out your skin too much.
Step 3: Soak nails in polish remover
In the third step, the nail polish remover with acetone comes into play. Soak the cotton balls and place them on your nails so that the color is completely covered. It is important that you use cotton balls and not ordinary cotton pads. The balls can absorb much more nail polish remover and soak the gel better.
Step 4: Attach cotton balls with foil
The cotton balls must remain on your nails for about 10 to 15 minutes. It is best to wrap some cling film around each nail so that the absorbent cotton does not slip and the gel can soak well.
Step 5: Remove gel
Once the waiting time is over, you can remove the foil from your fingers again and pull the cotton balls over the nail with light pressure. Now the nail polish should be mostly down. You can carefully remove any remaining color from the nail with a cuticle stick.
Tip: Once you have completely removed the gel, your nails will appreciate lots of care and moisture, for example with a nail oil bath or special nail care cream.
Method 2: Soak gel nails in acetone bath
For this you will need:
- a large bowl
- a small bowl
- a coarse-grained nail file
- nail polish remover with acetone
- cuticle pusher
- cuticle oil
Step 1: Prepare acetone bath
First fill the large bowl with warm water. Put the nail polish remover containing acetone into the smaller bowl. Now place the small bowl in the large bowl so that the contents are warmed a little. Very important: Do not try to heat the nail polish remover in a pot or in the microwave – it is flammable!
Step 2: Remove gloss layer
Here too, unfortunately, you can’t avoid removing the first shiny layer of your gel nails with a coarse-grained file.
Step 3: Soak gel
Then place your fingers in the heated nail polish remover for about 10 to 15 minutes. As soon as the corners begin to loosen, you can carefully remove the gel with the cuticle pusher.
The same applies to this method: Care for your nails thoroughly with a cuticle oil and a rich hand cream.
Method 3: Remove gel nails with nail polish remover device
Another way to remove gel nails at home is to use so-called nail polish remover devices that work with steam. Unlike the above-mentioned manual method, the fingers do not come into direct contact with the nail polish remover. Removing the gel layer by steam is supposed to be gentler on the nails and skin, and the whole process is supposed to take less time.
Method 4: Let gel nails grow out
You want to protect your nails and avoid the aggressive acetone nail polish remover? Then, unfortunately, you have no choice but to let the gel on your nails simply grow out. If you decide to use this method, you should make sure that your gel nails are undamaged.
Small damages are a great breeding ground for bacteria and fungi, which can permanently impair the healthy growth of your nails. Therefore, it is better to consult a professional and have the nail studio check whether it is possible to grow out the nails.

