6 Cute Hairstyles for Every Hair Length
There have rarely been more great hairstyles in one season, but our six trend favorites are in a class of their own: “Wow!” – looks for every type and every hair length. Plus: styling options, tips and tricks.
1. Swoosh
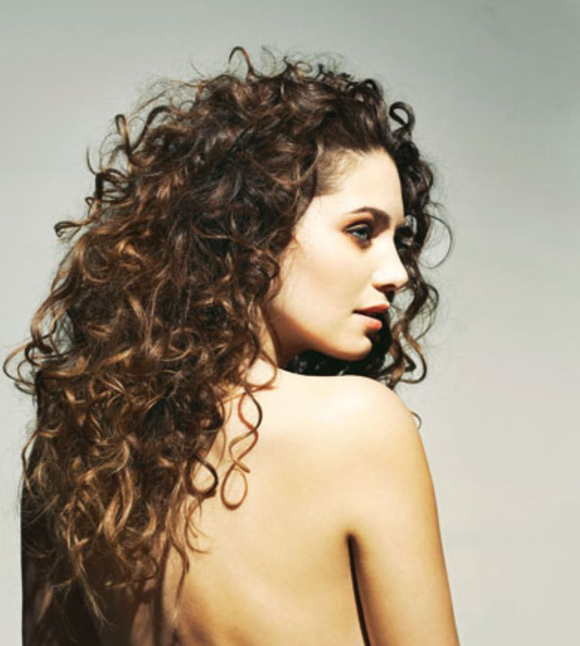
The special thing about it: the “Swoosh”, the casual curve after which the look is named, falls over a deep part to the side and casually falls into the face; In addition, the curls are tiered at the back so that they slide loosely into one another instead of piling up.
Ideal for: Women with strong natural curls or frizzy, sometimes wilful hair.
Who does it suit? Bingo: This look flatters every face shape!
The cut: natural curls have a distinct life of their own, and the longer the hair, the more frizzy it often looks. That is why the hair in the lower third of the “Swoosh” is layered. This takes out some volume, and the ends of the long curls curl into each other instead of falling boxy like a thatched roof.
The styling: Put curling spray into the hair (“Traumlocken-Daily-Styling-Spray” from John Frieda) and dry the hair over the diffuser attachment of the blow dryer. The air-permeable attachment has long, circularly arranged plastic “fingers”, which are pressed into the hair from below when blow-drying – the curls get bounce and are not swirled when drying. Then knead in curling cream (“Polished Waves Curl Cream” from SP Wella Professionals). Do not comb any more, otherwise it will be puffy!
Extra tip: If you want the curls to look especially textured, e.g. for the evening, wave the hair with the curling iron (approx. 1.5 cm diameter). Change curling direction regularly: one strand to the left, the other to the right and the next to the left again.
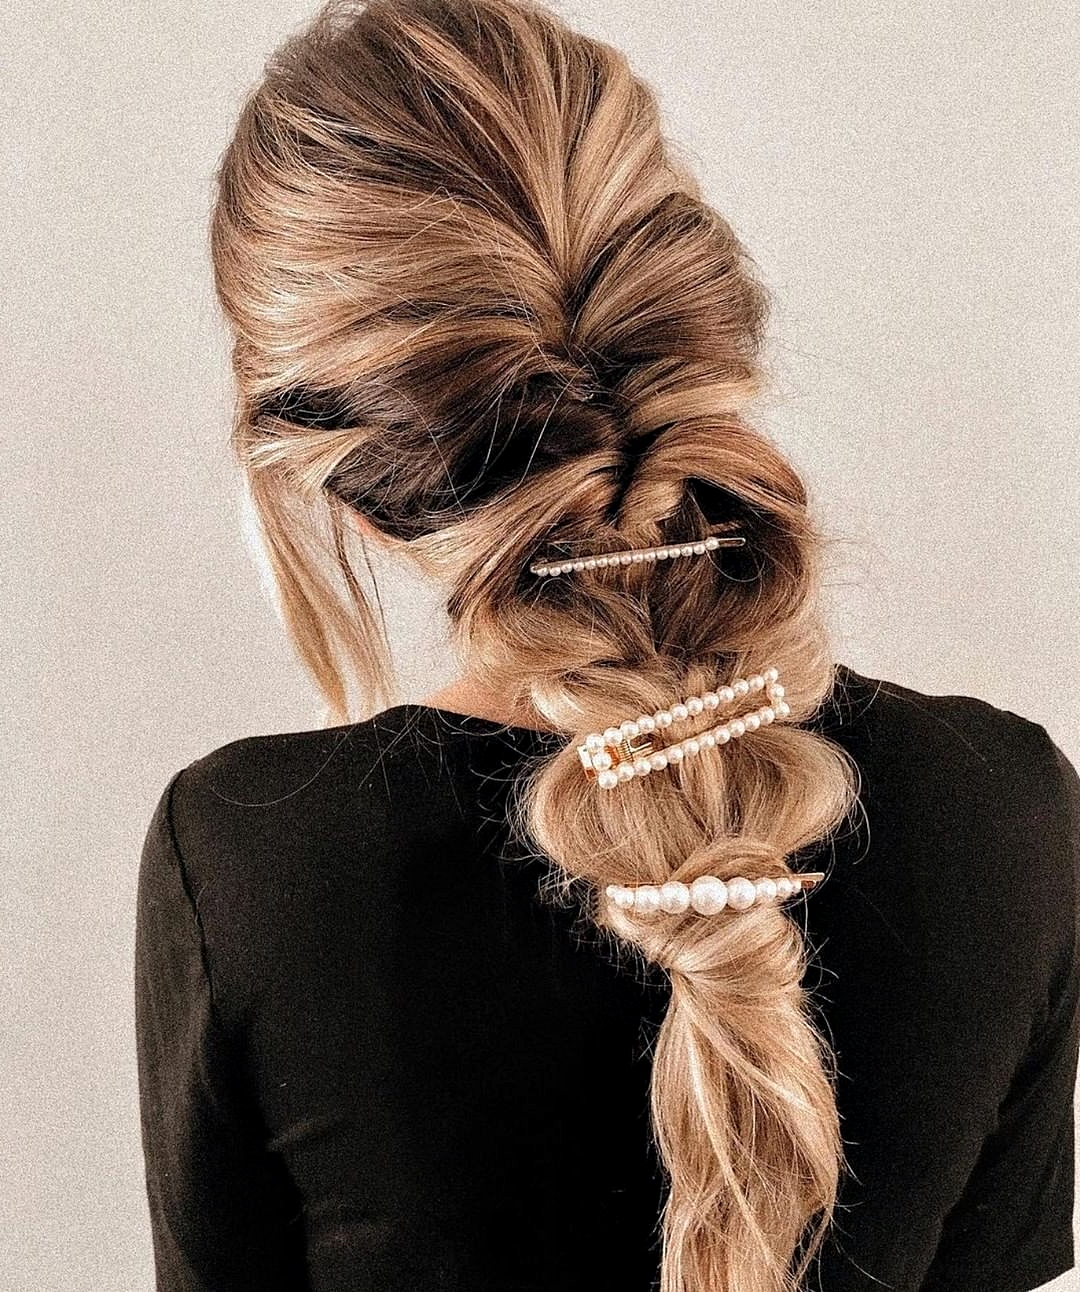
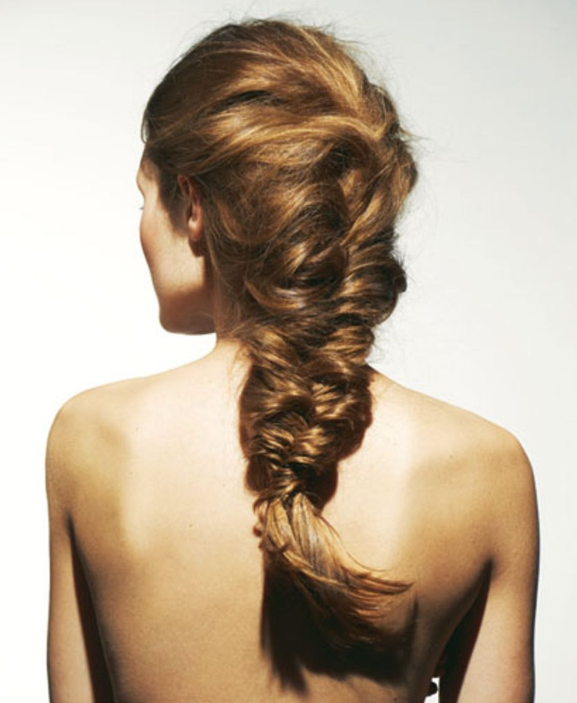
Styling variant for the Swoosh: Wickerwork
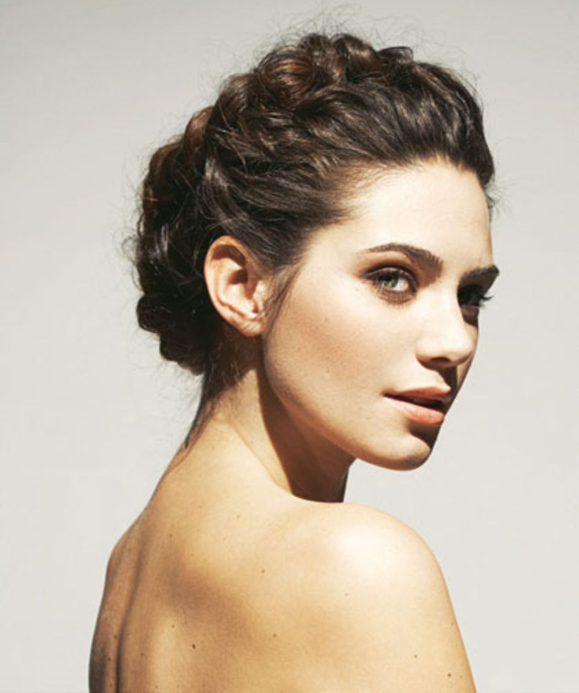
This is how it’s done: The plait hairstyle is ideal when the weather is damp and even carefully worked curls stand out crisply. First comb the hair out of the face and then start the braiding on the side of the forehead. The special thing here: The technique is similar to “normal” braiding – only the three strands are not laid one on top of the other, but rather one below the other and “woven” together. Every second turn, a strand is added from the side area. Finally, the end is pinned to the back of the head with clips or a thin clamp. The effect: the braid doesn’t lie on like a wreath, but stays close to the head. Tip: To make the hair more grippy when braiding, spray some hairspray into the palms of the hands beforehand (and in between).
2. Hippie 2014
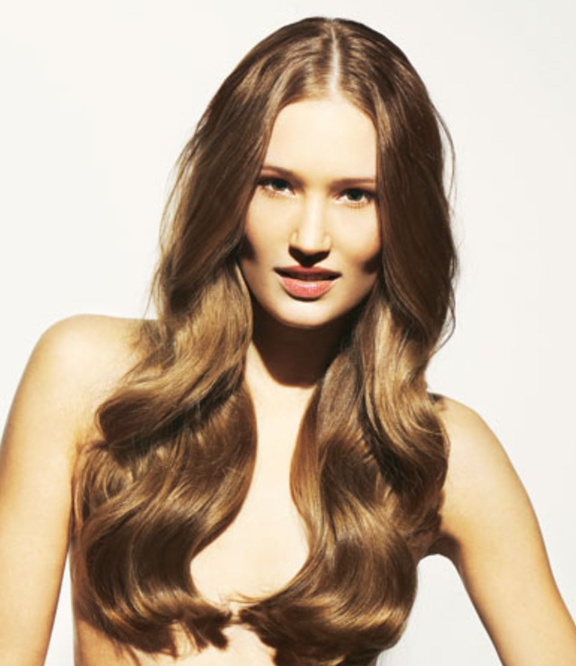
The special thing about it: soft, shiny waves plus a central parting. Feminine, classy, expressive – no wonder that even seasoned women like supermodel Elle Macpherson and Hollywood star Amy Adams (“American Hustle”) wear the look.
Ideal for: Rather straight to naturally wavy hair.
Who does it suit? All of them! And especially women with an angular or round face: the hairstyle frames it, makes it look slimmer and more harmonious.
The cut: The hair is cut to the same length, i.e. blunt (without gradation in the ends).
The styling: parting in the middle, spraying heat protection into the hair, drying the hair and then waving it with a medium-thick curling iron. Hold the stick vertically and wrap each strand around it in one direction (from inside to outside). This means that the waves also move evenly in one direction, and the look gets glamorous. Let cool, then comb through.
Extra tip: If you want to help with the shine (or need to, because the hair is a bit strawy): Do not just spray on a gloss spray (e.g. “High-Gloss-Spray” from Douglas), but press it in with your hands – like this reflects the light more intensely.
Styling variation for the Hippie 2014: Double braid
This is how it’s done: Looks like a classic herringbone plait, but it’s two strands of hair twisted in themselves. The area on the top of the head is first tousled vigorously, and in between, for a better stand, apply hairspray to the roots and retouch. From ear height, divide the hair into two broad strands and twist first one, then the other inwards, like a cord around your own axis. Connect both strands and loosen them up a little here and there with a comb or a narrow brush handle. Comb a few strands backwards from your face and secure them invisibly with a bobby pin.
3. Blunt-Cut
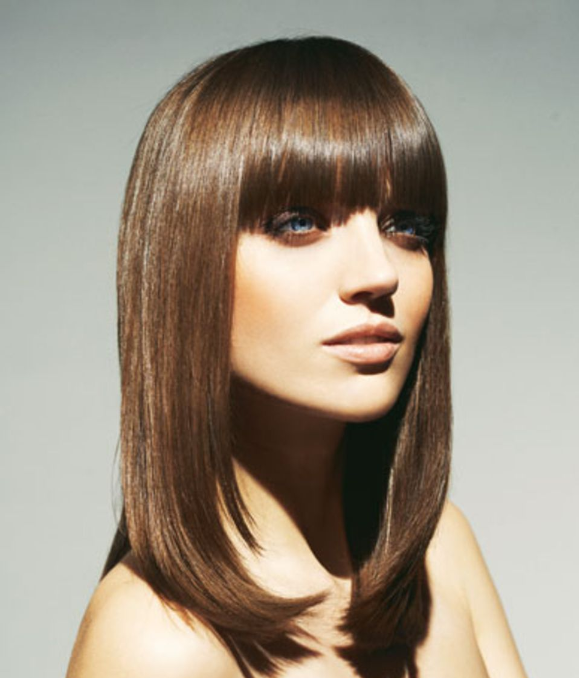
The special thing about it: The long bob (here in the hip up to the collarbone length) shines with fringed ends and XXL bangs. Its fans include supermodel Karlie Kloss and actress Naomi Watts (Diana).
Ideal for: Any hair quality.
Who does it suit? Since the XL-Pony looks like a boundary, the look flatters elongated faces – but is not optimal for round or wide faces.
The cut: A long bob, dull (“blunt”), i.e. cut to one length, fringed at the ends and around the face as if with a razor blade so that it does not look too perfect.
The styling: Spray heat spray (e.g. “Heat Protection Active Protection Spray” by Dove) and dry the hair with a hairdryer before straightening – wet hair is more sensitive. Then it’s time for the straightening iron: don’t start with the top hair, but with the bottom layer first – its base goes about to the earlobe, then the middle layer (to just above the ear), then the top hair. At the end give the tips a slight twist inwards. For the finish, apply a little shine spray (e.g. “Elnett-de-Luxe-Luminosity” by L’Oréal Paris) to the hair.
Extra tip: If you have to deal with flying hair Top fluid helps (e.g. “Karité Repair Serum” by René Furterer)! Spread it in the palms of your hands and brush it only once over your hair.
Styling variant for the Blunt-Cut: Casual waves
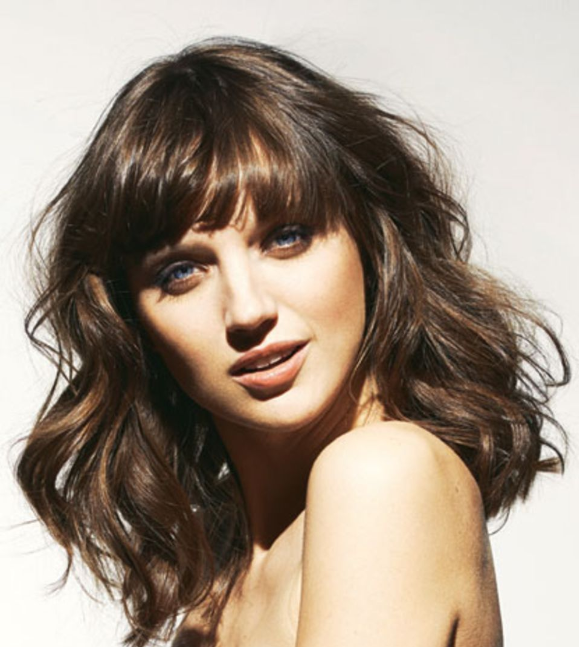
Here’s how it’s done: for a casual wave look after washing, first apply a styling mousse to the hair that not only strengthens the curls but also cares for them and protects the hair with building keratin (e.g. “Styling Mousse Flexible Curls” from Nivea). If you are prepared in this way, the waves hold up better – even if the humidity is higher and everything that is not naturally curled likes to hang down. Then wave the hair strand by strand with a medium thick curling iron. The look is particularly casual if you hold the curling iron vertically and always curl in a staggered fashion: from bottom to top and one strand first to the left, then right again, always in the opposite direction. After cooling down, just add some saltwater spray (e.g. “Surf Spray” from Bumble & Bumble) to the hair and shake the hairstyle with your fingers. This gives the hair more volume. In the case of very fine hair, it is best to spray a volume care product onto the roots immediately after washing and blow-dry dry (e.g. “Long-term Volume Blow-dry Lotion” from Guhl).
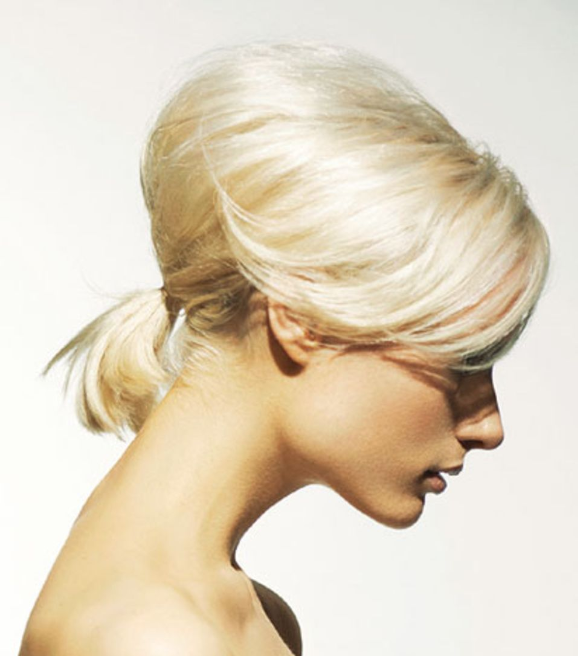
4. Marilyn Retro
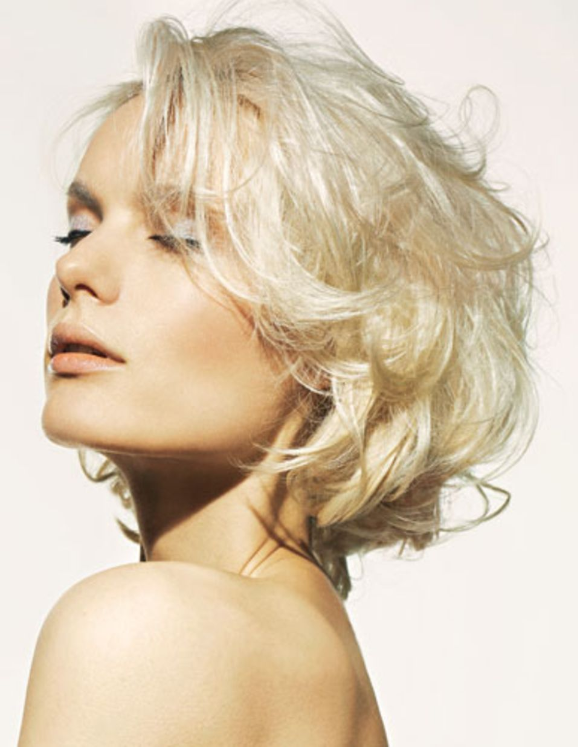
The special thing about it: the chin-length bob is feathery cut, yet still appears voluminous – and is a homage to the out-of-bed look of Hollywood icon Marilyn Monroe. It is currently worn by actress Cate Blanchett (Blue Jasmine) and country singer Taylor Swift.
Ideal for: Fine hair, because the cut creates volume.
Who does it suit? All of them! The pony falls into the forehead – and that flatters every face shape.
The cut: A chin-length bob, the same length, cut feathery towards the face. As a result, the side part falls into the face.
Styling: Knead mousse (e.g. “Volume-Lift-Volumen” from Syoss) into the hair and blow dry. Turn hair in strands on thick heating rollers (approx. three centimeters in diameter) from the forehead towards the back of the head (on the sides from back to front). Leave it in for about ten minutes, take it out and let it cool down. Then spread hair powder (e.g. “Fine-Volume-Powder” from La Biosthétique) in the hairline and slightly antoup. Then indicate a side parting with your fingers and crease the hair from back to front.
Extra tip: The waves get more bounce if you apply a little hairspray to each strand before untwisting.
Styling variation for Marilyn Retro: Sixties braid
Here’s how it’s done: As in regular styling, turn up the hair, then comb it out with a paddle brush. Touch hair vigorously up to the so-called hat line (runs around the head and is about two finger widths above the ears). Then pull a very deep side parting, pull hair behind the ears and grab it with both hands deep in the neck, push it upwards and use a transparent hair tie to form a micro horse tail. Push individual strands of pony hair forward into the face with your hand. Hairspray fixes everything.
5. Hawk
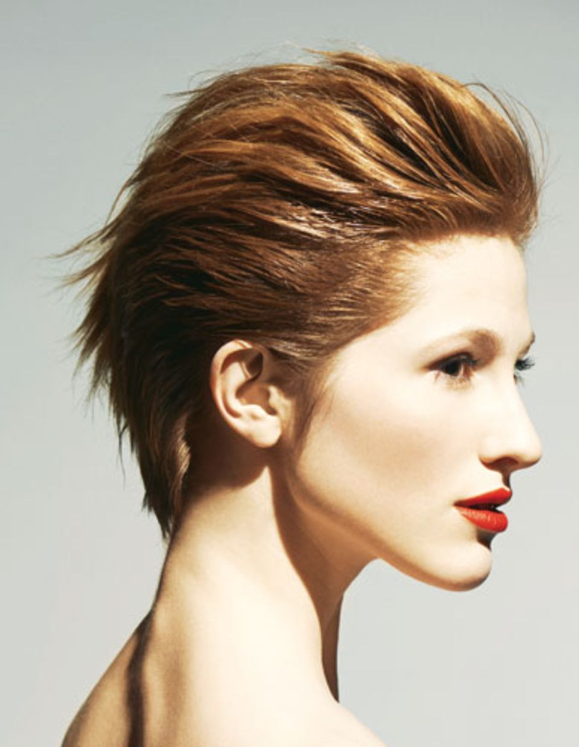
The special thing about it: The “falcon”, something like the punk among the trends, stands out due to the undercut short sides, is uncomplicated but effectively styled backwards – and worn, for example, by actress Tilda Swinton (Grand Budapest Hotel).
Ideal for: Any hair quality, except very strong curls.
Who does it suit? As a true all-rounder, this cut fits every face shape.
The cut: Basically an undercut with a longer top hair, on the sides and back of the head it’s shorter. For the “Hawk”, the hair on the top of the head is cut from the highest point of the head so that it falls like a separate unit and is not connected to the rest of the hair. The rest, especially the sides, will be stepped briefly.
The styling: blow-dry the hair from the face and back, the sides and neck flat to the head. For volume on the top of the head, spray salt water spray into the hair again and again and pull the hair up and back with your fingers while blow-drying. Finally, fix the indicated Iroquois quiff with hair lacquer (e.g. “styling lacquer” from Alcina/hairdresser) and pluck into shape with your fingers. Brush the sides back with a little gloss wax (eg “Brillant-Gloss-Wax” from Garnier Fructis Style).
Extra tip: To freshen up the Iroquois quiff quickly in between, tease the roots with your fingers.
Styling variant for the Hawk: New-Wavelook
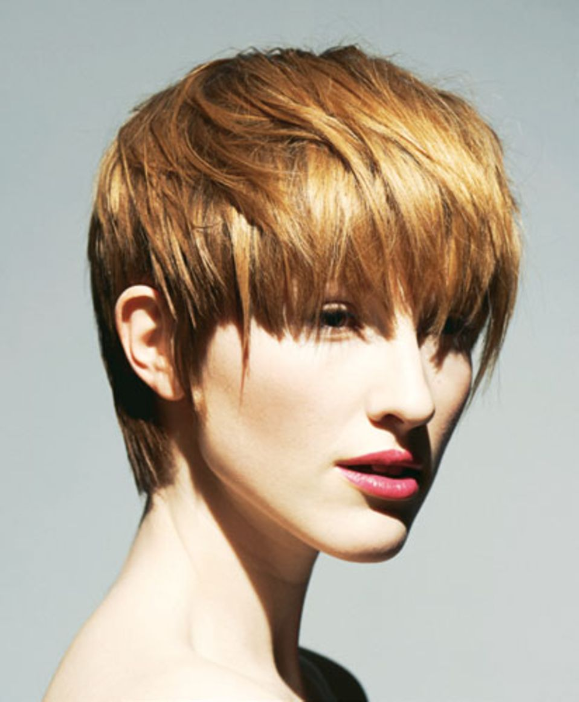
Here’s how it’s done: In order for everything to fall forward as consistently as in the photo above, a few steps are necessary. First, apply heat protection to the hair and blow-dry it at the lowest (!) intensity level – otherwise the hair will swirl and too much volume will be created. Stroke the hair on the short stepped sides and at the back of the head with fingers or brush closely to the head. Then work the longer hair on the top of the head with a straightening iron – first the lower part of the hair, then the upper. While straightening, pull the hair forward from the back of the head. This pays off, for example, with strong hair or a light natural wave – the hair will fit into shape more easily. In the second step, comb the hair deep into the face and only twirl out some of the overlong fringe strands with hair wax. Also work the tips of the hair with wax on the sides and pluck a little into the face. The shiny wax makes the hair look more structured. Not unimportant if short hair should look fashionable and not only practical.
Soft Fasson
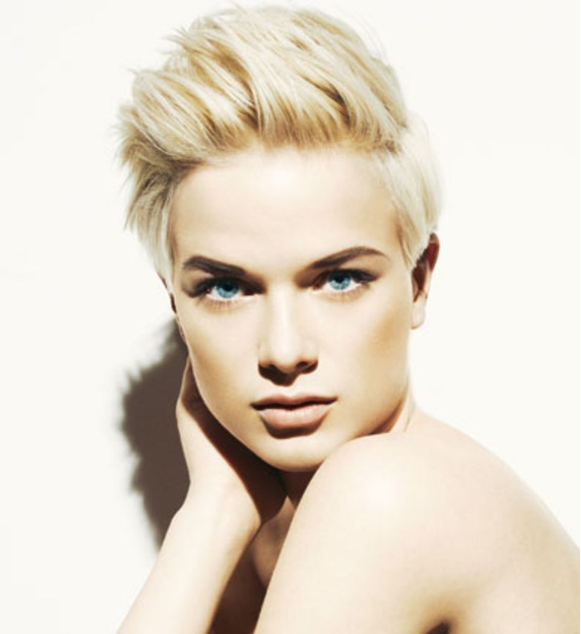
The special thing about it: The androgynous hairstyle now has long outer hair, which makes it look softer and offers more styling options. Recently she was even seen at the Oscars – to US presenter Ellen DeGeneres.
Ideal for: Any hair quality. For fine hair the cut is just perfect, because it gives nice volume on top.
Who does it suit? Any face shape!
The cut: Actually a classic men’s cut, but due to the longer, fringed and feathery pony part it looks wonderfully loose and feminine.
The styling: Apply a firming agent to the hair (e.g. “Kurfestiger” from Gard Professional) and then blow-dry the hair with a round brush up to the so-called hat line (runs half a hand’s breadth above the ear) steeply upwards and backwards. Backcomb the roots, then strengthen the hair with hairspray. Hair on the sides and back (just below the hat line) straight down and comb flat to the head with matt styling cream.
Extra tip: Because hair grows about one centimeter per month, the hairstyle above the ears can quickly appear too voluminous. It is therefore best to have it trimmed every four to six weeks.
Styling variant for Soft Fasson: Gigolo style
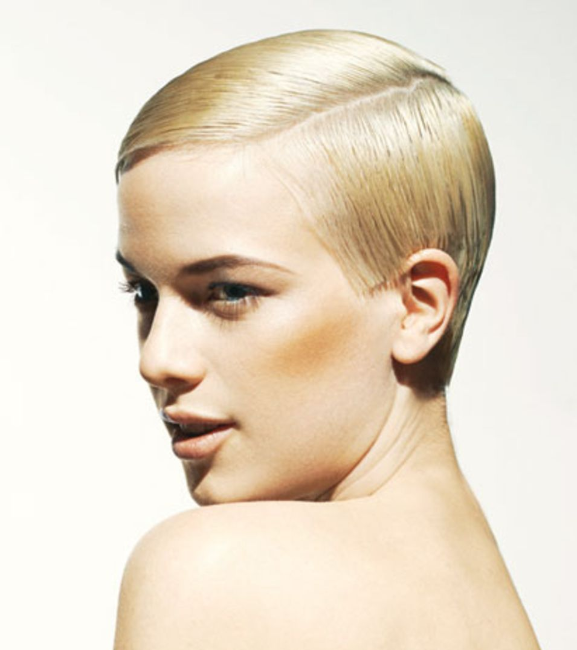
This is how it is done: Draw a deep and long side parting that reaches almost to the back of the head. Then blow-dry the hair straight to the head using a wide brush. Then comb in a lot of gel (e.g. “Power-Invisible-Gel” from Taft), work from bottom to top, i.e. from the neck to the back of the head and from the sides to the top of the head, otherwise too little product will end up in the hair – and it won’t lie good at. Let the hair rest for about ten minutes and then fix it with setting hairspray.